
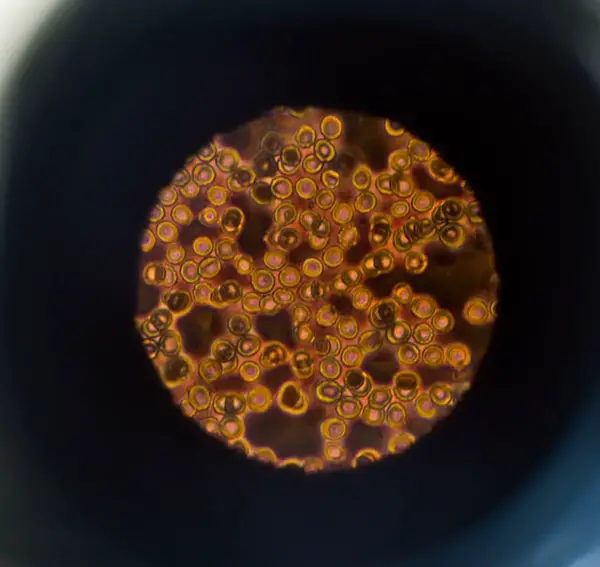
Modern microscopes are marvels of optics and technology which allow us to view minute details of cells with great clarity while others permit us to observe living organisms at incredible magnification.
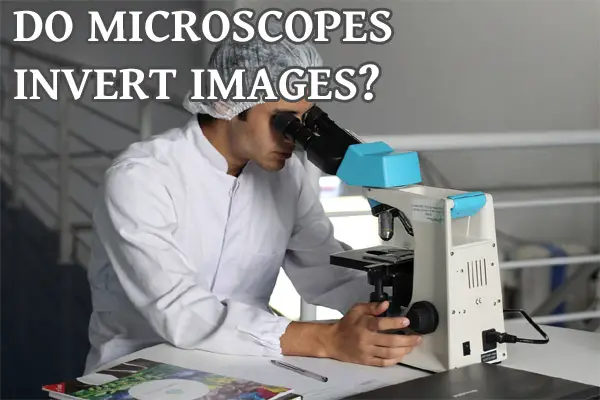
Have you ever wondered the following simple questions: Do microscopes invert images? Which kind of microscopes inverts images? This article discusses answers to these questions and much more. Read on.
Some microscopes invert images because they have multiple lenses and an increased level of magnification, including compound microscopes. They form enlarged, inverted, and real images. However, quite a few microscopes do not invert images including dissecting microscopes. The term inverted microscope does not refer to image inversion.
Why Do Microscopes Invert Images?
An image is inverted because of the reflection of light rays and because it goes through two lens systems: the objective lens and the ocular lens.
Let’s discuss these in detail.
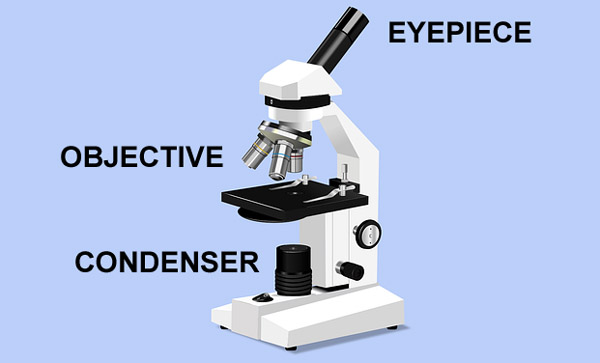
The most essential components of an optical microscope are objectives. These microscope objectives are responsible for the creation of a primary image. Plus, they play a very important part in determining the quality of images that the optical microscope can produce.
The objective is positioned near the specimen being observed and produces the first enlarged image of the object.
Also called an eyepiece, an ocular lens is where you look through to observe the sample. It enlarges the image formed by an objective lens so that you can see it.
The image will first pass through the objective lens and then the ocular lens, and the image will be inverted because of the objective lens’ curvature. The second lens further enlarges the inverted image that is projected from the first lens.
Both objective and ocular lenses are important to have to produce the proper magnification of the image. Most of the magnification happens within the objective lens.
Light Sources and Condensers
The light source, such as a light-emitting diode or an electric lamp, is there under the slide on which the specimen is being enlarged, and it illuminates the sample on the stage.
Condensers are lenses that gather and concentrate light from the illuminator into the sample. They are located below the stage and ensure that sharp images are created with a high magnification.
The light source under the stage helps you view the sample better. This light is then refracted. The light rays converge to produce an upside-down image once the light comes out of the other side.
The focal lengths of a lens determine the magnification of an image. The focal length is a measurement of how powerfully a system diverges or converges light. Magnifying power shares an inverse relationship with the focal length of the lens. The longer the focal length of the lens, the smaller the magnifying power of the microscope.
There are negative and positive focal lengths. Lenses are diverging lenses if they yield a negative focal length. And converging lenses always have positive focal lengths. A positive focal length forms a real image.
Do Dissecting Microscopes Invert Images?
Dissecting microscopes, also called stereo microscopes, do not invert the image of the sample under view because they have a lower total magnification. A dissecting microscope has two separate objectives and eyepieces and a low magnification range (between 10x and 40x).
It gives you an enlarged three-dimensional view of the sample so that you can see more fine details. The two eyepieces see the same object at a different angle, producing the 3D effect.
Compared to other microscopes, the stereo microscope utilizes the reflected light from the sample.
A dissecting microscope is called so because it is often used to conduct the dissection of a sample. This low-power microscope lets you see live samples and carry out dissections under the microscope.
It is often used for the purposes of examining large samples, such as plant parts, insects, and rocks.
Applications of a dissecting microscope
-
Stereo microscopes are used in forensic engineering.
-
Dissecting microscopes are used for examining fractures.
-
These low-power microscopes are used for inspecting circuit boards and watches.
-
Stereo microscopes are used for studying the surfaces of solid objects.
-
Dissecting microscopes are used for microsurgical procedures and dissection.
Advantages of a dissecting microscope
-
Stereo microscopes are used to observe complete samples and not in pieces.
-
Dissecting microscopes are easy to use and carry.
-
It is an important microscopic technique because it can be used in a variety of fields.
Disadvantages of a dissecting microscope
-
Dissecting microscopes are expensive to buy.
-
These microscopes cannot be used to observe tissue structures because they have a low magnification power.
Is an Inverted Microscope One That Inverts Images?
In an inverted microscope, the condenser and the light source are above the stage pointing downwards, while the objectives are hidden under the stage pointing up.
This is a reverse construction of normal conventional microscopes, where the objective lenses are on top of the specimen stage while the source of light and the condenser are under the specimen stage. So, with this microscope, you see the image from down upwards instead of seeing the image from up downwards.
The inverted microscope uses light rays to focus on a sample to create an image that you can see through the objective lenses. The condenser lens focuses the light on the sample or object.

The objectives, which are situated below the specimen stage, collect light from the condenser, enlarging the image, which is then sent to the eyepiece lens. The eyepiece lens reflects the light through a mirror. You can easily see the cells through the bottom of the cell culture vessel.
Uses of an inverted microscope
An inverted microscope is mainly used for diagnosis, identification, and sample preparation. Because of its versatility, it can be used for a wide range of tasks. Disintegrated or dried parts of organisms that cannot be seen using the conventional microscope methods can be seen using an inverted microscope.
-
Inverted microscopes are used to view living organisms or cells found at the bottom of Petri plates or cell culture flasks.
-
They are useful in assessing nematology specimens.
-
Inverted microscopes are used in fungal cultural diagnoses.
Advantages of an inverted microscope
-
An inverted microscope lets you view more specimens in a shorter period of time.
-
The risk of crashing an objective into the specimen is less with an inverted microscope.
-
These microscopes save you money and time in the preparation of a specimen.
-
You have larger working distances and can image big specimens as the specimen is above the objective.
-
You can use an inverted microscope to observe cells in large amounts of the medium.
Disadvantages of an inverted microscope
-
The biggest downside is the cost. An inverted microscope is costly to construct and is more complex.
Check out this video to learn about inverted microscopes.
Do Compound Microscopes Invert Images?
Compound microscopes invert images because of their increased level of magnification and two lenses. The image viewed with compound microscopes is two-dimensional.
Also known as a biological microscope, a compound microscope uses a compound lens system to offer magnification in the ranges of 40x-1000x. It consists of two lenses, an objective lens (near the object) and an eye lens (near the eye). While these two lenses produce high magnification, a condenser below the sample stage concentrates the light directly into the specimen.
A compound microscope is also called a high-power microscope because of its high magnification, and it’s often used to observe living cells.
Uses of a compound microscope
-
Compound microscopes are used for medical and forensic research. They help in the identification of diseases in pathology laboratories. Forensic laboratories use these high-power microscopes to identify human fingerprints.
-
Compound microscopes are used in schools for educational purposes.
-
These biological microscopes are used to detect the presence of metals.
-
They are used to observe viruses and bacteria.
Advantages of a compound microscope
-
Compound microscopes are easy to handle.
-
They have their own light source in their base.
-
You can get detailed information about the specimen due to the usage of two or more lenses.
Disadvantages of a compound microscope
-
The specimen can be magnified to a certain extent. It cannot be observed once this limit is achieved.
Learn more about compound microscopes in this video.
Final Thoughts
Microscopes lets you view things you could never see before. We use them to study molecular structures, microorganisms, and cells and their components. In fact, these optical instruments are not just used to observe microbes and bacteria but are also used in several industries.
A lot of industries use these tools for several purposes like manufacturing processes, quality control, and inspection. Additionally, microscopes are used to diagnose diseases and other conditions in hospitals.
There are many different types of microscopes, such as inverted microscopes, dissecting or stereo microscopes, and compound microscopes, to name a few. And some microscopes produce an inverted image like compound microscopes.
Click on the following link to learn how to make microscope slide mounting medium.
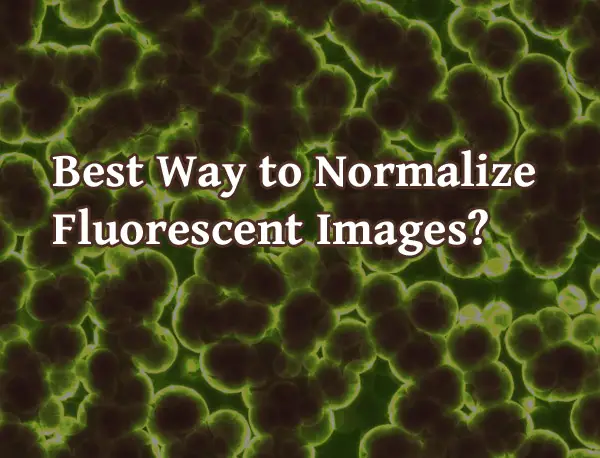
What is the Best Way to Normalize Fluorescent Images?
Fluorescence microscopy has become an essential procedure for understanding cellular structures, physiology, and medical diagnoses. It provides clear and quite colorful images of the sample under study. This makes identification and understanding of the biological processes so much easier. However, there are some challenges with fluorescence microscopy when it comes to obtaining good quality and reproducible images.
To counter these issues, normalization of the images is done.
Normalization of images in fluorescence microscopy can be done by (a) calibration using a sample of reproducible fluorescence field, and (b) using 10-50% w/v of concentrated Fluorescein or rhodamine between the cover glass and the slide (c) using the same microscope settings which show a good image across all samples. Anti-quenching agents (eg. AuNP) are also helpful.
Fluorescence microscopy has many applications in the field of biology and medical science. However, it’s quite often difficult to get identical images of the same slide in different microscopes and even in the same microscope if the images are being taken over some time (say, to study a biological process that might complete over a few days).
This is a major drawback of fluorescence microscopy, and it’s often the major reason why it can’t be used under various circumstances (ex. to make certain medical diagnoses), even though it’s an excellent tool to study various structures, proteins, DNA, and biological processes.
The quenching (or photobleaching) of the sample can be prevented by using anti-quenching agents like AuNP (gold nanoparticles). This safeguards the sample’s fluorescence for a longer duration of time and therefore will provide a slightly longer time for the examination of the sample with minimal changes in the fluorescence quality.
Normalization Of Images
Some of the major challenges with the fluorescence microscopy include:
(A) various instrumental factors, like different – microscopes may use different optics and different light detectors, and so the emitted light may have slight variations in different microscopes,
(B) shading. Because of shading, some areas of the field may appear brighter while some may appear darker, despite having the same amount of fluorophore (the dye), and
(C) Photobleaching. This can be controlled to some extent by reducing the duration of light exposure, and by using anti-quenching agents like AuNP.
The variation between different instruments is managed by calibration using a sample of a reproducible fluorescence field. Thin and uniform fluorescing reference layers are used here for the comparison of the image for image intensity correction and reproducing imaging conditions and quality control. The characteristics of the imaging situation can be summarized in a SIP (sectioned imaging property) chart for future use and comparison.
Shading is managed by applying a concentrated solution of fluorescence dye. Doing this brightens the image uniformly, and also prevents photobleaching of the sample to some extent. This is a simple, pocket-friendly, and reproducible method— making it a convenient method for routine fluorescence microscopy.
Photobleaching can be prevented by using anti-quenching agents (AuNP). Additionally, as mentioned above, the use of concentrated fluorescein dye also provides a certain degree of protection from photobleaching.
The normalization can also be done using certain imaging programs like metamorph, Isee, and Slidebook.
When performing measurements of intensity on a microscope such as a confocal to determine the amount of a protein for which you stained using an antibody, normalization is required because you will not be able to reproduce conditions from one day to another which would result in erroneous intensity values. In addition, picking an intensity value that is too high would result in washed out images that could not be used for measurements.
In this case you would want to go through your samples and set your laser amount, gain, etc to a value where all the images can be readable for measurements and not blown out.
Some Background on Fluorescence Microscopy
Fluorescence microscopy is the type of microscopy which uses the fluorescence produced by fluorophore stained specific structures/proteins in the specimen to visualize these structures.
In a regular light microscope, white light is used to illuminate the background. But in fluorescence microscopy, instead of using white light, a specific color of light is used— depending upon what structure is being studied. More on how it works is discussed below.
The sample is stained with a fluorescent dye (flours chrome/fluorophore) and these emit fluorescent light which helps the structure being studied visualized. Alternatively, the gene under study can also be GFP tagged. A GFP tagged DNA will produce a GFP tagged protein, and thus this protein can be visualized easily as well.
Principle Of Fluorescence Microscopy
Fluorescence microscopy works on the principle that when a certain wavelength of light is directed on the sample, the electrons in the fluorophore (dye) absorb the energy, and then emit light to get stabilized.
After absorbing light, the electrons in the atoms of the dye jump from the innermost shell to the outer shell due to excitation. But electrons are unstable in the outer shell. To get stable again, they emit the energy out and jump back to the innermost shell again.
The energy/light/photon thus emitted by the electrons in the dye is the fluorescence light that is observed in fluorescence microscopy.
How Fluorescence Microscopy Works
-
The light source in the fluorescence microscopy generates the white light, which then goes through the excitation filter.
-
The excitation filter allows the light of a certain wavelength to pass only (say, blue light or UV light).
-
This light is then reflected by the dichroic mirror to the sample.
-
When the light reaches the sample, the dye absorbs and then emits the energy.
-
The released energy from the sample goes via the objective lens, passes through the dichroic mirror, then to the emission filter, and lastly to the ocular lens where the observer can view the result.
-
Fluorescence microscopes usually also have a camera attached to them at the top, which transfers the image to a computer attached.
The light given to the sample is of high energy, short wavelength, and the energy emitted by the electrons is low energy and long wavelength. This is the reason that the light given and the light emitted are of different colors (ex. if blue light is given, green light is emitted).
The following video briefly explains how a fluorescence microscope works:
Applications Of Fluorescence Microscopy
Some of the advantages of using fluorescence microscopy include:
1. The biggest advantage of fluorescence microscopy is that different structures/organelles/proteins within a cell emit different colors, so it’s easier to see these structures and their locations distinctly.
2. Since this process does not kill the cells under study, various biological processes can be studied using fluorescence microscopy. Similarly, various pathological phenomena can also be studied.
3. Images of the subcellular structures formed by fluorescence microscopy are more magnified and clear when compared to other light microscopes. So, we can obtain much clearer images of these microscopic structures.
Disadvantages Of Fluorescence Microscopy
1.The major disadvantage of fluorescence microscopy is photobleaching. The fluorophores on repeated exposure to light lose their ability to fluoresce. So, the shelf life of the slides may not be very long (varies from dye to dye).
2. Quenching can also occur due to other factors. Quenching refers to the loss of fluorescence due to various factors, like pressure and temperature. This can be dealt with by using anti-quenching agents to some extent.
3. Only those structures that fluoresce can be visualized using this microscopy.
Points To Remember About Normalization In Fluorescence Microscopy
Due to various microscope-related factors, photobleaching, and shading, obtaining reproducible images in different and even the same microscopes is usually quite difficult. To combat these issues, the following measures can come in handy:
1.To deal with the instrument to instrument variation– uniform, and thin fluorescing reference layers can be used. These can be used for comparison and reproducing imaging control.
2. The best way to tackle shading is by using a concentrated solution (10-50% w/v) of fluorescein or rhodamine dye. Out of the two, fluorescein dye gives the best result. Using these concentrated dyes also prevents photobleaching to a certain extent.
3. Photobleaching can be reduced by limiting the exposure time of the sample with the light, or by focusing the light on an area next to the sample. Anti-quenching agents like AuNP (Gold Nanoparticles) can also help prevent rapid photobleaching.
Read the following article to learn the maximum magnification of a confocal microscope.
How Do Tablet Pens Work Without Batteries?
Have you ever wondered how tablet pens work without batteries? This article will explore the mechanics behind tablet pens and explain how they function without power.

We’ll also look at different types of tablet pens, and some of the benefits of using a tablet pen with your tablet, and tell you what things to consider when selecting the right one for your needs. So if you’re curious about what makes these pens tick, read on!
In general, pens or styluses can work without a battery using various technologies, including a digitizer built into the tablet surface that can detect many levels of pressure, electromagnetic resonance, a small amount of power wirelessly transmitted to the pen from a tablet, or in the case of a capacitative pen distortion of the tablets electrostatic field. Lets explain.
Types Of Tablet Pens
There are three main types of tablet pens: electromagnetic resonance pens, capacitive pens, and Bluetooth pens.
Electromagnetic Resonance Pens
Electromagnetic resonance tablet pens work by using the electromagnetic fields already present in the air. By using a coil inside the pen, it creates a small current.
This current is then used to create a signal that the tablet can read and interpret. Since there is no need for batteries, this also eliminates the possibility of running out of power while you are in the middle of writing.
Additionally, electromagnetic resonance tablet pens tend to be more accurate than their battery-powered counterparts since they are not susceptible to interference from other electronic devices.
Capacitive Pen
Capacitive tablet pens work in a similar way to electromagnetic resonance pens, but instead of using a coil to create a current, they use an electrode.
This electrode creates a change in the capacitance of the air around it, which the tablet can then detect. Capacitive tablet pens are not as common as electromagnetic resonance pens, but they are becoming more popular due to their lower price.
Capacitive tablet pens are also more precise than their electromagnetic resonance counterparts since other electronic gadgets don’t affect them.
Bluetooth Pen
Bluetooth tablet pens work by using Bluetooth signals to communicate with the tablet. This allows the pen to store a small amount of data that can be used to track the user’s writing strokes.
This data can then be used to improve the accuracy of the handwriting recognition software in the tablet.
Bluetooth tablet pens can also provide additional features, such as controlling music playback or launching applications. Bluetooth tablet pens are generally more expensive than other types of tablet pens, but they offer the most functionality and writing enjoyment.
Active Pen
Active pens get recognized by a sensor built into the touchscreen. They have additional features such as hover and click because they are recognized from a distance. The sensor, or digitizer, can also sense the orientation of the pen, such as which end is near the screen.
Pens for a Drawing Tablet
A drawing tablet is a type of tablet that is designed specifically for use with a tablet pen. They come in different sizes, but the most common ones are around 8 inches by 5 inches.
A capacitive stylus pen can work on a drawing tablet and it does not require any battery, this type of pen has a metal point that senses the location of the pen on the screen to work.
Moreover, drawing tablets have a grid of squares that the pen can track. This grid helps the tablet to accurately interpret the location and movements of the pen on the screen.
Since drawing tablets are specifically designed for artists and illustrators, they often include features that aren’t found on other types of tablets, such as customizable pressure sensitivity and palm rejection.
Pens for a Drawing Tablet With A Screen
A drawing tablet with a screen is a device that connects to a computer which allows you to draw on the screen directly. This is in contrast to traditional drawing tablets, which require you to draw on a screenless pad attached to a computer.
An Electromagnetic resonance tablet pen can work on a drawing tablet with a screen.
The Electromagnetic resonance tablet will be able to pick up the electromagnetic signals from the pen, and this will help to create a more accurate image on the drawing tablet. This is an amazing technological advance that will allow people to work on their drawings and projects with more accuracy and ease.
This means that you can see what you’re drawing as you’re drawing it, which can be helpful for ensuring accuracy. Additionally, many drawing tablets with screens include pressure-sensitive capabilities, which allow you to control the thickness and opacity of your strokes by varying the amount of pressure you apply to the stylus.
Pens for a Self-Contained Tablet
A self contained tablet or commonly known as Standalone tablet is a mobile device that has all the necessary features and components required for it to work without being connected to any other devices. This tablet includes a processor, storage, input/output ports, and a battery making it self contained.

A self contained tablet can be used for a variety of purposes, such as browsing the web, taking notes, drawing sketches, or even writing.
The pens that work on a self contained tablet are numerous but only two are common and mostly used. The most common type of pen which works with a self contained tablet is an electro resonance pen, which works by detecting changes in electrical fields. Another type of pen is the capacitive pen, which works by detecting changes in capacitance.
Both of these types of pens work well on a self contained drawing tablet. Other types of pens, such as optical pens or infrared pens, are not as common and may not work as well on a self contained drawing tablet. If you are looking for the best possible pen experience, an electro resonance pen or a capacitive pen is the way to go.
How Do Pens Work?
Tablet pens use a process called electrostatic coupling. This means that they rely on interacting electric fields to transfer information from one device with conductive material in its tip (like your pen or stylus, for example) to another whose surface has been treated to be conducting enough upon touching it.
The two come together at points where there’s no physical contact between them whatsoever; instead, relying solely upon their respective properties, which cause an interaction resulting in data being sent wirelessly back up towards you without having touched anything else along the way either.
So there you have it – the science behind how those nifty little styluses work on your tablet or smartphone without needing any batteries to help out.
While the technology is pretty simple in principle, in practice, it requires a lot of precision and accuracy to make sure everything runs smoothly; meaning that when it comes to using one of these devices, you can rest assured that a lot of time and effort has gone into making sure your experience is as lag-free and user-friendly as possible. And that’s always a good thing.
Where Does The Power Come From?
As we discussed, tablet pens are cleverly designed to not require batteries in order to function. Instead, they rely on a few different methods to generate power. Electromagnetic, static, and piezoelectric generation are all used to power tablet pens.
Electromagnetic Generation
Electromagnetic generation works by using electromagnets built into a circuit; this circuit generates electricity from hand movement. The more the pen moves with your body, the higher amount of charge you will generate. This charges up an internal battery that powers the lighted tip of your pen.
Static Generation
Static generation works by using friction between a ballpoint pen’s inner core and its outer tube-like sleeve. This creates static electricity, which is then discharged as sparks down toward that first wire in order to zap it enough to create voltage for electronics.
Piezoelectric Generation
Piezoelectric generation works by using a crystal that is inside or nib of your tablet pen. This crystal is pinched and broken when you click the button, generating an electric charge. That charge is then converted into a voltage by an electronic circuit, providing power to your pen’s light power.
All of these methods are clever ways to generate power for your tablet pen without needing batteries. So the next time you’re in need of a pen, don’t forget to bring your trusty tablet pen along with you! It’ll come in handy for all of your writing needs.
In some cases, though, you might find that your device doesn’t always seem to be as responsive as you’d like it to be. This could potentially be due to a build-up of static charge on the pen’s tip, which can eventually cause interference and disrupt the flow of information between the two devices.
If this happens, all you need to do is give the pen a quick wipe with a cloth to get rid of any excess charge, and you should be good to go!
Benefits Of Using A Stylus Pen
There are several benefits to using a stylus pen with your tablet. Here are some of them:
Using a stylus pen with your tablet can help you achieve greater accuracy when typing or drawing on a small screen. It provides a more natural writing experience than using fingers. It is also helpful in reducing the risks of smudge or damaging screens because there’s no need to touch anything; simply draw what needs to be drawn.
Pens help relieve RSI caused by mice and other input devices because we are used to pens in general and they are much more natural to hold and write or draw with.
Are Stylus Pens Rechargeable?
Obviously, pens which do not require any power do not need to be recharged. Active pens however that do require power can be ran on single use batteries, rechargeable removable batteries, or built in rechargeable batteries.
If in doubt about what kind yours does, consult the manufacturer’s instructions before making assumptions based on appearances alone. You never want to mistake of trying to recharge a non rechargeable battery as that may start a fire in your house.
What to Consider Before Buying a Pen for Your Tablet
Some tablets give you the option of using different tablet pens, such as drawing tablets that have different pens available for different types of art. To choose, think about what you will be using the tablet for, whether its calligraphy or digital spray painting or drawing, etc.
Also keep in mind that not all pens from a brand will work with all tablets from that brand. Some like bluetooh you may have to pair with the tablet, some may automatically get recognized, and some will not work with a particular tablet no matter what you do, you just have to buy the correct pen.
When selecting a stylus pen for your tablet, it’s important to consider the size and tip material. The size of the pen should be comfortable for you to hold, and the tip material should be compatible with your tablet’s surface. For example, if you have an iPad with a Retina display, you’ll want to choose a pen with a soft tip made of silicone or another similar material.
Last Words
Now that you know everything about tablet pens – how they work without batteries, different types, their pros, and cons, you might want to invest in a stylus pen. Since these pens are a great way to interact with your device.
Many factors will play into this decision-making process when it comes down to which type of stylus pen is best for you. Each option has its pros and cons, from compatibility with different tablet surfaces to battery life or power sources needed.
So before making any decisions about what kind of stylus pen might work best for you, ask yourself these questions: What size does my hand need? Do I want a rechargeable or non-rechargeable product? Is my surface compatible with the material of the pen’s tip? With these things in mind, you should have no problem finding the perfect stylus pen for your needs.
Click the following link to learn about the best tablets for 3D animation.
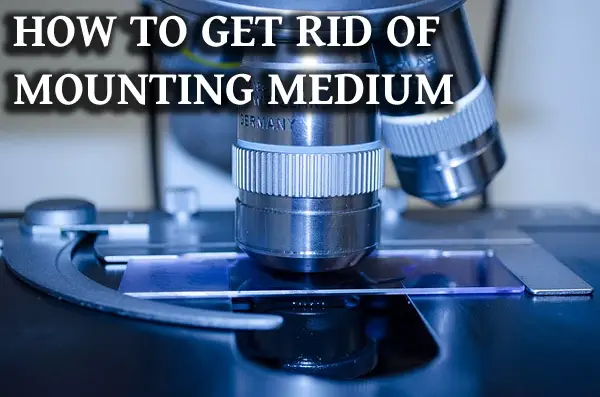
How to Get Rid of (Slide) Mounting Medium?
You need to make some changes and restain a specimen you have on a slide but its mounted with a hardset medium and the entire specimen is permeated by the medium.
Is there a way to remove the mounting medium and reuse your tissue? Let’s find out.
There are many types of mounting media that are used to fix, or attach, a specimen to a slide. Mounting media are commonly classified into two categories: aqueous (water) based and solvent-based. The water-based ones are removed with water. The solvent-based ones are usually removed with a solvent. For commercial solutions, consult with manufacturer for best removal method. Read on for details.
A specimen is usually fixed to a slide for fixed-cell imaging. In other words, when looking under a microscope cells that are known for moving around are not the most photogenic. It is important to freeze them in place. This is why fixation techniques are used. They can also help prevent photobleaching and help with optimizing the refractive index which allows us to see certain organisms more clearly.

Media type considerations
Before you can get into what will get rid of a mounting medium, it is best to determine which mounting medium you are trying to dissolve. The two major forms of media are aqueous and solvent based media. Both require different methods of removing the media from the slide and the specimen.
Aqueous Mounting Medium:
Aqueous mounting media are water-based solutions. In fact the most basic wet mount is actual water. The most common type is a simple buffered saline solution such as PBS, or phosphate-buffered saline. Most aqueous mounting media used are soluble in PBS, water, or certain alcohols, like glycerol.
Once the sample is placed in the mounting media a coverslip can be applied. It is important at this stage to make sure there are no bubbles which could obstruct the view from the microscope.
Some examples of aqueous mounting media include:
-
Water (of course)
-
Glycerine gelly
-
Glycerol
-
Apathy’s medium
-
Farrant’s medium
-
Highman’s medium
-
Fructose syrup
-
Polyvinyl alcohol
Once coverslipped it is important to keep the samples wet. Sealants are often used to not only secure the coverslip but maintain the moisture of the sample. Paraffin wax is a commonly used sealant.
If or when ready to remove the coverslips, you can use glycerol to dissolve the wax and soak the slides in PBS. This will dissolve the mounting medium and fully free the coverslip and the sample from the slide. Please be aware that this will also remove any staining on the slide as well.
Organic Solvent Mounting Medium
For slides that are mounted using an organic substance, PBS alone isn’t going to be enough. PBS can be used as a final rinse, but it will not unmount the slides alone. For organic substances such as paraffin you must use an organic solvent such as xylene in order to remove the mounting media.
Some examples of these types of media include:
-
Canada balsam
-
Phenol balsam
-
Dammar balsam
-
Euparal
These media are great for retaining the stain when applied to a specimen and are a great way to preserve slides for long-term use. There is no need to be concerned about the sample drying out or degrading in any other way.
Many organic solvents like acetone or xylene are skin and/or respiratory irritants. It is best to make sure that all safety precautions are being taken.

Unmounting slides
In order to unmount a slide, first you have to soak the slide in a solvent until the coverslip loosens. If you applied paraffin to the sides of the coverslip, you must first dissolve this before the unmounting can begin.
Getting coverslip off
Coverslips are usually adhered to the slide with paraffin wax or another substance known as Du noyer’s wax-colophonium resin mixture. These substances are not soluble and can be difficult to remove. This is possibly the hardest part of the unmounting process. If the objective is to remove the mounting medium without degrading the sample, care must be taken.
The slide can be soaked in a solution with a small concentration of organic solvent like glycerol or xylene for a short period of time. Remove the slide and slowly remove the coverslip.
If you are trying to remove the coverslip from an aqueous medium, once you remove the coverslip you can rinse the slide in aqueous solutions like PBS or water. If you are trying to remove the coverslip from a more organic medium, you will have to soak the slide for a lot longer to remove the coverslip and the medium from the slide as these solvents are harder and take longer to dissolve.
Reusing tissue in immunohistochemistry
It is possible to reuse sections previously mounted for immunohistochemistry following the earlier mentioned steps such as by placing the slides in PBS and waiting for the coverslip to detach. You can use a detergent like Tween to get rid of the medium but if there is a previously used antibody in the tissue section you will have to leave it longer in the detergent to wash out the bound antibody. It is also not advisable for the second antibody to be from the same host animal as the first antibody used in previous mounting or you may be unclear where your signal detected under the microscope came from.
Keep in mind that reuse may not give you the best quality images from your slides, but it may be enough for a pilot study when you are limited on tissue. Its always better to use a weaker solution to remove the mounting medium for a longer amount of time than a very harsh solution for a shorter amount of time.
If you are using a commercial mounting medium you can always contact the company and ask them what is the best medium removal method that will preserve whatever you need preserved. They have a lot of experience with this both from their experiments as well as user feedback.
Getting rid of embedding medium
One of the more common techniques that requires the removal of embedding medium from slides is immunohistochemistry. This is a technique used to analyze protein expression within tissue morphology. It requires the use of antibodies and staining in order to view under a microscope. Embedding media in these instances only gets in the way.
Before the process can begin, the specimen must be processed as normal histology slides by embedding in paraffin wax and being prepared through the slicing of a microtome. Once this is completed, the medium has to be removed.
This is done through soaking in fresh xylene for 5 minutes at least 3 times. Once this is completed, the rest of the process can continue. Soaking in fresh xylene doesn’t remove all of the medium because the specimen is still adhered to the slide. It also helps to rehydrate the specimen. However, it does remove enough to allow the antibodies and stain to adhere to the surface of the specimen.
Once this process is completed, the slides will go through another coverslipping process and be viewed under the microscope. This is a fairly tedious process that takes a few hours, but removing the slide medium is actually fairly quick.
Summary
There could be numerous reasons in which a person would want to remove the slide medium from a slide. Whether it is to start an experiment from scratch and reuse the slide or for such highly technical experiments like immunohistochemistry. The key elements are to fully determine the type of slide medium you are attempting to remove and the appropriate solvent. After that, the only thing that matters is time to remove the coverslip and remove the actual medium within the solvent.
Below is a useful video on mounting slides:
Click on the following link to learn how to make microscope mounting medium.
Can MRI Show Detail?
When you look at an MRI machine which only takes minutes to scan and does not have visible lenses and various size objectives like a microscope, you might ask yourself, how much detail does an MRI really show?

In this article I will describe what detail can be seen on an MRI, what MRI types show what level of detail and conditions that may affect how much detail is visible.
Continue reading “Can MRI Show Detail?”
What Is the Best Tissue Clearing Method? Commercial and DYI Options
Tissue clearing which started as an isolated, complicated process taking a long time has over the years evolved and been improved by several groups. It is now possible to purchase ready made reagents for tissue clearing and even skip the process of 3D printing chambers and constructing DYI setups.

Which then is the best tissue clearing method for your research?
There are many tissue clearing methods, such as hydrogel embedding tissue clearing, hyperhydrating solutions, aqueous-based tissue clearing, organic solvent-based tissue clearing methods, and high refractive index (RI) aqueous solutions. However, every method has its own advantages and disadvantages. There is no one best method for all situations. Let me explain.
But first, a few clearing basics so that you can understand the differences between methods.
What Is Tissue Clearing?
Tissue clearing involves a series of chemical steps that render cell cultures or tissues transparent. Biological tissues are made up of heterogeneous materials that have different refractive indices (optical properties).
Examples of biological tissues are epithelial tissues, connective tissues, nervous tissues, and muscular tissues in animals.
Light absorption and light scattering inside tissues are the primary reasons for tissue opacity. And it is a major obstacle for the imaging of a complete organ or body.
Mismatches of refractive indices inside tissues are the primary reason for light scattering and tissue opacity.
Refractive index matching can make tissue transparent and decrease tissue scattering.
Controlling the tissue’s optical properties may result in tissue transparency by chemical or physical changes. Therefore, the purpose of tissue clearing is to clarify tissue by decreasing the absorption and scattering of light inside biological tissues.
The best tissue clearing method should preserve fluorescent proteins and should have a great clearing capacity.
Importance of Tissue Clearing
Imaging 3D cell cultures, spheroids, organoids, and microtissues can be challenging due to the opacity of these models. The outer layers of the sample may differ significantly in function and morphology from the inner layers. Hence, obtaining clear pictures of all the cell layers is essential to completely understand the tissue sample being analyzed on all levels.
Using tissue clearing methods lets you image 3D cell cultures, spheroids, and organoids.
What Are the Procedures of Tissue Clearing?
There are a number of tissue clearing methods, and each method comes with its own drawbacks and benefits. Many tissue clearing techniques are carried out by the following steps:
1. Tissue Fixation
Tissue fixation is done to preserve tissue and cell components during the tissue clearing process. Chemicals used to fix tissues during clearing include acrylamide hydrogel embedding, glutaraldehyde, and paraformaldehyde.
Chemically known as polyoxymethylene, paraformaldehyde is a cross-linking reagent that is better at preserving the structure of cells. Organic solvents, on the other hand, dehydrate the cells and extract lipids. They also cause complete precipitation of proteins to preserve cells.
2. Permeabilization
Permeabilization, or the puncturing of the cell membrane, is needed when big molecules like antibodies need to get inside the cells to detect intracellular antigens.
Delipidation reagents, hyperhydration reagents, and solvents (acetone and methanol) are some of the reagents used in permeabilization.
3. Decolorization
Endogenous pigments absorb light, significantly reduce imaging quality, and interfere with the penetration of the light. Decolorizing these pigments would lead to 3D imaging and transmission of the light.
4. Refractive Index Matching
Mismatches of refractive indices inside tissues is the primary reason for light scattering and tissue opacity. Equilibrating the refractive index of the whole tissue can decrease the scattering of light. Contrast reagents, hydrophilic reagents, and aromatic solvents are used for refractive index matching.
What Are the Best Tissue Clearing Methods?
Now let’s look at some of the best tissue clearing methods.
1. Hydrogel Embedding Tissue Clearing
Hydrogel embedding tissue clearing methods stabilize proteins in the sample by cross-linking them to a hydrogel, extracting lipids with detergents, and then immersing the samples in a solution with refractive indices between 1.38 and 1.45. The primary benefits of these methods are their good clearing performance. And what’s so good about these methods is that they are compatible with protein-based fluorophores. However, the disadvantage of these methods is that the tissue clearing is not fast.
Benefits
-
- Expansion or swelling
-
- Preservation of fluorescent proteins
-
- Excellent clearing capacity
Drawbacks
-
- Costly equipment needed
-
- Technical complexity
-
- Slow clearing times
Application
-
- Mouse brain slices
-
- Complete mouse organs
-
- Complete mouse bones
2. Hyperhydration-Based Tissue Clearing
These methods use urea, detergents, and a final solution with a refractive index in the range of 1.38 to 1.48 to extract lipids. Examples of hyperhydration-based tissue clearing methods include the Scale family and CUBIC family.
The primary benefits of CUBIC are its preservation of fluorescent proteins and excellent clearing performance. However, big samples can take weeks to clear.
Benefits
-
- Preservation of fluorescent proteins
-
- Preservation of lipids
-
- Compatible with immunostaining
-
- High clearing capacity
-
- Short clearing times (small samples)
Drawbacks
-
- Expansion or swelling
-
- Long clearing times are impractical for immunostaining
-
- Long clearing times (large samples)
Application
-
- Mouse embryo
-
- Mouse brain slices
-
- Mouse skin layers
-
- Complete fish organs
-
- Mouse body and organs
3. Aqueous-Based Tissue Clearing
These methods can be classified into two groups: simple immersion and hydration or delipidation. In simple immersion, samples are submerged in high RI aqueous solutions (1.44-1.52) and become transparent slowly and steadily. This process was chosen for its lipid preservation and technical simplicity. It’s also worth knowing that bigger samples take a longer time to clear. Hence, simple immersion is usually used to clear tiny insects, organoids, and other smaller samples. Aqueous solutions used for refractive index matching are extremely costly.
It’s important to note that simple immersion methods do not remove lipids; hence, they cannot offer extremely transparent samples. Lipids are the primary source of light scattering. Tissue delipidation could improve quality and clearing efficiency. This can be accomplished with detergents or amino alcohols, such as Triton X-100, saponin, and sodium dodecyl sulfate.
Benefits of simple immersion tissue clearing
-
- Preservation of fluorescent proteins
-
- Preservation of lipids
-
- Technical simplicity
-
- Good for clearing small samples
Drawbacks of simple immersion tissue clearing
-
- Costly clearing solutions
-
- Transparency of sample limited by lipid preservation
-
- Low clearing capacity for large samples
-
- Long clearing times
Application
-
- Sectioned chicken embryos
-
- Neurospheres
-
- Mammal organoids
-
- Whole insects
4. Organic Solvent-Based Tissue Clearing
There are many kinds of organic solvent methods to clear tissues. Organic solvent-based tissue clearing methods dehydrate samples, remove lipids, and homogenize the refractive index to high value. Fast speed and high quality are the main benefits of this kind of tissue clearing. The main drawback of this method is the use of dangerous or corrosive chemicals that need sealing the sample to prevent damage to the microscope. Also, no lipid staining is possible because lipids are removed. Additionally, shrinkage of the sample can happen due to the dehydration steps.
Benefits
-
- Compatible with immunostaining
-
- Permanent preservation of samples
-
- High clearing capacity
-
- Short clearing times
Drawbacks
-
- Toxic and corrosive chemicals require special care to prevent damage to the microscope
-
- No direct lipid staining
Application
-
- Whole human embryos
-
- Tumor tissues
-
- Stem cells
-
- Mouse organs and body
The table below summarizes the characteristics of each tissue clearing method.
|
Family/Method |
Time to clear |
Main Components |
Lipid Preservation |
Changes in Tissue Morphology |
|
Hydrogel Embedding |
||||
|
PARS |
Days to Weeks |
Histodenz |
No |
No |
|
PACT |
Days to Weeks |
Histodenz |
No |
a little expansion |
|
CLARITY |
Days |
FocusClear
80% Glycerol |
No |
a little expansion |
|
Hyperhydration |
||||
|
Whole Body CUBIC |
Days |
4M Urea |
Yes |
expansion |
|
CUBIC |
Days |
4M Urea
50% Sucrose |
Yes |
expansion |
|
Simple Immersion |
||||
|
TDE |
Days to Weeks |
2,2′-thiodiethanol |
Yes |
No |
|
SeeDB |
Days |
Fructose Thioglycerol |
Yes |
No |
|
ClearT2* |
Hours to Days |
Formamide PEG |
Yes |
No |
|
ClearT |
Hours to Days |
Formamide |
Yes |
No |
|
FocusClear |
Hours to Days |
Diatrizoic acid |
Yes |
No |
|
Organic Solvents |
||||
|
iDISCO |
Hours – Days |
Dichloromethane Dibenzylether |
No |
Shrinkage |
|
BABB |
Days |
Benzyl alcohol Benzylbenzoate |
No |
Shrinkage |
|
Spatleholz |
Months |
Benzylbenzoate Methylsalicilate |
No |
Shrinkage |
|
Visikol HISTO |
Hours to days |
Visikol HISTO-1, Visikol HISTO-2 and Visikol HISTO-M |
Yes |
No |
Here is some more information about Visikol HISTO (organic solvent-based clearing technique.
Visikol HISTO is a tissue clearing method that renders biological tissues transparent through the refractive index matching method.
The Visikol HISTO protocol will differ significantly based upon the desired labels and the kind of tissue that is being used. The process is given below:
- Biological tissues are usually fixed before processing.
- The sample is pre-treated with the iDISCO to increase the penetration of the label into tissues.
- The sample can be labeled using endogenous fluorescence, immunolabels, and stains.
- Tissues are dehydrated to remove the water before tissue clearing.
- Sample is cleared with Visikol HISTO-1 or Visikol HISTO-M.
Advantages of Visikol HISTO
-
- No damage to morphology
-
- Affordable
-
- Fast tissue clearing
-
- Easy-to-use
-
- No special equipment needed
-
- Compatible with fluorescent labels
Application
-
- Whole mouse brain
Which Tissue Clearing Method Is Best for You?
Here are some of the factors you need to consider when choosing the best tissue clearing method.
1. Ease-of-Use
The use of solvent-based methods and protein expansion clearing methods are relatively simple where samples are placed in different solutions until they are rendered transparent. On the other hand, hydrogel-based techniques need embedding samples in acrylamide hydrogels which is a considerably challenging process.
2. Processing Time
The time needed to render a sample transparent will depend on factors, such as the method of tissue preparation, age of the animal, size of the tissue, temperature, and kind of tissue. Other than that, each clearing method will react differently to each one of these factors. While solvent-based methods can render fatty tissues transparent without any difficulty, lipid removal methods cannot.
3. Molecular Labeling Technique
Tissue clearing methods are compatible with either fluorescent protein or immunolabeling or both. Each tissue clearing method comes with its own benefits and drawbacks. And methods that are compatible with both fluorescent protein and immunolabeling have their own specific cons such as slow clearing, toxicity, tissue shrinkage, and cost.
Things to Keep in Mind
You will need to take all these factors into account when choosing your clearing method. You can experiment with several methods on tissue from the same source to compare them and narrow down your choices based on clearing quality, time taken, tissue shrinkage, or whichever factors are most important to you.
I personally have tested many methods, built my own clearing chambers from commonly available parts, and waited many weeks to see what the results would be. Still, there was not one method for all tissue types, all fixatives, and all circumstances. Just keep a good notebook of all the test you have done as there may be many, and within each method you might want to run several tests with different tissue thickness and different settings.
Keep in mind more and more methods will be available in the future. If you are short on time and dont want to go through the process of building a clearing device, buying a solution such as Visikol is a good option.
Check out this informative video on tissue clearing and tissue clearing methods:
Click the following link to learn about the best mounting medium for confocal microscopy.