
Determining the path you want to pursue in life and setting the pace for your future can be very tricky. It is even more complicated when you aren’t sure of the most fulfilling career path for yourself, one that pays well and wouldn’t make you hate your job. Entire friends, family, and relatives- all want to give you their opinion on the most profitable field, and none of their suggestions make it any better.
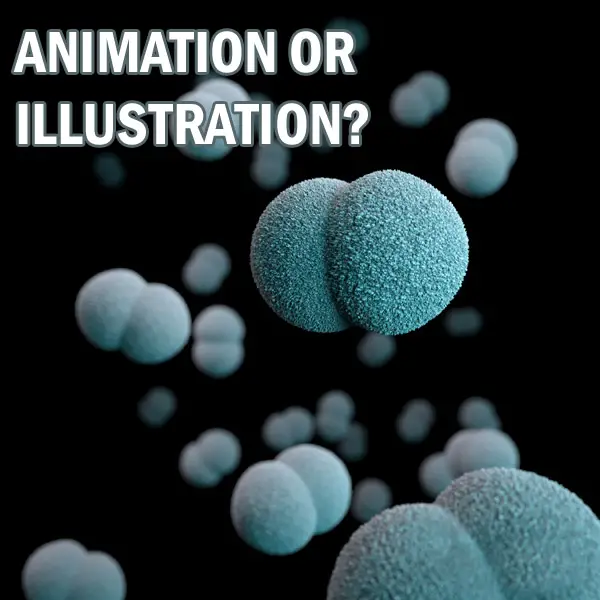
One thing is for sure though, you want to be involved in a career related to visual arts because you love all things art.
You can become an animator or an illustrator, depending on the area that interests you most. If you love art, you are already on the right footing to venture into any of the two career paths. Animation and illustration are closely related, but you can choose either and specialize in it. Better yet, you can become a scientific illustrator or animator, helping break down complex concepts into simple and easily understood language through visual art.
Don’t stress your brain trying to figure out which of these two directions is most suitable for you. There is no harm in trying either animation or illustration and determining where you feel most comfortable working. However, the two are quite broad subjects that require you to understand what they entail. Read this article to get all the answers you need, starting with the definitions.
What Is Illustration?
Illustration is a form of visual art that an artist presents to tell a story or convey an idea. The artist draws an image that invites people to look at it and figure out its message without explanations or text. Therefore, an artist uses the image to break down a comprehensive topic into a milder and more memorable one. For instance, scientific artwork is welcomed by individuals who want to understand the complicated terms associated with science. An artist can draw an image of certain scientific subjects to represent what they are in medical terms accurately.
A good example is the images in your science book at school that helped you understand how a human’s internal organs look like. Those images act as a bridge between art and science, easing the complexities of scientific knowledge. If not for scientific illustrations, common scientific topics would have remained a theory in many people’s minds.
What Is Animation?
Animation is the manipulation of images to make them lifelike and give the illusion of movement. This form of visual art involves capturing the images of puppets, models, drawings, and characters to give an impression of sequence motion. Animation is very important to capture and retain images in people’s minds. Advertisers particularly relish it because they are aware of the power of animation in picture retention among the target audience. This is because the brain combines the sequence motion pictures into one moving image, considering that the human eye only retains a figure for approximately 1/10 of a second.
Scientific animation is widely used to engage individuals based on particular topics. For instance, medical professionals can use animation as a progressive and accurate documentation source. Animations help break down complex information through visual art to demonstrate medical processes and explain difficult concepts in a detailed and scientifically accurate way.
Should I Study and Work in Animation or Illustration
This is where the power of choice comes into play. Depending on what attracts you most, you can choose to be an animator or an illustrator. The two career paths help break down information and easily explain concepts, but they entail different working conditions and environments. For instance, an animator can work as part of a team designated to bring a certain concept into life. You will work in a team that uses art to tell stories through representational art. You will learn many filmmaking aspects through animation, including using props, drawing characters, storyboarding, cadence, and backgrounds. If any of these interests you, choose one aspect, specialize in it, and make a career out of animation,
Conversely, an illustrator has control of what they want to create. Illustration combines representation art (entailing things, people, and places) and non-representation art (involving patterns, abstract art, and designs). Working as an illustrator is more open-ended and flexible, allowing you to utilize certain techniques and utilize your unique artistic taste.
Therefore, one has to choose the most comfortable career path, whether animation or illustration. When you do the things that excite you, you will most likely enjoy your work and experience less burnout. You can always switch between the two if you want to, as both will challenge you to utilize creativity.
What Is the Difference Between Animation and Illustration?
The following are the main differences between the two:
- Illustrations are images that visualize an idea and convey a message without the help of text. They include photos, drawings, paintings, engravings, and collages. In contrast, animations are illustrations involving a series of images in progression to simulate motion.
- Animation involves individuals working in a team to develop motion images and graphics in visual effects, movies, or games. Conversely, illustrators can work on their own and create pictures for publications, including newspapers, magazines, and books. They also develop images for commercial products.
- Illustration can involve using computers to draw images, scan them, and use software to color them. On the contrary, animation is primarily done on computers where artists mainly use software or write computer code to develop graphics.
Can I Do Both?
Yes, you can, but this solely depends on the type of illustration or animation you are involved in. For instance, if you are only interested in 2D animation, it is necessary to practice the two. This is because you may likely find getting work as an illustrator easy, and you may need to illustrate for you to animate in 2D. Animation and illustration are closely related, but that doesn’t mean that working in both will be easy.
When working as an animator for TV and screen, you quickly realize how expensive and time-consuming it may be. Therefore, burning both ends of the candle doesn’t sound like a great idea. What you need to do is focus on one niche (the one you’re most interested in) and tinker with the other in your spare time. This will gradually build your skills in both niches with time.
Animation vs. Illustration: Which Is Harder?
Animation is harder than illustration. This is because the time and attention to detail that goes into a short animation, say a 10-second video, is quite hectic. Doing animations is very repetitive; you need to replicate the art in many ways and capture even the tiniest bit of detail. Remember, you have to do all these replications while keeping the animation within the right dimensions, shape, and proportions. On the other hand, illustrations require drawing a still image on a paper of object. It also requires attention to detail but not as much as animation.
What Schooling Is Required for These Careers?
If you want to become an animator, you need a bachelor’s degree in animation programs or a closely associated field. You can also qualify to be a medical animator with a bachelor’s degree, majoring in art and a minor in biological sciences. However, the most preferred qualification for a scientific illustrator is a bachelor’s degree with a science major and an art minor.
An illustration career starts with a strong portfolio demonstrating the passion and ability to work in the art industry. You can land beginner-friendly illustration jobs with good drawing skills and a high-school diploma. However, it would be best if you still had at least a bachelor’s degree in illustration to market yourself as a professional illustrator. A medical illustrator needs to earn a degree in scientific illustration or a science-allied sphere. Most professionals in this field go the extra mile and earn master’s degrees in medical illustration due to the need to demonstrate a comprehensive understanding of art and science.
Can I Switch Between These Two Careers Later On?
Yes, you can switch from being an illustrator to being an animator. And its nothing like switching from art history to physics. The move is logical, and the transition process has been made easier with advancements in cost, usability, and software unification. It is a pretty smart move to transition between these two careers, and you can also use your knowledge to offer services in both fields- a plus in your portfolio and income.
However glorious the move appears, it has its challenges and setbacks. For an illustrator who wants to transition into animation, moving from a static image to a moving one can be arduous. While the two are closely related, they have different storytelling techniques and require different attention to detail. Therefore, an accomplished illustrator will have it rough successfully switching to animation, but the process is possible through a logical progression.
What Jobs Are Available for Illustration and Animation?
The following are the job options where your animation degree is useful:
- Graphics designer
- Animator
- Illustrator
- Concept artist
- Web designer
- Games developer
- VFX artist
Your animation skills are also in demand in various fields, including medical, advertising, computer systems design, data visualization, and insurance. Other areas that require animation include software publishing and crime scene replication.
Similarly, one can work as an illustrator in the following job capacities:
- Medical illustrator
- Courtroom illustrator
- Comic book illustrator
- Fine Arts illustrator
- Fashion illustrator
Here is an interesting comparison of 3D animation vs 2D animation:
Final Thoughts
Both animation and illustration are illustrious careers that will fulfill your desire to explore creative storytelling through visual elements. You can explore the two career paths and determine which niche suits you best. Then, proceed to carve your name as one of the most outstanding professionals in the visual arts industry.
Click on the following link to learn whether you can minor in medical illustration.
Best Tablets for 3D Animation
Today there is such a huge selection of tablets, both drawing and self contained tablet computers, that its difficult to choose one for your specific needs.
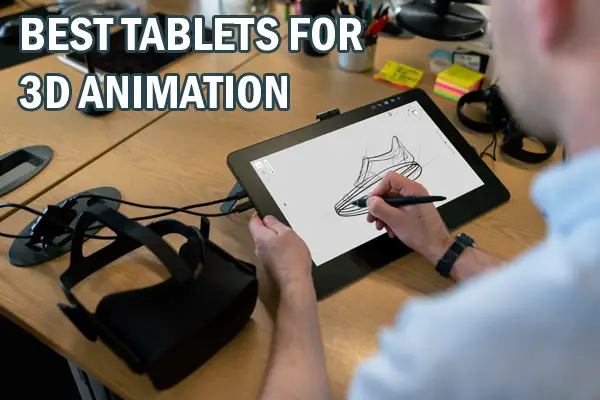
In this article I will look at the best tablets for 3D animation and what makes them stand out.
As mentioned, I will cover both drawing tablets which connect to a PC, display tablets with screens that connect to a PC, as well as self contained tablets in this review. I will focus on tablets for 3D work, not for 2D work such as Photoshop.
Currently, the best tablet for 3D animation is the Wacom DTK2420K0 Cintiq Pro 24 tablet. Other good choices include the Wacom One, XP-Pen Deco 03, HUION HS610, and the VEIKK A30. Let’s get into the reasons why.
Below are my findings along with some key details that each tablet for 3D animation has that can help you decide if another tablet for 3D animation might suit your needs better.
What should I look for in a tablet for 3D animation?
Before you go and purchase a tablet for 3D animation, you need to know that there are certain features that a tablet for 3D animation should have. These features can differentiate what tablet is good for 3D animation and what tablet isn’t.
In general, when you are doing 3D animation, you are also likely to be doing some 3D modeling on software such as Zbrush. 3D modeling is closer to drawing than is animation because you are basically using a pen to sculpt.
Here are a list of features you should consider when picking which tablet to buy:
1.Drawing directly on screen
A display tablet is a tablet that allows users to draw directly on the screen of that tablet. Even though there are many great tablets for 3D animation that aren’t display tablets, display tablets have an advantage as it’s easier to do 3D animation when you can draw directly on a tablet’s screen. It makes work more intuitive and you feel more connected as you are not working on a surface separate from what you look at.
I am not saying you cannot do 3D animation with a drawing tablet, many do, but if you get a chance compare working on both types. Not everyone prefers a heavier, larger, more fragile tablet however.
2. Size options
Size of the tablet matters for several reasons. With a self contained display tablet computer or even a display drawing tablet, the main issue is the size of the screen. You do not want a screen that is too small. Screen and display quality is also important since you are looking at it instead of a monitor. Every consideration such as eye strain or unreadable fonts you would find on a monitor comes into play with display tablets.
On the other hand, with a drawing tablet and to a degree with the other type, you want to buy the size that matches your drawing style. For example some people find it easier and less stressful on the body to use a larger tablet and use their shoulder rather than wrist more. Others find that to be too much work and tiring, which can cause RSI eventually. They choose medium size tablets.
Size also matters when you travel or dont have a large desk. A 24″ tablet is not perfect for these situations. Again a medium tablet works well. Keep in mind that not all companies sell tablets in different sizes like Wacom for example. Some companies only make some tablets in one size.
Large display tablets can be very heavy.
2.Rubber legs
Another great feature for a tablet designed for 3D animation to have is rubber additions. This can come in the form of legs on the back of the tablet, where the rubber can allow the legs of a tablet to have a firm grasp on a surface by eliminating the potential of slipping, when the tablet is propped up.
3. Budget
Your budget matters as with any purchase. Keep in mind that display tablets are usually more expensive than drawing tablets. Some can go into thousands of dollars.
4. Shortcut buttons
Shortcut keys, and especially customizable ones, where you can even program mouse clicks into them, can speed up your animation workflow and make your work easier. Tablets come with either none, a few, or many buttons.
Also keep in mind that on some tablets you have touch gestures enabled or a separate touch pad or touch enabled on the entire tablet. Some people may find this useful for clicks etc. I personally find it to get in the way, unless its on a separate little touch pad on the side.
5. Compatibility with software
This one applies to self contained tablets only. Basically if the tablet cannot run the 3D software you intend on animating in or the processor is not fast enough or the graphics processor has refresh issues while running the software, you best stay away from that tablet.
6. Stylus pen features
The pens that come with tablets have various features which are important for 3D animation. A pen should not require external batteries as these will make the pen heavier and need replacing. A pen should have comfortable side buttons since you will likely be needing to perform right and possibly middle mouse clicks in addition to tip clicks for left mouse button.
In terms of pen sensitivity, it is more important when 3D sculpting, but it can be very useful for 3D animation when doing things such as painting weights on joints for animation.
7. Good surface
The tablet should have a nice smooth surface. You can also buy half gloves made specifically for tablet work to help you move your hand over the surface easily without catching. Click here to learn more.
8. Properties manager
Your tablet should have not just a driver but a full tablet control app where you can choose key assignments, sensitivity (having too low or too high sensitivity is bad), things like pen mode vs mouse mode (does cursor end up in same place after you pick up pen and put it back down), custom key assignments and options for individual software, etc.
Best Tablets For 3D Animation
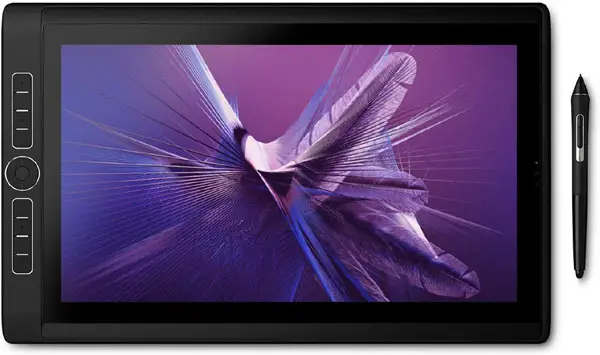
Best overall tablet – Wacom DTK2420K0 Cintiq Pro
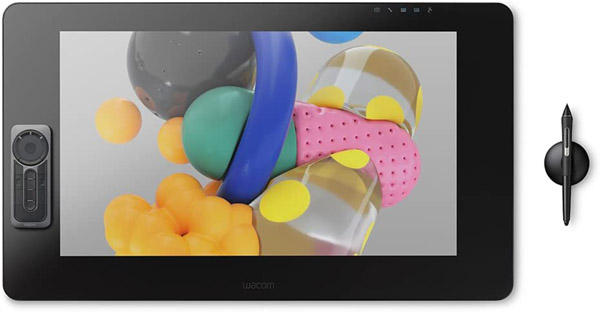
As stated above, the best tablet for 3D animation that you can use is the Wacom DTK2420K0 Cintiq Pro 24 tablet. There are many reasons why the Wacom DTK2420K0 Cintiq Pro 24 tablet is the best overall tablet for 3D animation.
First off, the Wacom DTK2420K0 Cintiq Pro 24 tablet is the best overall tablet for 3D animation because it’s exquisitely built. The Wacom DTK2420K0 Cintiq Pro 24 tablet comes with a 4K resolution (which is 3840 x 2160 pixels). This quality of the Wacom DTK2420K0 Cintiq Pro 24 tablet is outstanding.
As well, the Wacom DTK2420K0 Cintiq Pro 24 tablet has buttons that aren’t on the actual Wacom DTK2420K0 Cintiq Pro 24 tablet but on a movable remote with 17 keys, this gives you more screen space to draw (brilliant). This tablet hooks up to the latest versions of Mac and PC. As well, the Wacom DTK2420K0 Cintiq Pro 24 tablet has cables for USB-C, HDMI and Mini/DisplayPort.
It has anti glare properties which as we all know is a big issue with tablets. It has various stand options since its a large tablet to make your work comfortable.
This display tablet requires connection to a PC, which is a good thing, because as long as you can run your 3D software on it (and you can upgrade your PC piece by piece), you can use this tablet.
It also has the option to use the Wacom Pro Pen 3D (click here for more info and pricing), which is a pen specifically made for 3D work, a first, and has 3 fully customizable buttons for panning, zooming, tumbling, etc.
To see more features and current pricing, click here.
Runner Up- Wacom One
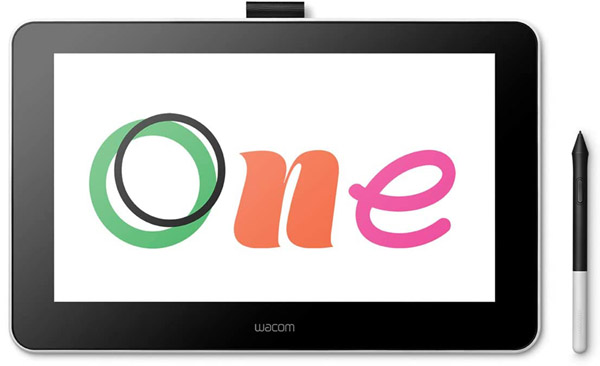
The Wacom One is a more budget oriented animation tablet with a screen. The pen needs no batteries and works on PC or Mac, again a good thing since it uses your computer’s computing power for memory intensive 3D work. It works well in programs like Blender, Maya and Zbrush.
The resolution is 1920×1080, less than the large Cintiq, but because its smaller its ok.
It does not have function keys on the surface (but its much less expensive) but you can always add keys with an external pad, programmable mouse or controller.
Keep in mind that the size is much smaller at 13.3 inches, it is basically the size of a medium sized laptop.
To see more features and current pricing, click here.
Best self contained tablet- Wacom MobileStudio Pro
This is a very capable tablet computer with an Intel Core i7 processor, a lot of RAM, and plenty of graphics memory in an Nvidia Quadro. No need to connect to a computer. Its pretty amazing what Wacom was able to fit in this design. Do not be surprised at the price. Its basically a flat workstation, great if your main work is in graphics and you have limited room. It even has upgradable RAM and SSD storage!
Its screen resolution is the highest at 3840x 2160. The tablet can handle CAD and video applications in addition to 3D animation and modeling, making it a great investment for the right person.
It can also be used as a drawing display tablet connected to a computer. You can even connect up to 3 monitors to it if you want to increase your display area. A tv can be connected to display your work to a large group.
Even though it has a display you write on, it still comes with 8192 levels of pressure sensitivity, great for both 3d animation and 3D sculpting.
It is also capable of using the Wacom Pro Pen 3D made specifically for 3D work. But it has plenty of shortcut keys built right in right on the side.
It comes with an integrated stand for more comfortable work or to switch positions.
To see more features and current pricing, click here.
Runner up for self contained tablet- Apple 12.9 inch iPad Pro
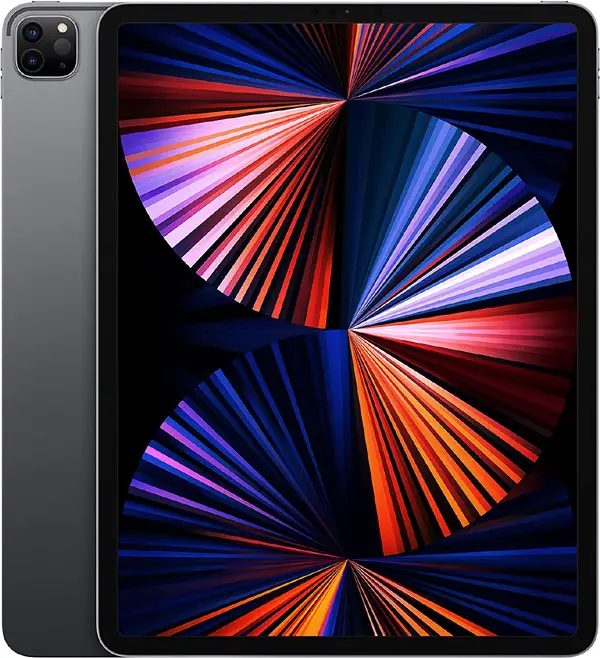
Yes, you can do 3D work with an iPad Pro, thanks to its larger size and computing power. Its also compact and not as high priced as some other tablets. It is not perfect but more about the drawbacks later.
It has an M1 8 core CPU and an 8 core GPU.
It supports the Apple Pencil 2nd generation, which has tap functionality on its side in addition to the tip. It has a battery inside so its needs to charge after 12 hours of use.
You can even connect it to a Magic Keyboard to change your workflow. There are no function keys but that can be done with an external device.
Even though you can do 3D modeling and sculpting on the iPad Pro using such apps as Forger and Shapr3D, you cannot really do 3D animation as of today. Your only option is to export your sculpts and models to a 3D animation package later. It is enough however to get someone new to 3D into the creative process.
To see more features and current pricing, click here.
Best budget tablet for 3D modeling-XP-Pen Deco 03
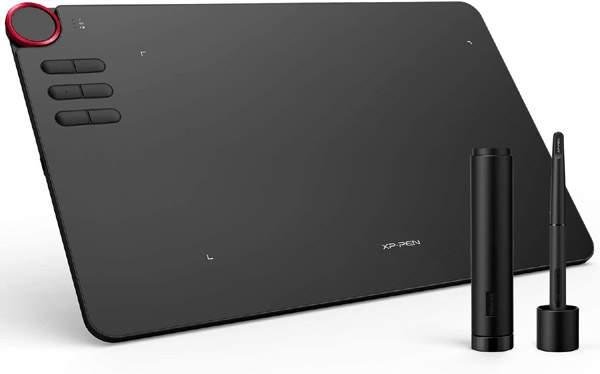
The best budget tablet for 3D modeling is the XP-Pen Deco 03 Wireless 2.4G Digital Graphics Drawing Tablet. It supports many different programs for 3D modeling.
It has a large drawing area compared to a similar size Wacom. The tablet is light weight but well built.
The stylus supports 8192 levels of pen sensitivity, plenty for 3d animation or 3d modeling. It has been tested with programs like Zbrush and Blender.
It comes with 6 fully customizable express keys on the side and a multi function dial. It allows for different key setup for different programs.
It works with a wired or wireless connection to your computer. It does not have a screen.
To see more features and current pricing, click here.
Best value tablet for 3D animation- Huion HS610

The best-valued tablet for 3D animation is the HUION HS610 Graphics Drawing Tablet. It needs to be connected to a computer to function, whether its a PC or Mac. It is compatible with popular 3D software packages.
It comes with as many as 28 customizable keys on the side of the tablet as well as a touch ring for changing brush size, etc. The software interface is very similar to Wacom tablets. It has all the features of more expensive tablets like pen tilt.
The pen is battery free like a Wacom. The buttons on the side of the pen can be assigned to things like mouse clicks etc. It comes with an artist glove included for less resistance while working.
To see more features and current pricing, click here.
Best ergonomic tablet for 3D animation- Veikk A30 V2
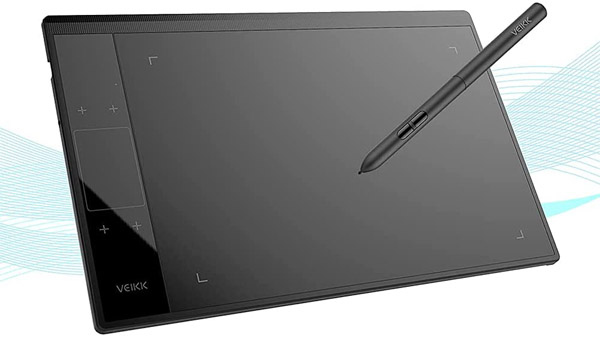
This tablet has ergonomics in mind (and its very affordable). There are no buttons to press, instead there is a main drawing area, a gesture pad separately on the side and 4 touch keys that can be assigned.
One feature that the VEIKK A30 Drawing Tablet has is that it is equipped with Intelligent Passive Technology. Intelligent Passive Technology means that the screen of the VEIKK A30 Drawing Tablet is more sensitive to the pressure of the drawing pen when you draw on it. As a result, you won’t need to exert as much force on the screen of the VEIKK A30 Drawing Tablet when you use it. Therefore, you will have a better time physically when using the VEIKK A30 Drawing Tablet.
The tablet is mostly drawing surface which means there is no wasted space. You dont want a large tablet next to several other input devices on your desk, its just too far to reach.
Its compatible with PCs and Macs. The pen does not need a battery. It has two assignable buttons like a Wacom pen.
The pressure sensitivity is comparable to other tablets and adequate.
It works well with software like Zbrush, Blender, Sculptris, Mari etc.
It comes with an artist glove so you dont have to buy one separately. It works for both right and left handed users.
To see more features and current pricing, click here.
To summarize
There you go. The best tablets for 3D animation. The Wacom DTK2420K0 Cintiq Pro 24 tablet is the best overall tablet for 3D animation. The runner up is the Wacom One. The best tablet for multiple activities, jobs and tasks is the Apple 12.9-inch iPad Pro. The best tablet for 3D modeling is the XP-Pen Deco 03 Wireless 2.4G Digital Graphics Drawing Tablet. The best-valued tablet for 3D animation is the HUION HS610 Graphics Drawing Tablet. The best ergonomic tablet for 3D animation is the VEIKK A30 Drawing Tablet.
Click on the following link to learn how to use a tablet for 3D animation.
Pros And Cons Of 3D Organ Printing
There are around 106,565 patients on the organ waitlist in the United States alone. About 17 patients die each year waiting for an organ. The disparity between the organ supply and demand for organ transplantation is a very well-known fact, and it doesn’t seem that it will be resolved anytime soon.
In a scenario like this, what if someone tells you that organs could soon be successfully printed in a lab? This is exactly what 3D-bioprinting an organ is. We are at a point in scientific advancement where this is a possibility.
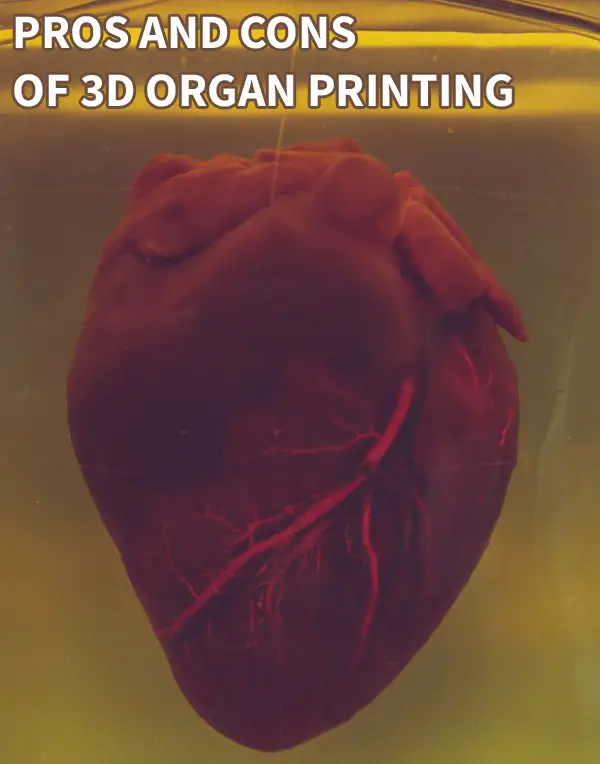
A 3D-printed organ would have many applications, especially in the healthcare industry. Let’s discuss the pros and cons of 3D organ printing.
Continue reading “Pros And Cons Of 3D Organ Printing”
Does Fluorescence Microscopy Kill Cells?
Are you knee deep in microscope slides examining the morphology of different cells? Are you just seeing a bunch of pretty shapes and colors without a full grasp on what the circles and squiggles do? A box of microscope slides represents a huge cellular graveyard. While helpful, sometimes motion is needed to get the full picture.

In this article I will explain whether fluorescence microscopy kills cells and explain the reasoning.
Continue reading “Does Fluorescence Microscopy Kill Cells?”
Why is Unreal Engine Crashing at Startup?
If you are working with Unreal Engine on your latest project, there is a high chance that at some point or another, you have experienced a crash at startup. You may be asking yourself “why?”
Unreal Engine is famous for its stability and reliability, but it doesn’t mean that crashes don’t happen. There are many reasons why your game engine might crash at startup. This guide will discuss seven possible ways to solve the problem.
Some factors that can cause Unreal Engine to crash at startup are a corrupt project file, outdated drivers, lack of resources, incompatibility with hardware, a corrupt installation, a bad configuration, or an antivirus conflict. Read on to learn more.
What Causes Unreal Engine to Crash at Startup?
Below are seven reasons that can cause your Unreal Engine to Crash at startup. You can test each one to determine what is the culprit.
1) A Corrupt Project File
A corrupt project file is a bad version of your Unreal Engine project, and it can cause the engine to crash. An error may occur when you try to open your game in Unreal Engine if there’s a problem with this project file.
A corrupt project file might be missing data or have broken links, so while working on your project, the file gets bigger every time you save it. That can lead to some issues with your game engine, making it difficult for you to search for specific files.
2) Outdated Drivers
Drivers are software that allows your operating system to communicate with the hardware. Outdated drivers can affect how Unreal Engine works on a particular platform or device.
If you have an out-of-date graphics card driver, it may cause Unreal Engine to crash. That’s because there’s a problem between these two devices, and they don’t understand each other. The same goes for other drivers and devices that you have connected with your PC, such as a mouse or keyboard.
Outdated drivers can lead to various problems in Unreal Engine, but the common ones are crashes when Unreal Engine starts up and low FPS on your computer.
3) Running Out of System Resources
If you are working with Unreal Engine, it’s expected that the game engine will use up some system resources. Unreal Engine will take all of your computer memory and processor power if it needs to because this way, the user interface (UI) will run smoothly without any lags or crashes. When there are not enough of these resources available for Unreal, it will cause the engine to shut down unexpectedly.
4) Unreal Engine Is Not Compatible with Your PC Hardware
It may sound strange, but it’s going to happen if you have an incompatible combination of devices connected. The number of different possible combinations for the hardware out there can be high.
Unreal Engine supports many types of hardware, but it’s not compatible with all of them. If you have some older components on your PC or something new that Unreal Engine simply can’t recognize, there is a big chance for that to be the reason for Unreal Engine crashes when you launch it.
The problem may occur because Unreal Engine doesn’t support the device connected to your PC. It can also happen because Unreal Engine doesn’t have adequate information about the particular device to work with it.
5) A Corrupted Installation
A corrupted installation is when something goes wrong during the installation process of Unreal Engine. If you have some problems with your game engine installation, they will be visible on a black screen at startup. That’s because there won’t be any working UI for Unreal Engine. Mostly, it happens if one or more files are missing or corrupted because you are trying to install Unreal Engine.
Another issue can be that your installation is not valid, which means it’s not up-to-date with the latest version of Unreal Engine. If that is the case, ensure you have downloaded and installed all updates before installing a new game engine on your PC.
6) A Bad Configuration
A bad configuration is when you have made some mistakes with your UE configuration files. There’s a chance that these issues can prevent Unreal Engine from starting up properly on your PC. It’ll lead to the engine crashing at startup because it cannot find the necessary files for running itself.
The most common configuration problem is when you have a bad path to the folder that contains these files. You may have specified wrong paths for settings or project files locations, which can also result in Unreal Engine crashing every time you try to load your project.
7) Unsupported Anti-virus
Many people don’t realize that their antivirus is the reason why they can’t launch Unreal Engine. There are multiple reports of that being true.
It happens because most popular antiviruses have some settings which block or delete Unreal Engine files used in projects. If your antivirus is blocking Unreal Engine, it won’t launch because the game engine doesn’t have access to its files on Windows.
How to Fix a Crashed Unreal Engine?
Fixing your crashed Unreal Engine is not hard as it may seem. There are plenty of reasons why your Unreal Engine can crash, but here is a list of common solutions so you won’t need to do any guesswork.
1) Ensure Your PC Can Run Unreal Engine
If you want to play programs made with Unreal Engine, ensure your PC has enough power for that. You can check the system requirements of Unreal Engine on the official website to find all minimum and recommended hardware specifications in detail. It will help you decide if your device meets these specifications or not.
If you can’t launch Unreal Engine and it crashes, there is a big chance that your PC doesn’t meet the requirements for the game engine.
2) Update UE
Updating your game engine can be one of the first things to do if you have some problems with crashes. Sometimes it’s necessary to check for updates manually on the Unreal Engine website, but in most cases, their installation happens automatically when they become available.
It doesn’t mean that updating will always fix problems with crashed UE. Unreal Engine is constantly updating, so it’s normal for there to be some hiccups along the way. Don’t worry about it much.
3) Delete UE Files
Deleting UE files is one of the popular ways to fix Unreal Engine crashes on PC. Sometimes your game engine installation becomes corrupted, so it’s best to delete all unnecessary files before reinstalling the program. Here are a few steps on how you can do that:
- Go into Uninstall Programs menu and remove everything related to Unreal Engine
- Delete all UE files from C:\Program Files\Epic Games\ or wherever you have installed the program to. Also, don’t forget to delete everything inside the Engine folder.
- Reboot your PC and install Unreal Engine again, but ensure that it’s the latest version of the game engine before doing so because previous versions will cause crashes.
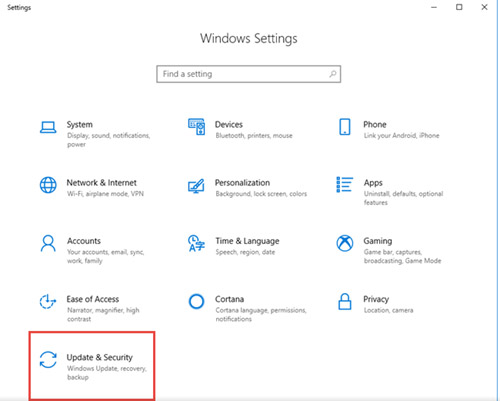
4) Check for Windows Updates
It’s possible that UE is not compatible with some updates installed on your PC. It can happen because Unreal Engine predates the latest version of the Microsoft operating system. There are cases where the game engine doesn’t work correctly after auto-update starts downloading new files to upgrade OS. Here’s how you can fix it:
- Open the Settings menu on your PC
- Find and open the Windows Update section there.
- Click the ‘Check for updates button to run the update process manually. Be patient because it may take some time, depending on how crowded Microsoft servers are at that time. You can also try restarting or shutting down and opening the PC, but don’t rush with it because it may break something and cause UE to crash even more!
- After updates are installed successfully, try running Unreal Engine again. Everything should work like a charm now, but if you still have problems launching this game engine, then move on to the next possible solution from our article!
- Reboot your PC after updating Windows to ensure that UE will work correctly after this process.
5) Install UE locally or on Another Drive
This can be a big problem for many users because you have probably installed Unreal Engine globally if the game engine crashes at startup. It means that all files are getting installed into C:\Program Files\Epic Games\ which isn’t a good option.
The directory becomes full after some time. That is why it is ideal to install UE locally or on another drive. These are the steps:
- Go into your PC Control Panel and open the ‘Programs’ section there
- Find Epic Games Launcher in the list of installed programs, right-click it, and choose the uninstall option instead.
- When complete, go through the installation process again but select local installation instead of the global one. You can also delete the Engine folder from C:\Program Files\Epic Games\ and install it somewhere on your PC.
- Ensure that you have at least 30GB free space because UE takes around 25GB when installed globally without other games or programs. If you don’t have much space, install UE locally or on another drive.
- Reboot your PC after following these steps, and it should work like a charm now, even if Unreal Engine is crashing at startup!
Below is a useful video on Unreal Editor crashing:
There are many solutions to fix Unreal Engine crashes on PC from the above. Some of them require basic computer skills while others need a more advanced approach, but they should work perfectly if you follow our instructions carefully.
Click the following link to learn how to make Unreal Engine less laggy.
How to Use a Tablet for 3D Animation? Is it Practical?
In 3D animation, whether its for medical purposes or general animation, there are various ways of interacting with the computer, from a basic mouse all the way to advanced haptics devices. This in part depends on where and how you work. Working in VR is completely different than at a desk.
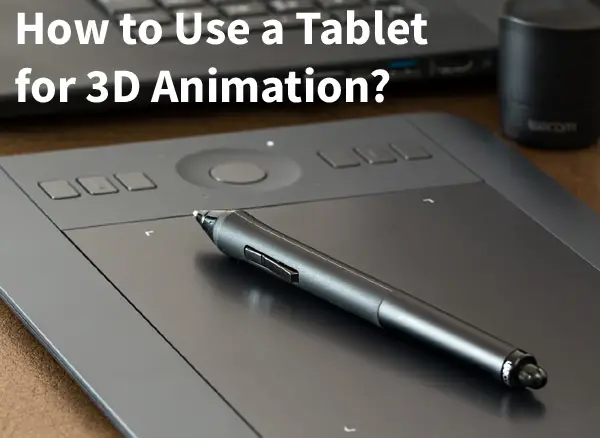
In this article I will discuss using a tablet for 3D animation including the pros and cons, tips, and the workflow.
Continue reading “How to Use a Tablet for 3D Animation? Is it Practical?”