
There are many commercial mounting media available on the market, but not all work well for confocal microscopy.

This article discusses some of the best mounting media for confocal microscopy, characteristics of a good mounting medium, refractive index, and other relevant topics.
Generally, the best mounting media for confocal microscopy are methyl salicylate or wintergreen oil, BABB (Benzyl Alcohol/ Benzyl Benzoate), and TDE (2,2’-Thiodiethanol). Commercial products include Vectashield and Prolong Gold. The right mounting medium can prevent fluorescence fading, preserve the integrity of sample for storage and keep it safe from microorganisms and moisture. Let’s discuss this in detail.
First a brief primer on the basics.
Confocal Microscopy Basics
Also known as confocal laser scanning microscopy, confocal microscopy is an optical imaging technique that creates a 3D picture of a specimen by employing fluorescence and lasers. Thanks to the laser, and upwards of 3 can be used on one slide, it allows collection of very clear images from a thick sample, one thin section at a time. Confocal microscopy has found many applications in biological sciences, including microbiology, genetics, and cell biology. It is particularly helpful in studying live cells.
The mounting medium is the substance that holds the sample in place between the slide and the coverslip. It allows for long storage of the sample and protects it from damage. Refractive index plays a vital role in selecting a mounting media. The mounting media, coverslip, sample, and glass should have a refractive index as close as possible to each other.
Here is a useful video on confocal microscopy basics:
Best Mounting Media For Confocal Microscopy
Here are some of the best mounting media for confocal microscopy:
1. Methyl salicylate or Wintergreen oil
Wintergreen oil is a natural product that is extracted from the leaves of the wintergreen plant. Methyl salicylate is the active ingredient of this oil. According to research carried out at The National University of Malaysia, wintergreen oil is more environmentally friendly and safer than the solvent xylene for mounting specimens on slides. Xylene is a colorless chemical that is used as a clearing agent in the medical laboratory.
2. BABB (Benzyl Alcohol/ Benzyl Benzoate)
This solution consists of one part benzyl alcohol and two parts benzyl benzoate. It has been used as an optical clearing agent for many years. While BABB clears tissues very fast, it quenches fluorescent proteins. Fluorescence quenching is a physiochemical process that decreases the fluorescent intensity of a specimen. Also, the solution can be applied only after dehydration of tissues because it is not miscible with water.
Methyl salicylate and BABB are the best mounting media when imaging depth is critical.
3. TDE (2,2’-Thiodiethanol)
Also known as thiodiglycol, TDE is an organosulfur substance that is mixable with organic solvents and water. And it is the best mounting medium when maintenance of cell morphology is important.
Commercial Mounting Media for Confocal Microscopy
1. Vectashield
Vectashield has been used for confocal mounting for many years, I have used it extensively and it has good anti fading properties. It comes in several versions- one that does not solidify and can be used with tissue that needs to be readily removed, and sealed on the perimeter with a roll of putty or nail polish, and one that solidifies and does not require any other sealants.
2. Vectashield Vibrance
This is a newer version of the popular commercial mounting medium which is hard setting and therefore does not require nail polish to close the slide. It also has improved anti fade qualities and no background, giving a more vibrant, stronger staining signal.
3. Prolong Gold
Prolong is another very good confocal mounting medium I have experience with, which has antifade qualities and a good refrative index of 1.47. It is also available with DNA stain built in if desired.
What Are The Characteristics Of A Good Mountant?
- The refractive index of the mounting medium should be near 1.518.
- It should be resistant to the growth of bacteria.
- It should not change in pH or color
- It should not cause distortion.
- It should not dissolve out.
- It should not wash away any stain.
- It should mix easily with toluene and xylene.
- It should stay stable once set.
Why A Mounting Medium Is Important?
Here is why the mounting medium is extremely important:
- It enhances the quality of the image
- It supports and stabilizes the sample.
- The mounting medium keeps the specimen safe from external contamination, such as moisture and bacteria.
- The refractive index of the mountant can have a notable impact on the quality of the picture.
Fluorescence Mounting Media Requirements
- Fluorescence mounting media should have a high refractive index
- It should buffer fluorophores (synthetic polymers, organic compounds, or proteins) and the specimen.
- It should prevent photobleaching. Also called fading, photobleaching happens when a dye loses its ability to fluoresce owing to photochemical alteration.
Recipe for Fluorescence mounting media
- 20mM Tris, pH 8.0.
- 5% N-propyl gallate. It is an ester formed by a condensation reaction between propanol and gallic acid. It helps prevent fading.
- 50-90% Glycerol. Glycerol increases the refractive index of the mounting media, and a higher refractive index leads to greater resolution. The fluorescence image gets better as the concentration of glycerol gets higher.
- Heat the solution to 37°C and vortex.
- Just 6-8ul of mounting media should be used for every 18mm coverslip.
- Use nail polish to seal the coverslip.
- Mounting media should be stored at 4°C.
DIY Mounting Media
Here is how to prepare mounting media yourself:
- Prepare mounting medium by mixing one part PBS with nine parts of glycerol.
- Adjust the pH between 8.5 and 9.0. This pH is ideal in preventing the quenching of fluorescein.
- You can also add an antiquench agent, such as ascorbic acid, propyl gallate, and p-phenylenediamine, to the mounting media to slow the fluorescence quenching.
Confocal Microscope And Widefield Fluorescence Microscope
Widefield microscopy is an imaging technique that allows the localization and detection of proteins and cells. In this technique, the complete specimen is illuminated with light of a particular wavelength, exciting fluorescent cellular objects within it. The fluorescence emitted by the specimen is either captured by a camera or seen through an eyepiece.
The maintenance cost of a widefield microscope is low compared to a confocal microscope. A widefield microscope is considerably cheaper than a confocal microscope because of its less complicated optics and the sensitivity of its detectors. It allows imaging of alive or small biological samples. However, a widefield microscope is not good for examining thick specimens or specimens that scatter light significantly. Imaging such specimens with this microscope would give vague images with high background.
On the other hand, a confocal microscope enables to get 3D images of the specimen with high-quality resolution. It is good for examining thicker structures or ones that scatter light. Confocal microscopy offers more resolution in-depth and reduces background fluorescence away from the focal plane.
Refraction
Refraction is the change of direction of light when it passes from one medium into another medium of different densities.
Also known as the index of refraction, the refractive index is the ratio of the speed of light in a particular medium to its speed in a vacuum.
Below is a list of refractive indices for common mediums in microscopy –
Glass – 1.52
Immersion Oil – 1.51
Glycerol – 1.47
Water – 1.33
The refractive index is a vital parameter in calculating numerical aperture in light microscopy. A numerical aperture is a dimensionless number describing the light gathering capability of a condenser or objective. It is an essential factor when trying to distinguish detail in a sample viewed down the microscope.
Matching the refractive index of your mounting medium to the refractive index of the glass components is essential as it will optimize the brightness and resolution of the images.
Mismatched refractive indices, on the other hand, can cause chromatic aberration, decreased resolution, or spherical aberration, which can affect the brightness of the specimen.
Tips To Reduce Photobleaching
Here are some useful tips to reduce photobleaching.
Use resistant dyes
One of the effective ways to reduce photobleaching is by using dyes that are less vulnerable to bleaching. Janelia Dyes, AttoDyes, Cyanine Dyes, DyLight Fluors, and Alexa Fluors are all dyes that are resistant to bleaching.
Decrease light intensity and time exposure
Photobleaching can also be reduced by reducing light intensity exposure to fluorophores. Decreasing light intensity also decreases the number of excitation-emission cycles and extends the life of fluorescent molecules. However, it’s important to note that decreasing light intensity can decrease emission signals. Hence, you need to find a balance so that the quality of the image is maintained. Additionally, decreasing time exposure to light sources decreases the number of excitation-emission cycles and decreases photobleaching.
Keep in Mind
A mounting medium plays a vital role in enhancing the clarity of an image during confocal microscopy. It is also essential to protect your sample from physical damage. And the refractive index plays a crucial role in selecting a mounting medium. The refractive index of mounting media, coverslip, sample, and glass should be as close as possible to each other.
Here is a useful video about mounting media:
I hope this article has helped you decide on a mounting medium for confocal microscopy.
Click the following link to learn how to perform deconvolution.
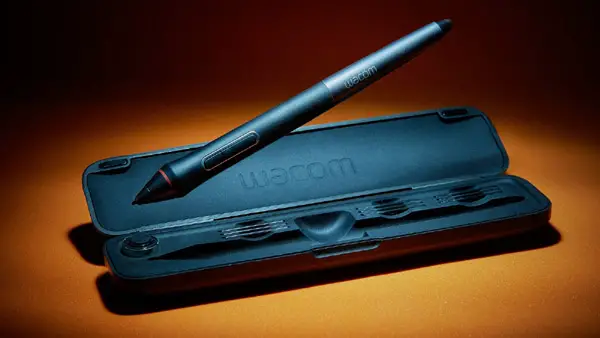
Why Are Wacom Tablets So Expensive?
If you are an illustrator, animator, graphic designer, or someone having any kind of dealings with digital arts and wants to kick it up a notch — the first thing you should be doing is to invest in a useful drawing tablet. And by ‘useful drawing tablet’ I mean to find an input device that functions as good as the day you bought it, even after a decade.

In this regard, Wacom tablets are usually highlighted when you are looking for a graphic tablet that could help you increase your workflow, but when artists are sizing it up, the most common thought that comes to mind is if the price justifies itself?
As compared with other drawing tablets, Wacom tablets excel in terms of intuitive control options, technology, overall performance and durability, resulting in being pricey. There is still not much competition and customers have brand loyalty after years of use. In general, Wacom tablets have what the other brands lack and there are some potential reasons behind it. Let me explain.
In this article, I will disclose the main grounds for Wacom tablets being more expensive than other drawing tablets.
Lack of Competition
Being a drawing tablet that has great brand recognition — Wacom tablets are often considered over others because of their less impressive substitutes. Take mobile brands for example, those who are fed up with Samsung phones (android) can switch to an iPhone (iOS) and vice versa.
But if we ponder the idea of switching to a different graphics tablet brand, we are not left much of a choice other than sticking with Wacom.
However, to think that the lack of serious competition is the basic cause of Wacom tablets being so expensive can not be wholly true. Sure, Wacom has always been a recognized brand name out there when it comes to buying a decent drawing tablet — but these days, this is slowly changing.
For a long time, Wacom has been known to be the one brand manufacturing large graphic tablets and pen displays. That being the reason, those who needed a tablet with a large drawing area had no other choice than to go for Wacom’s. Though that is not the case anymore, brands like Huion have also introduced large graphic tablets, Huion Giano for example.
Wacom Is An Authentic Product With Market Acceptance
The durable and convenient graphics tablets of Wacom have earned great market recognition. When asked for Wacom’s build quality — a user reported in Quora “I have been using Intuos 4 for a considerably long time (almost 15 years), though it looks a bit weary but works as good as the day I bought it”.
Some non-Wacom tablets have proved to be nifty and useful but thats for a non-professional, short-run usage. You would find people complaining these tablets break easily and not having the best drivers installed.
Despite the fact that other tablet manufacturers started making high build quality tablets like Wacom (some already have), it would still take them some time to earn the market recognition Wacom has or that they deserve.
In terms of build quality, Wacom graphics tablets are often praised. It is also a matter of brand loyalty. The amount of trust and overall adequate build quality has made Wacom tablets best for professional use and if we consider how long they last, it justifies the high price tag.
They Have A Great Driver Support
Not every manufacturer out there has tablets with flawless drivers and neither is the case with Wacom, but what makes Wacom special is that they are known to release continuous driver updates for their tablets. Consider Graphire 3 for example, which was released in 2003. It kept receiving continuous driver support until 2014, that’s 11 years of drivers support for the tablet.
Likewise, the Intuos 2 which was released in 2001 also kept getting driver support until 2012 for a continuous 11 years and thanks to that it still works with Windows 7 and all the earlier versions of it. Though, the old Graphire 1 tablet had fewer years of driver support, from 2001 to 2007. And in a sense, this is a good call as Wacom is supporting their tablets now more than they did in the past.
However, we have yet to see if the other drawing tablet manufacturers provide something like Wacom does for their buyers.
Better Technology
Wacom tablets come with technology and features that remain to be seen among competitors. All Wacom tablets provide at least 2048 levels of pen pressure sensitivity, though most of the users won’t feel a need to go above 512 pressure sensitivity except for those who are involved in making much detailed art.
Professional and premium tablets of Wacom like the Intuos Pro have some exceptional features that the competitors are missing. Tilt sensitivity and multitouch for example, though there isn’t a big number of users that could use tilt sensitivity feature but those who do, have no other option than to choose Wacom.
Wacom Tablets’ Dominant Features
Wacom tablets are known to be professional ones for a reason, as I stated before, Wacom tablets usually stand out in terms of features and overall performance. The first and most important factor looked for in a drawing tablet is if it makes your experience enjoyable and as close to real drawing as possible. Thanks to Wacom, they have made their products pressure-sensitive so that artists can get their projects up to par with paper illustration.
For tablets that have displays built in, the display is another significant part of a drawing tablet, after all, it is what you see and work on. When comparing Wacom’s display to that of competitors’, the colors appeared more vivid when working and were easier on the eyes.
Wacom facilitates its users from beginners to professional illustrators with different models and sizes of the display, for example, if you are a beginner and starting out, you might look for a smaller and appropriate display — Wacom One Tablet should be your best bet. Likewise, if you are an intermediate artist and want to elevate your game a few notches up, go for Wacom Cintiq, it’s pricey but with additional features as well.
Are Wacom Tablets Worth it?
This has to be the most common question asked among artists because of their high price (if not overpriced) tablets. But if we consider what the tablet actually provides, it is worth giving a second thought. The matte surface of Wacom tablets feels smooth and paper-like as if you are working on an actual paper, which also helps you make your strokes more accurate unlike any of the iPads.
The screen is also pretty good, the users cannot ignore the fact that it is highly useful when it comes to color representations and the comfort of being able to draw directly and precisely on the screen. Moreover, if you are a pen snob and that matters to you a lot, many of the stylus/pens gradually come to a point where they are not as good to work on a detailed project. However, Wacom tablets feature pens that are known to have less to no issues with them. Plus they have been a favorite pen among many artists.
Although it’s not always about smooth surfaces or great pens, you can still face some issues/inconvenience here and there. One of the problems that can be potentially encountered is that you won’t find any hotkeys buttons or areas on Wacom One tablets. Therefore, using your thumb to click on ‘undo’ and ‘redo’ buttons can be frustrating but it is a condition.
For inconveniences like those, either you need to have your keyboard in reach or manually navigate the menu on the screen, and that could be time-consuming. However, there is a solution to that specific problem, users can get a Wacom ExpressKey Remote.
This multi-button device is made to have all kinds of features like undo, redo, changing, and adjusting the size of the brushes, and whatnot.
For the most part, Wacom tablets prove to be useful and nifty devices that have helped artists to get the most out of a graphic tablet. The minor defects are negligible or can be easily sorted out. Its durability and better features than its competitors have also been a reason for its being costly.
Putting It All Together
Graphic tablets have been a great convenience for artists, illustrators, or anyone involved in digital arts, but that is only the case when you have the right tablet with you. Wacom tablets may be found to be expensive but many users have reported them being worth it for many different reasons.
Not only do they have a lasting build quality but also exceptional features. Moreover, Wacom tablets receive up-to-date driver updates to work smoothly with your device. Customer loyalty and market recognition have also helped Wacom to be at the top when it comes to choosing graphic tablets.
If you are interested in finding out the most affordable Wacom display tablet, watch Aaron Rutten’s neutral review about it:
Finally, choosing a substitute with close if not the same specifications to Wacom is considerable but we are yet to see if any of the competitors come forward with this kind of a strategy to turn the tides in their favor.
Click on the following link to learn if you can use a Wacom on two computers.
Why is Paraffin Wax Used in Microtome Sectioning?
One of the many steps involved in the procedure of microtome sectioning is the preparation of paraffin wax embedded section blocks. So, what is a paraffin section block? And why is paraffin wax used in microtome sectioning instead of other materials?

In this article I will describe the use of paraffin wax in sectioning and the reasons why it is the chosen material.
Paraffin wax in microtome sectioning is meant to provide structural support to the tissue sample so that it can smoothly undergo the process of slicing by the microtome without any morphological or microscopic damage to the sample. The presence of a wax support also makes the handling of these sections easier and they last longer.
Before getting into paraffin, lets discuss microtomy briefly.
Microtome sectioning is an important part of any biological lab. Using microtome sectioning a specimen from a larger sample is obtained for microscopic evaluation. It’s a long procedure, and usually requires a lot of practice and expertise to prepare good specimens.
Once the sample is sliced and placed on the slide, the paraffin wax is removed with the help of xylene and alcohol. Following dewaxing, the sample is ready for staining, mounting, and observation. Therefore, paraffin wax is not a permanent constituent of the sample, or the slide, and is strictly meant for providing support for the sample while sectioning.
Microtomy is a crucial part of a biological lab, as it is the first step in the preparation of a slide. Let’s explore a little more and see what exactly microtomy is.
What Is Microtomy?
Microtomy is the procedure of obtaining thin sections (or slices) of a tissue sample using a microtome. A microtome is a device that slices the block of paraffin containing the sample.
A thin and evenly sliced sample is essential to create a good microscopic slide, as a thin sample would enable the examiner to understand the microscopic details better. Therefore, it is essential to master the art of preparing a microtome section for anyone who works in a biological lab.
The steps of microtomy, in brief, is discussed below:
- The sample is obtained. This can be a human organ tissue obtained via biopsy, animal tissue, or some other biological sample.
- The sample is then fixed— very commonly with a 4-10% formalin, or some other fixative like Buoin’s fluid (preferred in animal samples), Cornoy’s fluid, etc. This step is important as this prevents any post-mortem changes in the sample. An ideal fixative is one that doesn’t cause any morphological, nuclear, or cytological changes in the sample either.
- The tissue sample is then washed under running water for about 30 mins and then dehydrated with the help of alcohol.
- Proper dehydration of the sample is essential for proper sectioning, and so to check for any remnant of water molecules, xylene is used. Xylene is a great indicator for water as it turns milky on reacting with water. If there are no water molecules, the sample can be taken to the next step. If water is still present, the process of dehydration is repeated.
- Now the sample is ready for the preparation of the section block, and this is done using molten paraffin wax.
- The paraffin wax section block, once prepared, is put in the microtome and sliced to obtain the specimen.
You can see how a microtome is used in this video:
Advantages of Paraffin
Paraffin tissue blocks have several advantages over frozen sections. They are easier to store, which can be done in room temperature (as long as its below 80F), and are not heavy like glass slides. They can be stored for many years.
Another advantage of paraffin is that you can utilize larger tissue sections, such as brain slices of an entire human brain hemisphere.
Another advantage is paraffin blocks maintain tissue morphology better than frozen sections. They are more stable and damage to tissue is less likely, a very important factor when tissue is scarce such as from human subjects.
How To Prepare A Microtome Section Block Using Paraffin Wax?
Once the sample is fixed, washed, and dehydrated, it is ready for section block preparation.
For this, paraffin wax is melted (melting point 61 degrees Celsius) and poured into a small mold formed using two L-shaped molds. Since two L-shaped molds are used, the size of the block can be adjusted according to the size of the sample.
The molten paraffin wax is then poured into this mold. This is followed by the placement of the sample in the molten paraffin wax as well. The paraffin wax is then allowed to cool down and harden up. Once complete wax is hard, the mold is removed, and a paraffin wax section block is obtained.
Before placing this block in the microtome, the paraffin wax must be trimmed well at the edges so that the block can fit better in the device.
The block is then sliced, put in a water bath (to remove any wrinkles in the sections), and eventually on the slide. One drop of egg albumin is smeared on the slide before the specimen is put on it. The egg albumin acts as an adhesive that prevents the washing out of the specimen while staining the slide. Once the specimen is safely put on the slide, the paraffin wax is removed using xylene and alcohol. This procedure is known as deparaffinization.
It then proceeds to the steps of staining.
How To Get Good Quality Paraffin-Embedded Tissue Section
To obtain a good quality section, a few things must be kept in mind:
- Once you have the paraffin block, the first step would be to make sure that the edges of the block are smooth. If it’s not even, it should be smoothed out using a blade. This is done to ensure the sample block fits well in the machine. An uneven paraffin wax block will wobble during the process of slicing the sample, and therefore will create an uneven specimen.
Additionally, the extra wax on the front of the block must also be removed using the microtome itself. This is done to expose the sample— which will ensure the slice contains a good amount of specimen in it.
- The second basic thing to keep in mind is that the blade in the microtome must be sharp. If the blade is not sharp enough, the paraffin wax will crumple while it’s being sliced, and proper sectioning wouldn’t be possible.
- The section block must be cooled down before slicing. This can be done by either putting the block in cold water for 24 hours, or by keeping the block on ice for some time. This is also done to ensure that the specimen slice doesn’t crumble while slicing.
In addition to these basic precautions, you also want to keep in mind that different tissues may require different kinds of handling. For example,
- Fatty tissue must be dried for a couple of hours after slicing. Fatty tissues are generally difficult to work with as they are not easy to penetrate.
- Hard tissues, like bone and uterine tissue, should be treated with 1% acid alcohol to soften the specimen. If this step is not done, the microtome might not be able to slice the sample properly and evenly.
Microtomy section preparation is a skill that everyone who works in a biological lab must know. However, it can be tricky and may need a lot of practice to create good paraffin section blocks and to be able to slice them well to get a perfect specimen.
Things to remember about paraffin wax
- The paraffin wax is meant to provide support to the sample so that the slicing of the sample is easier.
- The wax must be cooled down before slicing to ensure that a good quality specimen is obtained.
- Also, the paraffin wax must be removed once the specimen is safely placed on the slide, as aqueous stains may not be able to penetrate wax.
After staining of the slide, mounting of the slide is done using a mounting medium to preserve the specimen. You can read about how you can prepare your own mounting medium here: How to make a microscope slide mounting medium.
Can You Use a Wacom Tablet on Two Computers?
Wacom tablets are not like your tablet computers. They’re graphics or drawing tablets, which are gadgets commonly used in the graphic design industry to allow a person to sketch by hand while recording an image or graphic in digital form. The data is presented on the monitor of a PC or Mac that is connected.

A graphics tablet is a bit of an investment, and hence, may leave you wondering if you can use it on multiple computers. In this article I will talk about using a Wacom tablet on two computers.
In general, a Wacom tablet can be used on two computers, and there are several methods. Wacom tablets can be connected to different computers via the standard Bluetooth or wired USB connection and quickly moved, or a USB peripheral sharing switch can be used to keep the tablet connected to two computers permanently. Read on to learn the steps involved.
Using a Switch to Connect Tablet to Two Computers
Many of us have shared input devices such as keyboards and mice between two computers in order to save desk space and cost. Can this be done with a drawing tablet?
Although if you use a wireless bluetooth connection, you can only pair one computer to your tablet at a time, if you use a wired connection, this is possible in two different ways. You can either pull the usb cable out of one computer and plug into the other, or you can use a switch to use usb peripherals such as a Wacom tablet on 2 computers. You can use a switch such as this one.
Such a switch is very useful as it allows 2 computers to share 1 USB device, such as printer, scanner, mouse, keyboard, card reader, flash drive etc. You are not limited to just a tablet. All you have to do is press a button to switch computers, a great feature if your desk space is limited and you only have one drawing tablet, especially when its a larger one you dont want to move around. You can use one device on two desktops, one desktop and one laptop, etc.
If you plan on doing this, first make sure you install the tablet driver software on both computers and set up the tablet so that the mapping, buttons etc are set up properly on each computer. Then install any drivers the usb switch might need. Finally plug in the drawing tablet into the switch and connect it to both computers.
Follow these steps to install the required driver software.
- Go to the Wacom drivers page. Look for the latest driver that’s compatible with your operating system and click the Download button beside it
- Follow the instructions to finish the installation
Certain devices and operating systems require you to install the DisplayLink driver software too. A blank device display screen after installing the Wacom driver is an indication that you need to download the DisplayLink driver software.
Here’s how you can do that quickly and efficiently:
- Go to DisplayLink downloads
- Click on your operating system
- Select the download icon beside the latest driver that corresponds to your operating system
- Follow the instructions to finish the installation
- A DisplayLink icon will appear in your system tray or menu bar. Click it to adjust brightness, resolution, and other display features.
How To Connect Wacom Tablet to Your PC?
Once you’re through with the lengthy installation process, you may be eager to connect the tablet and actually use it.
Follow these steps to connect your Wacom tablet to your PC.
- Connect your tablet to your computer using the USB cable or Bluetooth feature.
- Download and install the driver.
- Start your computer again (for Windows only, and not required for Mac).
- For pairing the devices, remove your device from the charger (before attempting to pair, make sure your tablet is fully charged.)
- On your PC, go to Bluetooth settings/preferences.
- The LED on your Intuos will begin to blink blue when you press the power button.
- Select “Wacom Intuos” and then “Pair” on your computer.
How to Connect Wacom Tablet to Android
Smartphones are portable devices you just can’t live without. For everyday users, more specifically designers and digital artists, connecting their graphic tablets to small-sized portable devices is a convenient and efficient way to work on the go.
Certain models like the Wacom Intuos are compatible with some Android devices, you simply need to purchase an OTG connector for the device. Similarly, the Wacom One requires a USB-C hub with Type-C that connects to HDMI USB-A. Plug in the USB-C hub to the compatible Android device via the USB-C connection.
Here’s how you can set up a Wacom tablet to work with an Android device.
- Check to see if your Android device is compatible. Several phone brands including Asus, Huawei, Samsung, LG, Nokia, Vivo, and Xiaomi have devices that work well with Wacom tablets.
- Connect your devices via a compatible USB OTG Connector.
- Update your Wacom tablet before connecting to an Android device. To update your firmware, use the Wacom Desktop Centre. You can find it under Wacom tablet in the Start menu for Windows, and in the Applications folder under Wacom tablet for a Mac.
Connecting your Wacom tablet to an Android device is pretty much useless without a stylus. To make the most of digital drawing, and illustrations, go to your Apps > Settings > Language & input > Keyboard setting > Select input method.
Can You Install 2 Tablets on the Same PC?
Yes! Two tablets can be used on the same computer. You can start/stop the Wacom Professional Service (Intuos) and the Wacom Consumer Service by going to Task Manager > services (bamboo). Unless you’re trying to use both drivers at the same time, there won’t be any conflicts.
However, there are a few things to be mindful of while trying to install multiple Wacom tablets on one PC.
- Make sure the drivers you installed from Wacom’s website are compatible with both tablets. If you’re unsure or facing troubles while using either tablet, install ALL the latest drivers to successfully switch between the devices.
- Compatibility conflicts may arise between drivers. To get rid of that, you’ll need to uninstall all current drivers and other software related to the tablet such as “Tablet Web Driver”. Then, restart your PC and re-install the latest drivers as mentioned above.
Can a Wacom Tablet Be Used with a Laptop?
Graphic tablets are preferred by digital artists and photographers due to their ease of use. The efficient technology can be connected to desktops and laptops alike. Most Wacom tablets have a standard USB connection or Bluetooth mode that allows you to connect to the device so that you can get on with drawing.
As discussed previously, before you can utilize the tablet’s many features, you have to install a couple of drivers to get it up and running. Once you’ve installed the special drivers, you can connect and disconnect freely without having to worry about a lengthy setup process the next time around.
Here’s how you can set up your Wacom tablet to work on your laptop or other similar devices:
- Close all running applications to ensure a successful installation that will be accepted across the system.
- Connect your tablet using the USB cable provided to an open port on your laptop or desktop computer.
- Visit Wacom’s Driver downloads page, check the compatibility with your operating system and select the one that’s right for your laptop or PC.
- Install the driver files. The next few steps vary for a Mac or Windows.
For Mac:
If you’re using a Mac, you should be able to see a .dmg driver file, double click it and look for Install Tablet.pkg, and double-click to open. Now follow the on-screen install prompts to complete the installation process.
For Windows:
Simply double-click the downloaded file, select Run and follow the install prompts.
Start a new program and test if the Wacom tablet is working properly.
Here is what Aaron from PHLEARN has to say about setting up and using a Wacom tablet the correct way:
Improving Workflow with Wacom Tablets
In actuality, the Wacom tools are simply there to help us get to the end goal faster, better, and without the use of several technologies. Check out the Wacom collection of tablets if you think your workflow requires a boost. There are several more brands available. So go ahead and play with your Wacom, and don’t forget to try out all of its features and capabilities.
Finally, don’t get discouraged by the steepness of the learning curve. Touch tablets are a new tool, and like with any new tool, you’ll need to spend some time getting to know them and customizing them to your needs. Getting rid of your old mouse can appear to be a daunting operation that takes a lot of practice and patience.
Like any device, your Wacom tablet may give way or stop working. Click the following link to learn how to fix a non working Wacom Tablet.
How to Make Unreal Engine Less Laggy?
In 1998, Epic Games showcased the Unreal Engine for the first-person shooter unreal, a free, cross-platform game engine. Many popular video games such as Fortnite and Infinity Blade have used it. The engine is powerful and can handle large worlds full of high-quality textures with ease, whether its an interactive biology game or a surgical simulation.

However, it does have its flaws that can make the experience less than desired for some users. In this article I will describe how to make Unreal Engine less laggy.
If you experience lag in Unreal Engine you can try to optimize certain editor settings, clear cache, disable background programs, adjust screen resolution, as well as restart your system, check for updates on your computer, install new drivers and upgrade hardware components. Let’s discuss.
Optimize Unreal Engine settings
In Unreal Engine editor you can try the following to improve performance:
You can turn on the “Show FPS” option to see what the actual FPS is as well as the STATS option to see messages. To increase your FPS you can uncheck “realtime” which freezes things like particle effects.
You can turn on Game Mode to hide the UI elements and everything that will not be shown when you click the Play button. You can turn on Immersive Mode which gives you a full screen and hides other elements.
“Quick Settings/Engine scalability settings” menu allows you to change the quality of the editor including the resolution of viewport, view distance (LOD) and other settings you can experiment with to see if they improve performance.
Install an SSD to Improve the Loading Time
This is a good tip for all the pc users out there! An SSD will load everything faster than an HDD. You should consider purchasing it.
An alternative method would be to use cloud storage to store your files, but it can be expensive depending on how much storage you need.
Update Graphics Card Drivers
This is one of the most common causes of lag in Unreal Engine. Update your graphics card drivers if you are experiencing any problems when using your computer.
Turn Off or Disable Any Background Programs that Could Be Using Up CPU Power
Unreal Engine can also experience lag due to background programs. It can be hard to determine what programs are causing the problem. Still, you could try closing unnecessary background processes while using your machine or minimizing them, so they don’t use much processing power.
If that doesn’t work, there might be something wrong with your hardware, or there might be another issue on your computer.
Reduce Screen Resolution for Better Performance
If you are still experiencing some problems with lag or framerate drops, reducing your screen resolution may help. It means that the active window will be smaller, so there is less to render at any time (and therefore, it’s easier for the computer). It might also feel a bit more sluggish if you like using the machine on higher settings.
Different resolutions might be available for your screen if you use a laptop or monitor of another size. You should also adjust the Graphics Quality settings in Unreal Engine according to the power of your computer.
Upgrade Motherboard and Processor if it is Old
It is another common cause of lag. If you are experiencing problems with Unreal Engine, it might be time to upgrade your motherboard and processor if they are old.
You should do that only if you have the money or the inclination because replacing these components can be expensive compared to other methods of improving performance. It’s also possible that your computer is not powerful enough to run some programs on high settings.
Clear Cache for Unreal Engine
A cache can also cause lag in your system. You should try clearing the cache if you are experiencing problems with Unreal Engine.
To do it, find the Unreal Engine cache directory and delete all of its contents. That will not affect any saved files or installed mods.
Ensure Your Computer Meets the Minimum Specifications
You should check to ensure that you have enough space on your hard drive and RAM and meet the minimum requirements.
To do that, go into Settings -> System Info. Here, you will find out how much space you need, what kind of computer you have, etc.
Ensure Your Settings Are Optimized for Performance Rather Than Visuals
You should confirm that the Settings -> Graphics tab has Physics, Post Processing, and Vegetation options set as Low.
Try Switching to a Wired Internet Connection if You Are Using WiFi or Mobile Data
Internet connection can be another cause for the lag. You should try switching to a wired Internet connection rather than Wifi or mobile data. For example, it might be possible that your computer’s wireless card isn’t powerful enough, and the program is lagging because it can’t keep up with all of the data coming through.
Here is a video on network lag in Unreal Engine:
Re-Install Windows on Your Computer
If you have all sorts of weird errors popping up while using your computer, or your system keeps restarting itself without apparent cause, it’s probably time to consider reinstalling Windows. It will solve almost any problem you might be facing, except hardware malfunction!
When deciding whether it is necessary, compare how much time and money it would take you and how much time your computer is worth.
Buy a New Computer
Purchasing a new computer is probably the best solution if you are experiencing problems with Unreal Engine and your system is old. You will experience more stability and less lag.
Factors To Consider When Thinking About Upgrading Your Computer:
1. How Much Money Do You Have?
If you have money and want the best performance, it is worth buying a new computer. If your budget is not as large, upgrading certain parts may be more beneficial, such as adding a better graphics card or increasing RAM size.
RAM is a major factor when considering performance. The more RAM you have, the better your computer will run. It does not matter what speed it is as long as you have enough of it, unless your computer has software that can benefit from faster speeds, such as video editing or graphic design programs.
2. What Software Do You Use?
Different programs will require different types of computer parts to run smoothly. For example, if you are using a video editing program such as Adobe Premiere, having an extra graphics card and fast RAM speeds is important because it allows for multiple tracks or videos to play at once without any lag time between them so that they can get edited perfectly.
On the other hand, if you use a program that requires less intensive processing, having an extra graphics card would not benefit your software’s performance because it is not actively used.
3. How Old is Your Computer?
If you have an older model, it would be beneficial to upgrade certain machine parts before buying a new one. For example, if your processor came with only two cores and now games require more than that, or if you need more RAM space because programs are starting to run slower on your computer, that may be a sign that your computer is becoming outdated.
On the other hand, if you have an older model such as one released ten years ago, it may not make sense to upgrade certain machine parts because computers become obsolete quickly after they get released. New programs start requiring faster processing speeds or more RAM space which makes them incompatible with older parts.
4. What Components Have You Tried Before?
You may know which parts do not benefit your computer’s performance due to previous experiences. For example, if you added a better graphics card but the framerate is still low, it was probably a waste because other factors can cause lag, such as hard drive space or slow RAM speeds for the computer to handle the program.
Understanding how each component works and what factors can influence software performance before adding new parts is important. It will help you make a more informed decision about which route to take when dealing with lag or other issues that may arise from having Unreal Engine installed on your machine.
5. What Are Your Computer’s Specs?
Knowing the specifications of your machine is important when diagnosing issues that may arise while using programs on it. It will give you a better idea of what factors can cause lag and how much more RAM or processing speed you need for certain software to run properly without any interruptions in performance.
Below is a useful video on improving the performance of Unreal Engine:
If you have tried all the possible solutions listed above and are still experiencing Unreal engine lag, something is likely wrong with your hardware.
I hope this article has given you enough solutions so that you have solved your Unreal Engine lag issue.
Click the following link to learn what hardware is needed for 3D rendering.
Can You Reuse Citrate Buffer?
If you are working in the field of biology then you know how important the use of citrate buffer is. It has many uses in the lab and is often found in stock alongside solutions such as PBS.

In this article I will discuss everything to know about reusing citrate buffer to ensure you have the best results as well as some related questions, such as temperature and storage.
As generally accepted in the scientific community, you should not reuse citrate buffer. It is not worth it to reuse citrate buffer because it is not expensive to make and you do not know exactly when it has lost its effectiveness. Your tissue should be getting a fresh, potent solution because tissue is limited, whereas reagents are not.
Many scientifically related fields call for the use of a citrate buffer at one point or another. This makes sense, however, as a citrate buffer is an important and useful chemical solution that can be used to do many different jobs.
What does a citrate buffer do?
As previously stated, using a citrate buffer is a common requirement if you’re working in biology, chemistry or any other scientifically related field of work. Some of its uses include RNA isolation as it can prevent base hydrolysis, immunofluorescence as it can help bring out the immunostaining, and antigen detection, as it breaks the cross links between antigens and other substances.
Antigen Retrieval
One main job that a citrate buffer (10mM Sodium Citrate, 0.05% Tween 20, pH 6.0) can be used for is antigen retrieval. Antigen retrieval is a process where an antibody is manipulated to target a specific protein inside a selected segment of tissue. The result of a properly carried out procedure of antigen retrieval will recover hidden epitopes.
Antigen retrieval can be a lifesaver for scientists during many different experiments. It’s common to follow the practice of preserving tissues with formaldehyde. However, formaldehyde fixation is known to cross link amino acid residues. As a result tissue specimens hide strains of protein, which these scientists were hoping to find.
Function In Antigen Retrieval
By carrying out a quick antigen retrieval process, any selected tissue specimen can easily have this chemical mishap erased in no time. As a result, the preserved selected tissue specimen can be used again as you will be able to retrieve proteins that you need from it once again.
Although there are a few ways that you can do this, by far the best, easiest, and most effective way to carry out an antigen retrieval process is by using a citrate buffer. This is because a citrate buffer can easily unlatch any cross-links that have been formed between antigens and any other substances in a selected tissue specimen.
Microwaving
To use a citrate buffer safely and effectively you need to prepare your citrate buffer properly. One key element that you need to pay attention to when preparing your citrate buffer for any experiment is the temperature at which you will use your citrate buffer.
Microwaving citrate buffer is used for heat induced epitope retrieval and it is commonly done at near boiling temperature for up to 20 minutes. You need to get your citrate buffer to the right temperature .
There are many ways that you can get your citrate buffer at the right temperature for your scientific experiment. Some ways in which you can get your citrate buffer at the right temperature are as follows;
-Using a pressure cooker
-Using a microwave
-Using a hot water bath
-Using a steamer
However, although there are many ways for you to get your citrate buffer at the right temperature, the easiest, best, and quickest way to do so is by using a microwave.
Here is how you safely and effectively microwave your citrate buffer to the temperature that you need it to be. Since the process of antigen retrieval is one of the most common uses of a citrate buffer, I will use it as an example.
- Deparaffinize your selected specimens of tissue. You need to deparaffinized your selected specimens of tissue with xylene. Soak your selected specimens of tissue for 5 minutes on each side.
- After this, you must soak your selected specimens of tissue in 100% ethanol. Soak your selected specimens of tissue in 100% ethanol for three minutes.
- After this, you must soak your selected specimens of tissue in 95% ethanol. Soak your selected specimens of tissue in 95% ethanol for one minute.
- After this, you must soak your selected specimens of tissue in 90% ethanol. Soak your selected specimens of tissue in 90% ethanol for one minute.
- After this, you must soak your selected specimens of tissue in 80% ethanol. Soak your selected specimens of tissue in 80% ethanol for one minute then rinse clean with water.
- While this procedure with your selected specimens of tissue is being carried out, you can place your citrate buffer in a staining dish and microwave it to the appropriate temperature. The temperature that you want your citrate buffer to be at for antigen retrieval is 95-100 degrees celsius. For you not to overheat or underheat your citrate buffer, it’s recommended by experts to do your heating in fifteen to twenty-minute intervals so that you can check constantly and consistently.
- When the previous steps have been completed, you can combine your selected specimens of tissue with your citrate buffer on the staining dish. Then proceed to incubate your staining dish in a secure location for twenty to forty minutes for the best results while keeping the temperature at the correct level.
Always be very careful when heating chemicals to such high temperatures, especially when the pH is not neutral. If the solution starts boiling, you can get bubbles and splashes, in addition to glass containers possibly breaking from the heat and the hot contents splattering on you.
If you want to learn more about preparing citrate buffer, you can check out this video:
Storage
Fresh or leftover citrate buffer needs to be stored in the right fashion to keep its effectiveness. This is how you need to store your citrate buffer the right way so that you can resume it for future projects.
Temperature
Just as you must use your citrate buffer at the right temperature it is equally, if not more, important that you store your leftover citrate buffer at the right temperature as well. The right temperature to store your leftover citrate buffer is at room temperature for up to 3 months or at 4C for longer storage.
Container
Another important thing to consider when you want to store your leftover citrate buffer for a future project of yours that will call for the use of a citrate buffer is what container you store your citrate buffer in. You must store your citrate buffer in its original container. However, if the original container that your citrate buffer came in is no longer in prime condition, then you must store your citrate buffer in a different container. It’s recommended that this new container be as close to the original container in its makeup as possible. Make sure that this new container is made of the right materials (glass is preferred over plastic) and can be effectively and tightly sealed.
I hope this article answered some of your questions about citrate buffer and reusing it. Click the following link to learn how to make microscope mounting medium.