
Ever attempted to peer thru a hazy window, straining your vision to make out what’s hidden behind the opaque glass? That’s often how researchers feel when they’re trying to understand the complex structures of biological tissues. But thanks to clarity tissue clearing, that foggy window can become as clear as crystal.
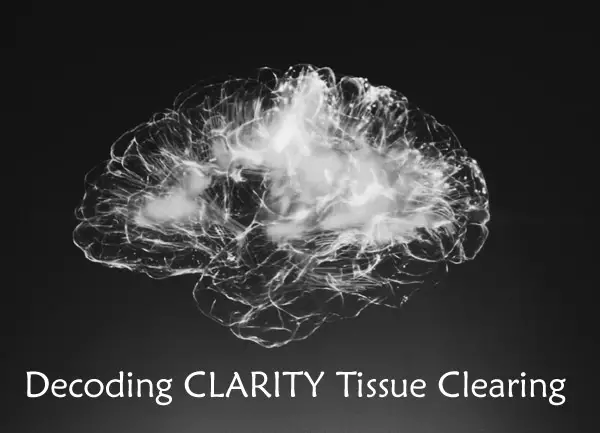
This scientific technique is revolutionizing our understanding of intricate biological systems like the human brain. We’re set to explore its techniques, comparisons with other methods, and even how it’s revolutionizing brain research.
Understanding Clarity Tissue Clearing
Attempting to gaze through a dense bit of tissue is comparable to attempting to observe through mist. But what if we could make that fog disappear? Enter clarity tissue clearing. This scientific method transforms biological tissues into transparent specimens, making them easier for researchers to study.
The term CLARITY stands for Clear Lipid-exchanged Acrylamide-hybridized Rigid Imaging-compatible Tissue hYdrogel. Quite the mouthful, isn’t it? To simplify things, let’s think about how this process works as an artist preparing a canvas. The biological tissue is our canvas here and needs some preparation before we can start painting – or in this case, studying.
This fascinating technique involves swapping out specific components of the tissue with exogenous elements while maintaining its structural integrity. You’re essentially giving your sample a ‘makeover’ which allows us more accessibility and functionality in research.
A Peek Into The Process
In clarity tissue clearing protocol (source), samples are embedded within hydrogels followed by lipid removal processes rendering them optically clear but still preserving their structure and molecules such as proteins and nucleic acids intact. So yes. It is possible to get rid of all those pesky lipids clouding up your view without losing any valuable information.
The result? A fully hydrated specimen that won’t dry out or shrink over time offering stable imaging conditions – much like having unobstructed binoculars while bird-watching. What’s better than gaining new insights into biology without disturbing cellular architecture?
Making Every Cell Count: Why Transparency Matters
Tissues are composed of different types of cells that interact in complex ways. Traditional methods like slicing tissues into thin sections or dissolving them away can disturb these interactions, making it harder to see the bigger picture. Clarity tissue clearing is like getting a VIP backstage pass – you get an all-access view of cellular concerts happening inside your sample.
Imagine the possibilities. With this ability to visualize each cell in a 3D context, we’re smashing through previous limitations. Depth is no longer a barrier to our progress.
The Clarity Tissue Clearing Protocol
Getting a clear view of biological tissues can be quite the challenge. That’s where CLARITY comes into play. The CLARITY Resource Center offers a wealth of information on this process.
Clearing Process and Equipment
The heart of the clarity protocol is preparing the hydrogel monomer solution. The main components of the clarity protocol’s hydrogel monomer solution are acrylamide, bisacrylamide, formaldehyde (PFA), and boric acid mixed in distilled water. PFA-fixed tissue samples are incubated in this solution at 4°C indefinitely to start the hydrogel formation.

In addition to your regular lab equipment like pipettes and microcentrifuge tubes, you’ll need some special items: A vacuum pump to remove bubbles from your sample chamber after it’s filled with clearing solution; And a power supply capable of delivering steady current throughout electrophoretic tissue clearing (ETC).
Incubation Time and Conditions
A key factor affecting success with CLARITY is incubation time – not just any old tick-tock will do. Your brain or spinal cord tissue needs ample time bathing in that delightful cocktail we call our ‘clearing solution’. Typically, adult mouse brains require about one week while post-mortem human brain slices may need up to two weeks.
If you’re thinking “Well… I’ve got plenty of time”, slow down. Over-incubating can cause increased background fluorescence making images difficult to interpret – definitely something we want to avoid.
Did you know? The basic CLARITY protocol involves the preparation of hydrogel solution, transcardial perfusion with the hydrogel solution, and finally tissue embedding in a hydrogel monomer.
Advantages and Limitations of Clarity Tissue Clearing
Tissue clearing is a groundbreaking approach that lets scientists explore biological tissues like the brain in three dimensions. One popular method, clarity tissue clearing, has brought forth a wave of advancements while also facing some challenges.
Analyzing Cleared Tissues
Cleared tissues give us an inside look into intact biological systems. They maintain their structural integrity during the process which allows for high-resolution imaging to be carried out later on. Traditional methods of tissue analysis involve staining thin slices of tissue on glass slides limiting spatial and morphological analysis. But with cleared tissues’ endogenous fluorescent properties and refractive indices, we can observe them without disturbing their natural state.
The technique’s real power comes from its ability to make soft body parts transparent – literally clear as crystal. By replacing lipids (fats) in cells with hydrogel polymerization – it’s like turning your biology textbook into 3D glasses.
This unique characteristic enhances our understanding by allowing for more comprehensive visualization compared to traditional two-dimensional approaches. However, this technique is not without its drawbacks.
The clarity protocol involves multiple steps including hydrogel formation followed by lipid removal which may lead to variability between samples due to differences in treatment conditions or individual sample characteristics such as size or age. The devil really is in the details here.
Balancing Transparency and Preservation
In all fairness though, achieving perfect optical transparency isn’t always possible because every specimen behaves differently based on factors like age, type etc., so sometimes you might need several rounds before hitting gold. Plus remember how we mentioned about replacing fats? Well those pesky things are pretty essential for cell function, so the trick is to get rid of enough lipids to make the tissue clear without damaging cellular structures.
Another challenge comes with imaging deeper into cleared tissues. The more you go in depth, it’s like walking further into a foggy forest; everything starts getting blurry due to light scattering issues. You’ll need a high numerical aperture and short working distance – sort of like having the right kind of flashlight when you’re trying to navigate through that dense fog.
Clarity Tissue Clearing vs Other Methods
When it comes to tissue clearing methods, the gold standard has traditionally been 2D thin section formalin fixed paraffin embedded samples. Yet, the scientific landscape is shifting. Enter CLARITY – a technique that’s making waves in the field of biological imaging.
The brilliance of CLARITY lies in its unique approach to tissue clearing. It utilizes hydrogel-based chemistry along with electrophoretic tissue clearing (ETC) to render tissues optically transparent while preserving their structural integrity.
SDS Micelles in Tissue Clearing
Sodium dodecyl sulfate (SDS), a common detergent used for cell lysis, plays an integral role in many clarity protocols including passive clarity techniques. In these methods, SDS micelles serve as nano-sized vehicles that carry away lipids from the tissues.
In comparison to other traditional methods like BABB (Benzyl Alcohol Benzyl Benzoate) or ScaleA2 which only make tissues transparent but do not necessarily remove lipids completely nor maintain native fluorescence efficiently; CLARITY goes beyond just optical transparency and provides an avenue for deep-tissue molecular phenotyping at cellular resolution without losing contextuality of structures.
This doesn’t mean though that all other approaches have fallen by the wayside – they still hold value depending on your specific needs and constraints.
CUBIC vs Clarity
CUBIC protocol also known as clear unobstructed brain/body imaging cocktails and computational analysis is another method which uses high-temperature and strong detergents for tissue clearing. While it’s true that CUBIC can process larger samples more quickly, the intense treatment often results in tissue distortion.
On the other hand, Clarity retains the structural integrity of tissues and enables researchers to visualize neural networks in their entirety – something which is a big deal when studying complex structures like an adult mouse brain or post-mortem human brain.
Clarity Tissue Clearing in Brain Research
The exploration of the human brain, as well as that of a mouse brain, is crucial for advancing our understanding of neurological diseases. Clarity tissue clearing has revolutionized this field by making it possible to study these intricate organs more closely.
Before we can delve into how clarity tissue clearing impacts brain research, let’s get acquainted with what exactly this technique involves. In essence, clarity tissue clearing, also known as CLARITY transforms biological tissues into transparent specimens without disrupting their structural integrity or molecular composition.
Transcardial Perfusion Process
The process begins with transcardial perfusion – an essential step when preparing tissues for clarity. This method helps maintain the structure and morphology of delicate post-mortem human and animal brains during subsequent processing steps.
In short, using PFA-fixed (paraformaldehyde) solutions ensures that proteins within the cells are cross-linked securely before moving on to further stages in the protocol.
This initial preparation paves way for immunostaining techniques which allow researchers to identify specific structures within processed mouse and post-mortem human brain tissues. Thanks to clarity technology; detailed imaging at cellular level becomes possible.
A Deeper Dive Into Clarity Technology
To appreciate its impact on neuroscience research fully, let’s take a deeper dive into some specifics about this technology. At its core lies hydrogel formation: A mixture containing acrylamide monomers is infused through vascular channels into organ systems like the spinal cord or whole brain.
After polymerization, this hydrogel network stabilizes biomolecules in their native state within the tissue. Then comes lipid removal using SDS micelles, rendering tissues optically transparent while retaining fluorescent protein signals and nucleic acids intact.
With the power of clarity tissue clearing technology, we can now get detailed data about neuronal networks in mouse or human brains. This tech even lets us uncover details that were once hidden from view.
Best Practices for Successful Clarity Tissue Clearing
Perfecting clarity tissue clearing techniques can be quite a challenge, but with the right practices in place, you can achieve remarkable results. It’s all about careful handling and storage of your samples.
Use of Sodium Dodecyl and Nitrogen Gas
Sodium dodecyl sulfate (SDS) plays an essential role in achieving optimal transparency during clarity tissue clearing. Its detergent-like properties help dissolve lipids to clear tissues effectively. But remember, SDS is hazardous – so handle it carefully.
Nitrogen gas comes into play when you’re preparing your hydrogel monomer solution – this is where minimizing exposure to oxygen becomes critical. Oxygen impedes hydrogel formation by reacting with radicals that initiate polymerization.
To combat this issue, use nitrogen gas while making up the solution to displace any ambient oxygen. Store the mixture at room temperature under gentle shaking conditions for 24 hours before adding your sample – this helps get rid of residual dissolved oxygen which could hinder polymerization.
In addition to these methods, CLARITY Resource Center suggests storing cleared tissues at 4°C indefinitely or preserving them as whole-mount slides for long-term storage.
| Tips & Techniques: |
|---|
| 1. Gentle Handling: Avoid damaging delicate structures within your sample by using fine-tipped forceps whenever possible. |
| 2. Precise Timing: The time taken during each step has a significant impact on final outcomes – following suggested timelines will lead towards success. |
| 3. Safety First: The CLARITY protocol requires caution and adherence to safety precautions due to the potential hazards of chemicals involved. |
All these measures might seem overwhelming, but remember – patience is key. It’s a meticulous process, requiring care at every step. But trust me when I say this: The results are well worth it.
Visualization Techniques for Cleared Tissues
To fully leverage the potential of clarity tissue clearing, we need to master some specific visualization techniques. This is where software tools like Imaris come into play.
The Importance of Numerical Aperture and Working Distance
Numerical aperture (NA) plays a vital role in determining the resolving power of an objective lens. The higher the NA, the better your system’s ability to gather light and resolve fine specimen detail at a fixed object distance or working distance.
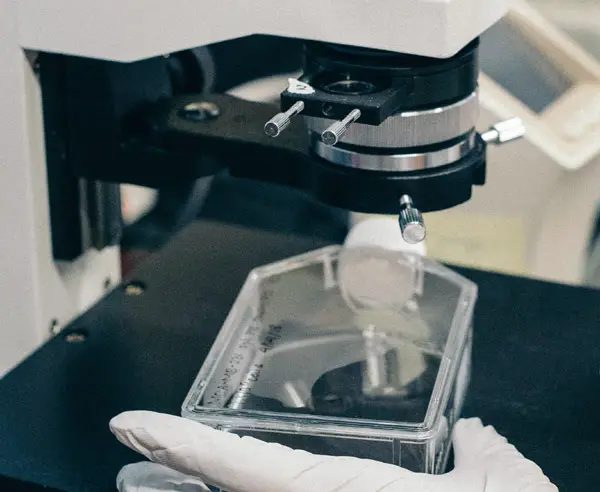
In addition to this, understanding working distance—the space between your sample and the front lens—can help you avoid damaging delicate samples while ensuring optimal imaging conditions.
Cellular Membranes Visualization with Imaris Software
Imaris Software, specifically designed for visualizing 3D data sets, has proven incredibly useful when dealing with cleared tissues. It lets us see cellular membranes as never before—rendering them in three dimensions with remarkable precision.
This tool provides an effective way to visualize complex biological structures within our cleared tissue samples.
Key Stat: Neurite tracing can be performed using Imaris software, allowing for manual tracing of individual neurons and analysis of interconnections.
Detecting Nucleic Acids: An Important Aspect Of Cellular Analysis
Nucleic acids are crucial elements in cells that carry genetic information. Their detection is fundamental when studying cell functions on both molecular and organismal levels.
- An innovative technique is using fluorescent stains that bind specifically to these nucleic acids, allowing us to see them under a microscope.
- By leveraging the optical transparency achieved through clarity tissue clearing, we can use these techniques even more effectively.
Moving Forward: The Future of Visualization Techniques
Thanks to advances in both software and hardware technologies, our ability to visualize cleared tissues continues to improve. This means researchers will be able to gather increasingly detailed data about biological structures at cellular levels.
FAQs
What is CLARITY tissue clearing?
CLARITY tissue clearing swaps out opaque biological elements with transparent ones. This lets researchers view tissues in 3D, revolutionizing biology and brain research.
What is the process of tissue clearing?
The procedure involves preparing a hydrogel solution, perfusing it through the specimen, and embedding the tissue in hydrogel. The sample then undergoes incubation to reach transparency.
What is the CLARITY method?
The CLARITY method uses chemicals to make tissues see-through while preserving their structure for detailed imaging. It’s crucial for studying complex systems like brains at a cellular level.
What are the disadvantages of tissue clearing?
Tissue clearing can be time-consuming and require careful handling due to potential chemical hazards. Also, some techniques may alter endogenous fluorescent properties or refractive indices of samples.
Conclusion
So, we’ve uncovered the incredible world of clarity tissue clearing. It’s a game-changer in biological research and particularly instrumental for brain studies.
We’ve seen how it replaces traditional 2D methods with a transformative approach. From hydrogel formation to incubation time, every step is crucial.
The process may be intricate, but the benefits are vast – high-definition imaging capabilities that can unveil hidden details within tissues. But remember: as powerful as this method is, limitations still exist. Yet those challenges don’t overshadow its potential.
In essence, clarity tissue clearing allows us to look deeper into life’s fundamental building blocks. The result? A better understanding of complex systems like our own brains. Click the following link to learn more about tissue clearing methods.
Recent Posts
Mastering point cloud to 3d model conversion can feel like translating whispers from another dimension into vivid sculptures. You've got this cloud of data points, a chaotic concert of coordinates...
Let's say you've got a drawing, something you sketched out during a burst of inspiration, and now you're itching to see it leap off the page into three dimensions. Well, that’s exactly what I did...