
Confocal microscopy multicolor experiments require understanding of fluorescence spectra and how each fluorophore you use needs to be set up in the microscope for the signal to show, appear in the right channel and with the correct color. Setting up your lasers is also a process you need to go through.

In this article I will describe everything you need to know, in simple to understand terms, to set up your microscope so that you are able to see your stainings properly.
Continue reading “How to Set up Confocal Lasers and Fluorophores Based on Fluorescence Spectra”
How Much Does an MRI Machine Weigh?
All MRI machines can capture pictures of internal structures and organs, which can significantly help make a precise diagnosis and lead to an appropriate treatment plan.

But how much does an MRI machine weigh? Let’s find out.
The weight of an MRI scanner can differ by type and model. For example, the weight of the GE Openspeed Open MRI machine is 21,000 lbs, the weight of the GE Signa Ovation MRI machine is 44,000 lbs, the Hitachi AIRIS II MRI scanner weighs 44,000 lbs, and the Hitachi Altaire MRI machine has a weight of 90,000 lbs.
Let’s discuss these MRI machines in detail, including type, use, and specifications.
MRI Machine Types and Specifications
GE Openspeed Open MRI 0.7T – 21,000 lbs
This MRI scanner from GE is great for people with claustrophobia. It is also suitable for individuals who are anxious or obese. This open MRI scanner is used to examine small parts of the body, such as the shoulder and knee. It has a table that can accommodate 500 lbs and offer better access.
It is 2-3 times faster than the other scanners operating today. The performance of this MRI system matches up to that of a 1.0T High-Field MRI system thanks to the combination of powerful computer processing power and high-performance surface coils. Unlike the conventional open MRI systems, this system has a shorter scan time and produces sharper images.
GE Signa Ovation – 44,000 lbs
This MR imaging system is designed to provide superior patient comfort. The best thing about this MR scanner is that it can accommodate people who have claustrophobic problems, bigger people, and patients who cannot tolerate the close quarters of traditional MR equipment.
Hitachi AIRIS II – 34,000 lbs
The Hitachi AIRIS II has a wide table that provides a high level of comfort. The MRI table can support up to 500 pounds. This MRI machine is equipped with a permanent magnet that is low maintenance and provides excellent image quality.
Hitachi Altaire 0.7 T – 90,000 lbs
This MRI machine from Hitachi has a special open design that uses asymmetric two-post architecture for maximum openness. It has an advanced computer system with an intuitive interface, an LCD color monitor, and 1 GB of memory. It is open on all sides, allowing easy access to people. This MRI machine has a table that can support up to 500 lbs. It features Vertical-Field with Optimized Sub-System Integration (VOSI) technology that enhances image quality.
Philips Panoroma 1.0 T – 15,000 lbs
The Philips Panorama is an open MRI system that features a 360-degree panoramic viewing angle. Compared to the previous versions of Panorama, this MRI system is incredibly light at 15,000 lbs. And being lightweight, this system is easy to install.
Also, the open design enhances the comfort of patients, especially those with claustrophobic problems, and creates an excellent patient experience. Plus, it offers excellent image quality.
All in all, this open bore MRI system makes the examination comfortable for both patients and physicians.
Siemens Magnetom Concerto 0.2T – 25,000 lbs
This open MRI scanner is used to diagnose inflammatory diseases of bones and vessels. Acceptable scan times, quiet gradients, and open magnet design all deliver maximum patient comfort.
As you can see, the weight of an MRI does not depend on the strength of the magnet. A 0.7T unit can weigh 25,000 lbs or 90,000 lbs.
What Is the Biggest MRI Machine?
The Center for Magnetic Resonance Research (CMMR) is home to the biggest MRI machine in the world. The Agilent Technologies magnet weighs 110-tons and is the first 10.5 Tesla whole-body human MRI magnet in the world.
A Tesla is a measurement unit that determines the strength of magnetic fields. Back in 2018, scientists in CMMR successfully carried out the first scans with this large MRI scanner.
This whole-body imaging magnet is capable of creating scans at a greater level of detail, bringing new abilities to researchers studying how our body functions. In turn, these findings may help doctors determine the best treatment options for a variety of health conditions like cancer, diabetes, and cardiovascular disease.
The University of Minnesota Medical School’s Center for Magnetic Resonance Research (CMRR) is a research laboratory that offers unique, advanced instrumentation, expertise, and infrastructure for magnetic resonance-based biomedical research.
The University of Minnesota Medical School is a reputable medical institution that develops and employs some of the world’s latest magnetic resonance methods and instrumentation to help understand the functioning of organs in disease and health.
How Heavy Is an MRI Magnet?
Not all MRI machines are created equal. Much of the difference between devices is because of the magnet strength. The magnetic strength of an MRI machine is key in creating different levels of quality in the pictures.
When it comes to MRIs, magnet strength matters as it is directly associated with the quality of your scans. This can make a significant difference in a physician’s ability to diagnose conditions precisely. The higher the magnet strength, the better the quality of the image.
The magnets used in MRI machines are mostly in the 0.5-Tesla to 3.0-Tesla range, with 7.0 Tesla magnets becoming more available. A 3.0 Tesla magnet is stronger and it offers a good quality image in less time.
A 3.0 T MRI machine may weigh up to 17,000 lbs, and a 1.5 T MRI machine weighs approximately 10,000 lbs. As a matter of fact, a permanent low-field magnet may weigh three times more than a 1.5 T MRI machine.
Because of the power of these magnets, the MRI suite can hold dangers for both patients and clinicians if strict precautions are not taken. Metal objects like stethoscopes, scissors, pens, and paperclips can become life-threatening projectiles if taken into the scan room.
How Big Is a Normal MRI Machine?
The kinds of MRI machines commonly used today are conventional closed MRI and open MRI.
Conventional bores are excellent for a variety of studies. The images produced are extremely detailed and of excellent quality. This enables clinicians to make a precise diagnosis and devise a specific treatment plan for people.
In some cases, the closed-bore scanners will create superior quality images than an open-bore system due to their increased available signal and greater field strength.
The conventional bore is usually 60 cm wide, and people with claustrophobic problems may feel uncomfortable using it. In addition to this, imaging studies typically often need half an hour in the machine to obtain a complete scan, which can contribute to anxiety and discomfort.
Another downside is that the bore size may be too small for bigger people.
Wide bore MRI machines have a 70 cm bore opening. People with claustrophobic issues often find the wider bore to be less stressful than the conventional narrow bore.
What’s more, wide-bore MRI scanners have more headroom compared to open-bore scanners. The wide bore accommodates claustrophobic or larger people.
Wide bore machines can accommodate patients weighing up to 550 pounds, which is a higher weight limit than conventional MRI machines. The image quality of the wide bore MRI systems is still better than the open bore systems because of the excellent signal-to-noise ratio.
Overall, MRI machines vary in external size, and some are large enough to require their own room. Even if a machine does not fill the room, the room it is placed in usually is kept empty because of the dangers of the strong magnet.
Why Are MRI Machines so Big?
Here is why MRI machines are so big:
Field Strength
The most crucial aspect of an MRI machine is the magnet and its magnetic field. A big magnet is needed to create a magnetic field large enough to operate an MRI.
The magnetic resonance scanner uses strong magnets, which create a strong magnetic field that forces protons in your body to align with that field.
Without the magnet, magnetic resonance imaging wouldn’t have existed. Similarly, the magnetic field used by the MRI machine wouldn’t exist without the magnet.
Constant Cooling
A magnet should be kept cool continuously to keep it stable. At present, liquid helium is used to cool the magnet. The amount needed is huge, so a massive amount of space is needed to contain it.
The magnet of an MRI machine should be maintained at a temperature of 4 Kelvin ( -270°C) to ensure precise imaging and proper operation. A cryocooler, which is a refrigeration unit, is used to cool the liquid helium.
A regular MRI machine uses 1,700 liters of liquid helium, which needs to be topped up regularly.
Here is a useful video on the differences between different types of MRI machines:
Click the following link to learn if MRI can show detail.
What Type of Microscope Produces 3 Dimensional Images?
We have all seen the amazing 3D images of biological specimens displayed, but how are they produced and what microscopes are capable of creating such 3D imagery?
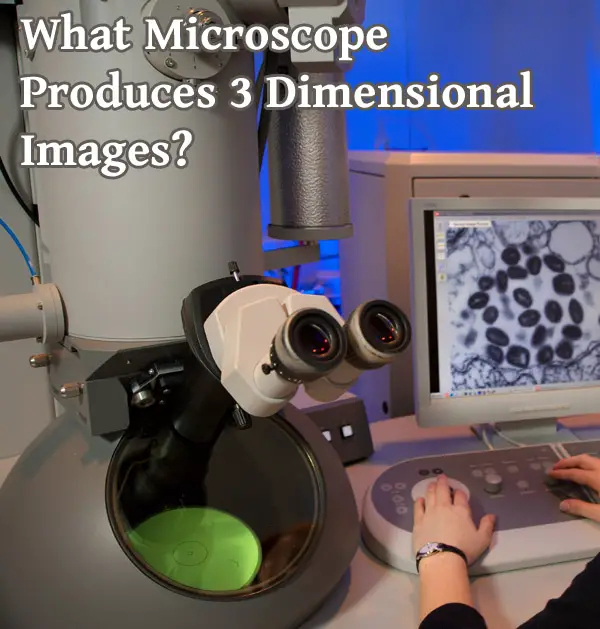
In this article I will discuss the techniques and technology used to produce microscopic 3D images and which types of microscopes can perform this task.
In general, microscopes that produce 3D images include dissecting microscopes, confocal microscopes, and scanning electron microscopes. Other types including transmission electron microscopes and light microscopes may output to 3D utilizing extra steps. 3D images such as volume or surface renderings may be produced in realtime or through the process of 3D reconstruction.
Microscopy has opened the doors to a whole new world of discovery. Prior to the invention of the first microscopes, most information about the unseen, microscopic world was merely theoretical at best. With microscopy, we were now able to get a closer look at these highly impactful organisms and gain more information. However, these microscopic techniques have some limitations.
While the more common light microscopy was able to illuminate the microscopic world, it came at a cost: 2-dimensional (2-D) imaging. Most of the samples had to be flattened in order to allow the light to pass through them in order to create a clear image. Specifically in cytological (cells) or histological (tissue samples), the sample size has to be super thin before being placed between two glass slides in order to be seen due to light penetrance and other issues.
Then on top of that, for even better resolution the investigator would use oil immersion. A drop of specialized oil is placed on the slide to reduce the air between the actual slide and the lens of the microscope. All of that is used to generate a 2-D image.
For 3-dimensional (3-D) images, there has to be a bit more work involved. At one point it was up to the investigator’s imagination to generate these images and simply draw them to the best of their ability. With the use of electron microscopy, we have also been able to view the 3-D surface of cells. As technology has evolved, more has been achieved to go from 2-D to 3-D including developing microscopy that generates real time 3-D imaging.
What do we mean by 3D?
There may be some confusion as to what is actually meant by 3D. 3D refers to viewing something in three dimensions- X, Y and Z and usually being able to rotate the scene, such as with a model of a 3D cell.
This can be achieved by various methods, including viewing in 3D in microscope, realtime 3D rendering, non realtime volumetric or surface rendering, or viewing and manipulating a virtual slide.
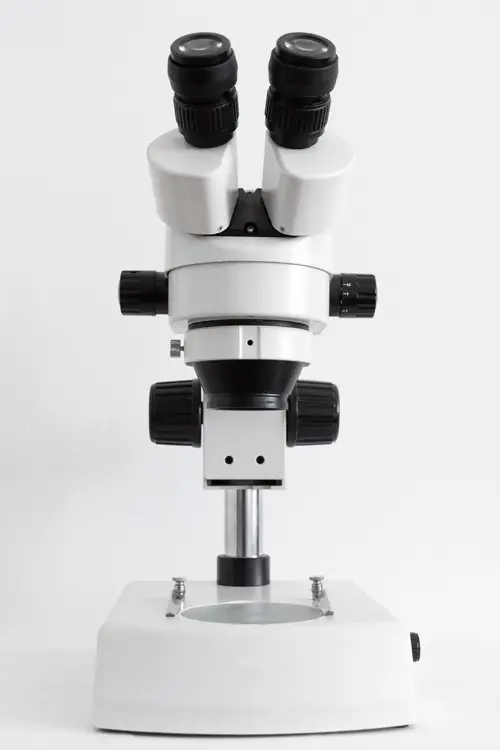
Stereo microscopes- Real Time 3D Viewing
The stereo microscope has been around since the late 1600’s. While not as refined as the ones today, it was still a valuable piece of equipment in generating 3D images in real time without as much of the preparation as the light microscopes and the later electron microscopes. Most people today know of these types of microscopes as dissecting microscopes.
The magnification for these microscopes is considerably low. Where compound light microscopes can reach magnifications into the thousands and electron microscopes into the millions, stereo microscopes can only achieve a magnification of about 10x-50x. This is still greater than an actual magnifying glass (2x-3x). This is because the light is directly reflected from the specimen. The lights on the microscope are used to either illuminate the surface of the specimen (top light) and in cases of more translucent specimens illuminate structures within the specimen (bottom light).
The stereo microscope allows for the investigator to look at a specimen that is normally seen with the naked eye. The image that shows due to the fact that two separate optical paths are utilized including two objectives appears three dimensional, as if you are looking at an object in all its three dimensional reality under an extremely powerful magnifying glass. The reason things appear 3D is light does not go through a flattened specimen on a slide but rather an intact thick specimen lit from all sides. Stereoscopy therefore allows for the illusion of a 3D image.
Scanning Electron Microscopy (SEM): 3-D Images
Scanning electron microscopy (SEM) is one of two types of electron microscopy. What separates electron microscopy from light microscopy is the source used to visualize the image. In light microscopy the source is actually light. The light can have different wavelengths that will produce different variations to the image, but the concept is the same.
The light is passed through the sample. The refracted, or bent, beams pass through a one (simple light microscopy) or more commonly a series of lenses (compound light microscopy). The lenses are what allow for resolution (clarity) and magnification (making the image appear larger) of the image.
Electron microscopy uses a different source: electrons. A beam releases a stream of electrons at the sample. The electrons penetrate the sample. The sample then reflects secondary electrons and X-rays that are then detected to generate an image. This is all done in a controlled environment with very expensive machines.
Scanning electron microscopy is used to take images of the surface of the cells. The scanning electrons are meant to penetrate the surface of the cells slightly in order to produce an image. Many of the images seen include structures such as the cell membrane, cell surface proteins, motility structures like cilia or flagella, and other external parts of the cytoskeleton.
The result is a 3D image of extremely small objects which cannot be seen with any other type of microscope. Even though the image appears to be 100% 3D, it cannot be measured as there is no depth information. SEM images can be converted into true 3D objects through the process of 3d surface reconstruction using the data from the SEM image if you want to rotate them.
Because SEM is used to take images of the surface of the cells. The cells have to remain intact. That means these images represent true 3-D images of the cells under examination. Unlike other forms of microscopy, these super thin samples are actually counterproductive since we want to see the intact structures of the cells. The sample sizes could be virtually any size and still have an image generated. The magnification is not as large as transmission electron microscopy, but it is still very impressive and gives a more accurate representation of what happens with the cell membrane and/or cell wall.

Transmission electron TEM- Through 3D Surface Rendering
On the other hand, transmission electron microscopy (TEM) requires a bit more work in order to achieve a 3D rendering. TEM requires a more involved sample preparation before the microscopy can even be performed. The sample must be thin so an ultramicrotome is called for to produce a sample that is less than 150 nm in thickness.
Transmission electron microscopy is also more specialized and requires trained professionals in order to use them. Once the sample is prepared and placed, transmitted electrons are passed through the sample. The electrons that get through the sample are then collected in a lens below the sample and an image is generated. Picture a stencil where you place different colors of sand on top. Once you lift the stencil, you are given an image.
In order to generate a 3D image with TEM, serial sections need to be photographed and from there a 3d model can be created based on the images in the stack . The basic concept is that multiple images are taken of multiple sections of the samples. From there computer software is used to generate a 3D image of the cells and corresponding structures. This process does take time and additional labor, but has been shown to be fairly successful.

Confocal Microscopy – 3D Surface or Volume Rendering
Confocal microscopy is part of the spectrum of fluorescence microscopy. It is used to give more detailed and defined images of cellular structures at different depths within the cells. Unlike light microscopy and electron microscopy, live specimens can be used and are typically still viable after the process is completed with minimal light damage.

Confocal microscopy uses fluorescence optics but the process is more refined. Instead of releasing a widespread light over the specimen and using the refracted light to generate the best image possible, a very small focused stream of light is directed through the sample at a very specific depth. The light or point of illumination is then reflected back to the lens without the remaining unfocused light yielding a very small yet highly focused image. This process is repeated throughout the area of the sample to at the same depth to reveal a 2D image with higher resolution.
In order to generate a 3D image, this process must be done multiple times at different depths to generate many 2D images in a “3d stack”. Those images are then combined to generate a 3D rendering of the specimen. Such a rendering can be a volume rendering or a surface (polygon) rendering.
With newer confocal microscopes, however, it is now possible to render the image on the fly in 3D in the included microscope software. The future seems very bright for 3D in microscopy.
Virtual Slides
There is another form of 3D microscopic imaging that requires extra work- virtual slides (whole slides). These are scans of an actual specimen slide taken at different depths and magnifications to give you a digital version of a physical slide which will not degrade over time and can be easily transmitted from computer to computer. Virtual slides can be viewed using online or software based viewers.
Here is an interesting video on how a scanning electron microscope works:
Conclusion
As microscopy has grown the technical aspects of generating high resolution images with detailed impressions of structures has become an even more accessible reality. With the application of software technology, a lot of those super detailed while flat images can be utilized to generate 3D renderings of microscopic specimen samples. In some cases, those images can even be taken of live specimens while still leaving them viable for use in other experiments.
As the technology around microscopy grows, perhaps it will come to meet the ingenuity of those that utilize it.
Click the following link to learn what hardware you need for 3D rendering.
How Long Does a 3D Printer Last?
Nothing lasts forever, or so they say. 3D printers aren’t an exception; some last longer than others. 3D printers are not inexpensive, whether its the Ultimaker, Ender 3, or Prusa 3D printer. That is why you have to carefully consider the one that will serve you the longest before you have to replace it.
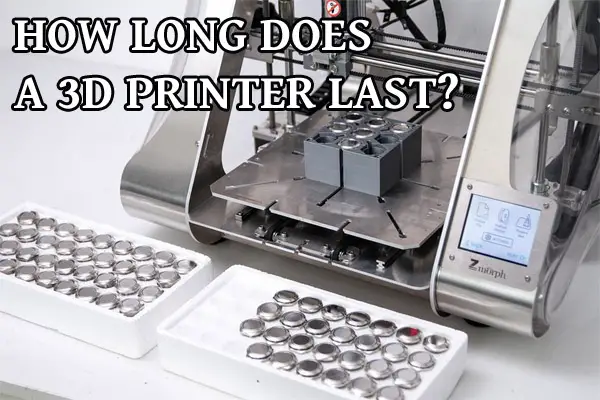
Careful use, proper cleaning, and replacements of the 3D printer impact how long the machine will last. So, how long should a 3D printer last and what determines it?
Various 3D printer brands have different lifespans. A good quality brand printer should last you 5 to 10 years. Stay away from unknown brands and prices too good to be true. Maintenance is key; otherwise, your printer may break down even before completing the one-year warranty the brands usually offer customers. Longevity of your printer depends on how often you use it.
The longest lasting quality 3D printer brands include Makerbot, Ultimaker, Monoprice, Formlabs, XYZ, Creality, Flashforge, and 3D Systems. If you have never heard of a 3D printer brand, its best to stay away from it. There are cheap imitation printers out there that look like better known ones but will not last long at all, not even a year.
Maintaining your 3D printer shouldn’t be a hassle, especially if you have the right information to guide you. This article will help you learn how to maximize the longevity of your precious 3D printer fully. Read on to find out more!
How Many Printing Hours Does a 3D Printer Have?
A good printer should last approximately 10 years, printing at least four hours each day. The total number of hours the machine could hit in its lifespan could be about 7,500-15,000. But, you have to put in the work to ensure the printer lasts long. The work entails replacements, repairs, and fine-tuning the machine’s parts to secure a long lifespan.
You gain greater benefits beyond extending its lifespan when you maintain the machine. For instance, the machine could have increased printing capabilities, improved speed, and quality. These improvements also mean you cut down on costs spent on seemingly endless repairs when the machine keeps breaking down due to lack of proper maintenance.
Individuals regard older 3D printing machine models as those prone to frequent breakdowns. Technology has improved the brands being churned into the market today. Hence there are 3D printing machines that are more reliable and break down less. However, older brands are still in use even today, the key reason being proper care and maintenance. Without maintenance, even the newer models will break down as often as the older ones are prone to.
What Causes 3D Printer Breaking?
Most 3D printers can last several years if you do your part. “How?” you ask.
A 3D printer has several parts. Some are long-lasting, meaning you don’t have to replace them frequently, while others are the parts that break down often if you don’t maintain them properly. Some wires on the 3D printing machine can break, especially due to their nature as parts that experience constant bending and movements. Breakages happen if your printer doesn’t have the longer-lasting flex cables.
Also, some individuals, especially those in the printing business, love to experiment with various designs and upgrades to maintain a competitive edge in the printing business. While this could be a good idea, you push the machine to its limits, leaving it vulnerable to breakdowns that reduce its lifespan.
Other reasons that contribute to a 3D printer breaking down include:
-
Lack of proper storage for the machine
-
Ignoring minor underlying issues, making them worse as time goes by
-
General carelessness
-
Bumping the machine on hard surfaces
-
Not following the printer’s usage guidelines
What Can You Do to Ensure Your 3D Printer Lasts Longer?
This may seem obvious, but buying a reputable 3D printer is the first step toward a long-lasting machine. A good brand is reliable and durable and doesn’t break down even when a minor issue occurs. Reading other customers’ reviews on the internet about the brand is a good way to know the best brand you can trust for your printing needs.
Next, have the right knowledge to know what to do and when to do it when servicing the 3D printing machine. Knowing the right action to take is key to securing an extended life span for your machine. For instance, you may need to replace certain parts over time.
The parts that need frequent replacements include:
-
Fans
-
Linear bearings
-
Nozzles
-
PTFE tubing
-
RAMPS boards
-
Extruders
-
Heatbreak tubes
-
Wires
-
Print bed surface/sheets
-
Stepper motors
-
Belts
Now that you have learned how to ensure a longer-lasting 3D printer, it is important to learn the proper maintenance tips for the machine.
Proper Maintenance Practices for Your 3D Printer
The following are important maintenance tips to ensure the longevity of your 3D printer:
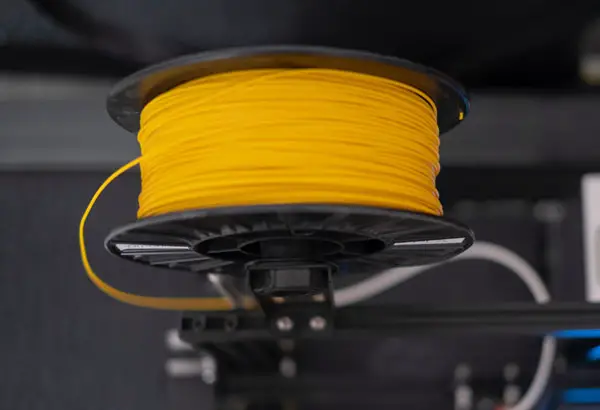
1. Always Keep the Filament Nozzle Clean
A clean filament nozzle is important to maintain a high print quality on the printer. Always clean it to prevent clogging, which may deteriorate a print’s design, affecting its structure. Also, nozzles are one of the 3D printer’s consumables, meaning they need replacing if the print’s quality has severely deteriorated. Replacing the nozzle is the best you can do if cleaning the filament doesn’t improve its function.
2. Replace Nozzles
There isn’t a specific rule of thumb guiding individuals on the specific time frame necessary to replace or change a 3D printer’s nozzle. However, it is good to change this consumable every three to six months, depending on several factors. The factors include the quality of your printer, what kind of filaments the machine has, and how often you use the printer.
3. Regularly Lubricate the Machine
When did you lubricate your 3D printer? If you haven’t done so in a while, you could lower the machine’s lifespan. A 3D printing machine comprises various moving metal parts that need lubrication. Lubricating them prevents friction, which is the major culprit for wear and tear on your machine. Don’t overly lubricate the moving parts, as the lubricant could gum up, attracting dust and grime.
4. Update the Software for Reduced Printer Model Aging
Keeping your 3D printer’s firmware updated is one of the easiest ways to maintain the machine in to-notch shape without breaking a sweat. A 3D printer is similar to your smartphone or laptop, requiring frequent updates to function well. You can single out the machine requiring a software update if the hardware is in good condition, but you feel like something is amiss with the printer. Updated software ensures the machine runs smoothly, preventing certain mishaps that lead to the printers aging prematurely.
5. Regular Cleaning of the Extruder and Build Plate
Operating the 3D printer entails applying glue to the build plate to avoid the prints moving. Glue is a fantastic agent for attracting and sticking unwanted substances like molten plastic to the build plate, resulting in improper prints if not cleaned. The 3D printer’s build plate needs to be perfect if you intend to use the machine longer without experiencing frequent breakdowns.
Some materials may also stick to the extruder when the filament passes through the rollers. These materials wear off from the rollers, altering the rollers’ geometry and ruining the extrusions. Proper cleaning of the rollers ensures the extruder remains spotless, functions properly, and lasts longer.
Also, keep all the other parts clean to prevent dirt and material build-up, causing them to shift and get stuck in other areas. A shift in the machine’s components alters how the printer works, reducing its longevity.
6. Replace the 3D Printer’s Worn Out Parts
Replacing the machine’s worn-out parts may seem like a no-brainer, but some individuals overlook this aspect until the damage is too extensive to correct. Your machine is made up of several parts with different life expectancies.
Therefore, you need to replace those as soon as they wear out. Failure to do so causes a strain on the machine as it continues to function, the long-term effect being a massive breakdown that will be costly to repair, much like with your car. The worst-case scenario is that the damage may be irreversible. Utilize frequent replacements to secure the longevity of your 3D printing machine.
7. Tighten up the Printer’s Screws
Your 3D printer has screws installed to keep the pulleys intact. The screws are placed on the machine’s X and Y axes to facilitate a continuous motion of the pulleys. As the motions continue, so is the likelihood of the pulley screws loosening up over time, resulting in a misaligned 3D printer system. Misalignment hampers the quality and longevity of the printer, a situation you can easily avoid by tightening the pulley screws if they loosen up.
Here are some more tips on 3D printer maintenance:
Bottom Line
It is frustrating to part with your money and buy a printer, only to break down when you need it most. You can take several steps to ensure your 3D printer lasts longer, starting with buying a good quality one in the first place. Then, perform proper maintenance practices based on your machine’s needs, preventing incidents that tamper with how the printer works and lasts in the long run.

Do you need more information on all things 3D printers? You are in the right place! Our blog has more 3D printing articles for you to sample. See you there!
Why is Weight Painting Difficult?
Weight painting is a clever way to apply weight information to your model smoothly in a pretty intuitive way in order to rig a 3d mesh.

But why is weight painting difficult? Read more to find out why and the solutions to this.
Weight painting can be difficult for a number of reasons including not understanding the basic concept, having many weighted influences affecting a model, using automated weighting unsuccessfully, not having enough practice, and experiencing software errors. Let’s discuss and see how to make it less difficult.
Some of the difficulties you may encounter during the process of weight painting include:
Difficulties in Maya
Despite being one of the most used 3D animation software globally, Maya has a complex toolset.
If it’s your first time working with this software, you might be overwhelmed with the learning curve and spend more time looking for information than actually doing your project.
Another challenging part of using Maya for weight painting is that it requires a user to assign weights to every vertex manually. This process takes time and is prone to errors.
The best way to go around this challenge is;
Difficulties in Blender
Although Blender is a powerful tool that you can use to create 3D animations and objects, it is also known for being complicated to use.
The learning curve is so steep that many people avoid using it altogether.
Depending on the video card you use on your computer, Blender may present several challenges such as
- A black stripe on models – This typically happens when normals for one of the faces point in the wrong direction. You can solve this by having the blender recalculate the normals.
- Hidden objects – Some images may not show up in your 3D view. If you accidentally press H while searching for another key, you will hide the selected object. To solve this, press Alt+H
Default weights not working
Default weights are a set of weights that can be used to quickly and easily create a new character. All the vertices and faces of the character can be created by painting their colors and adjusting their weights. The default weight is applied when there are vertices in the model with no weights or insufficient weights to correctly define all vertices in the object.
A default weight failure in weight painting occurs when there is no weight defined on any faces or vertices in an object, causing an incorrect surface to be generated when it gets exported.
In the weight painting process, default weights should be applied to the skin, hair, and eyes. But if you have a specific goal in mind for your character’s skin weighting, you have to select all the other bones in the body and clear the default weights before painting them.
There is a way to fix this by applying a new set of default weights which depending on the software can be done with a script.
This script will scan through your mesh automatically and change any bone whose weight is set to “default,” which means it has been cleared from painting by someone else.
Glitches in software
Glitches happen when a program malfunctions and fails to work correctly.
These glitches can be caused by;
- Trying to save a file in a different format, like PNG instead of JPG, and save it with an extension that is not compatible with your device.
- Using different software on an incompatible operating system
- Using the brush resize tool to change the size of the brush in the wrong way
In all honesty, in programs like Maya weight painting may crash the program for any number of unknown reasons out of nowhere
Many possible solutions are available if you need to fix your weight painting issue, such as saving in another format or using another software compatible with your operating system.
To make your weight painting experience pleasant, try these solutions:
1. Proper 3D mesh for animation
Make sure that the mesh is clean, not too heavy, no intersections, no holes.
2. Correct joint placement
It is essential to know how to use joint placement properly for your object to be weighted correctly. If joints are not placed perfectly, they will not be taken into account by the paint system, resulting in incorrect weights.
To properly place the joints in Maya;
Select joint name from paint “skin weights tool.”
Right-click the joint you want to paint, then select influence in the marking menu
Drag across the skin. The joint influences painted vertices in relation to other joints.
3. Correct density in areas of deformation
The correct density in weight painting can be found by how closely the painted strokes are together. If they are too far apart, then it looks airy or feathery and will take up too much surface area on your object. It will be difficult to see what you have painted and look sloppy and unprofessional if they are too close.
Correct density ensures that there are no holes in the mesh due to inconsistent thicknesses.
To be used as a reference for the density of a given area in an image, the user will first need to paint a weight map. The color should represent how dense the pixels within this area should be.
Different areas of an image may have different densities, for example:
- A black and white image or a line drawing that has no shading will have a uniform density
- Areas with conspicuously higher contrast may need higher densities to prevent the lines from appearing too thin due to insufficient contrast.
If you have a brush node with node path A to B, Node Path A is set to 100% opacity, and Node Path B is set to 50% opacity. When this brush node moves from point A to point B on your mesh, a stroke begins at 100% opacity and gradually fades out at 50% transparency.
If you want this stroke to be more even or gradual, you can adjust the Density value by going into the properties window and changing the value from 0.0 to 1.0, making it so that your brush will have no deformation weight painting.
4. Even spans
Even spans in your model will make sure that the weight painting process goes as smoothly as possible and doesnt run into unnecessary issues performing the calculations which are complex behind the scenes of the intuitive process.
5. Start with rigid
If you are having problems you can make your weight equal 1 on each joint to begin with and then knowing what you started with add other weights.
6. Practice
To get proficient at weight painting and get over the fear, complete a dozen skinnings of characters, including higher resolution ones. Remember that practice makes perfect.
Here is a lesson on how to paint weights effectively in Maya:
Conclusion
Despite its benefits, the process of weight painting is not always straightforward and may seem like a daunting task with lots of trial and error.
You can use existing software to create weight-painting, but it requires human intervention and manual labor.
Click the following link to learn what 3d rigging is and why its important
Is Light Sheet Microscopy Confocal? Differences and Similarities
Are you confused by the terms light sheet and confocal? Are they completely unrelated or does one fall under the definition of the other?

In this article I will define the terms and explain exactly how they are related, along with additional information such as comparisons between the two.
In general terms, in light sheet microscopy samples are illuminated by a thin sheet of light emitted from the side. In confocal microscopy, point illumination as well as a pinhole to block out-of-focus light is used. Both methods use fluorescence and are capable of producing stacks and 3D renderings, with light sheet being more capable of scanning larger tissue volumes at higher speed while confocal being better at depicting subcellular detail at higher magnification.
To understand how this works, you first need to know how a standard SPIM works. As its name implies, in SPIM, the specimen is illuminated with a thin, wide sheet of light to observe the specimen’s fluorescence over time.
In confocal SPIM, there is an additional feature: a pinhole positioned between the detector and the objective lens that allows only fluorescence from one focal plane to be detected at a time.
The pinhole blocks out-of-focus light from above and below the focal plane, which improves image resolution compared to non-confocal SPIMs.
Light Sheet Microscopy Basics
Light-sheet microscopy is a method for non-invasive, high-resolution imaging of biological samples. In this technique, cells are illuminated by a thin sheet of light propagated orthogonally to the light path for image acquisition.
This results in high penetration with minimal photobleaching and phototoxicity and thus allows long-term imaging of live samples.
Light-sheet microscopy benefits from the use of several specialized optical components. These include a condenser to generate the light sheet, an objective to collect emitted fluorescence or reflected light, and a tube lens in between to relay the image from one to the other.
The system can be arranged in two configurations: single plane illumination (SPIM) microscopy, where only one side of the sample is illuminated at a time, and dual-plane illumination (DPIM) microscopy, where both sides of the sample are illuminated simultaneously.
In addition, SPIM can be divided into two types: off-axis SPIM and reflective SPIM. Off-axis SPIM illuminates the sample from 90° with respect to the detection axis.
Reflective SPIM illuminates the sample from below through a specially designed glass-bottom dish or a coverslip coated with a scattering material.
Uses of Light sheet
Cell biology
If you want to visualize organelles in 3D, you can do that with a light-sheet microscope.
This is the most common application that people use it for.
To observe cellular dynamics
The microscope is designed to observe cellular dynamics over a long period in living specimens.
It employs a laser light sheet, a technique that uses a sheet of laser light illuminating the sample from an angle, as opposed to conventional microscopy, where the specimen is bombarded with illumination from all directions.
This means that the cells are exposed to less light than conventional microscopy to be observed for more extended periods without damage.
The critical advance lies in adaptive optics, a technique first developed to improve astronomical images taken by ground-based telescopes.
By measuring distortions caused by turbulence in the atmosphere, adaptive optics can alter the wavefront of incoming light using a deformable mirror.
The result is an image that is much sharper and more detailed than possible.
To visualize gene expression
Light-sheet fluorescence microscopy (LSFM) is a fluorescence imaging technique. It uses a thin sheet of light to illuminate a single plane of the specimen, while fluorescence from other aircraft is suppressed.
LSFM can provide optical sectioning similar to confocal microscopy or multiphoton microscopy by scanning the light sheet with less photodamage and photobleaching.
Moreover, LSFM enables fast 3D imaging of entire cells and organisms without damaging them through photobleaching and phototoxicity. It also allows for visualizing gene expression in whole embryos, with minimal disturbing light penetration into the specimen and surrounding area.
To perform super-resolution imaging
Light-sheet microscopy has been used to perform super-resolution imaging. This is achieved by using a pulsed laser to illuminate a thin section of the sample and taking images at the axial focal plane.
The sample is moved slightly in the z-axis, and the process is repeated. The resulting images are then combined using computational methods, such as iterative deconvolution or super-resolution optical fluctuation imaging (SOFI) analysis, to obtain an image with resolution better than that achievable with conventional microscopes.
Light sheet vs Confocal- Differences and Similarities
Light-sheet and confocal microscopes have several differences and similarities. Here are some of the differences.
Differences
Image Quality
With confocal microscopy the specimen must be illuminated through a pinhole and viewed under a highly narrow angle of view. This results in a high-quality image because it blocks scattered light from outside the focal plane, which can degrade image resolution.
In contrast, a light sheet is a fragile sheet of light that illuminates the entire sample from the side, creating a more uniform image. However, because the light is much brighter than in a confocal microscope, it is harder to control the scattered light outside the focal plane (especially for large specimens).
Light Efficiency
The efficiency of a laser can be increased by spreading it over a large surface area. A light sheet microscope takes advantage of this by using lasers to create fragile sheets of light that can cover large areas.
These sheets are created using cylindrical lenses and cylindrical mirrors and go through the specimen one by one. In contrast, only a tiny fraction of the laser energy makes it through the pinhole aperture to illuminate the sample in confocal microscopy.
With confocal microscopes, there are issues of light penetration through thick tissues. Even if the tissue is fully permeated by a fluorescent antibody marker, it may not be visible for this reason.
Speed
In traditional confocal microscopy, the laser beam is scanned across one sample axis, which is also moved along an orthogonal axis.
In light-sheet fluorescence microscopy (LSFM), the specimen is illuminated by a thin sheet of light that sweeps across it in one direction. At the same time, a detector scans in the perpendicular direction.
This arrangement makes it possible to acquire images at high speed, with very low photo-bleaching and phototoxicity.
LSFM is well suited to live cell imaging and other applications where dynamic processes need to be observed and recorded over time without damaging the sample.
The speed of lightsheet microscopes is what makes them perfect for studying large tissues or even entire organs such as rodent brains that have been cleared with methods like CLARITY. This is best for studying things such as neuron projections from one part of the organ to another. While light sheet microscopes are achieving better and better resolution, confocal microscopes still dominate in terms of observing cell detail under very high magnification (up to 150x objective).
Similarities
Both types of microscopes can be used to create image stacks and ultimately 3D volume or surface renderings of the objects studied.
Both light-sheet microscopy and confocal microscopes are types of fluorescence microscopes. Both techniques involve laser scanning of a specimen to produce an image.
The main difference is that confocal microscopes use a series of pinholes to exclude light outside the focal plane. In contrast, light-sheet microscopy combines illumination and detection along the same axis using a thin light sheet.
Light-sheet microscopy uses a thin sheet of laser light to illuminate the specimen below or above rather than illuminating it with a point source (as in a conventional microscope).
The thin layer of light reduces photobleaching and phototoxicity, which are significant problems when imaging live specimens over time. The advantage over confocal microscopy is speed; because fluorescence emitted from all points on the specimen are collected at once.
Both light sheet and confocal microscopes can be used to image cleared specimens.
How old is light sheet microscopy?
The Ultramicroscope was the first light-sheet microscope, and was first created in 1903 by Richard Adolf Zsigmondy and Henry Siedentopf. It consisted of a rectangular slit combined with white light. It produced images of microscopic particles and enabled scientists to closely observe the interaction of individual molecules. However, it was not a fluorescent light sheet microscope. Those did not appear until the 1990s.
Price of light sheet vs confocal
When it comes to light-sheet microscopy, a typical system costs around 200,000- $400,000, depending on what features are included. The lattice light-sheet approach for in-cell imaging costs about $700,000.
Confocal microscopes are still more popular and more available than light sheet and can be purchased used for a much lower price, but a modern confocal microscope from a well known brand such as Olympus or Nikon, with an average of 4 lasers, will cost around $300,000.
Pricing of either can vary greatly based on the type of imaging you want to do, the type of specimen holders, objective types which can have different characteristics even with the same magnification, and attachments. You can even buy a light sheet attachment to a confocal microscope, but those can be pricey at $200,000.
Here is a useful video on light sheet microscopy basics:
I hope you found this article useful. Click the following link to learn the maximum magnification of a confocal microscope.