
Computer-aided design (CAD) is the use of computers to help create and optimize different designs for various fields. It has over the last few decades led to increased interest in 3D modeling for other fields such as 3D animation and creation of more lifelike and organic models.
3D modeling comes in two main forms: 3D parametric modeling and the newer and increasingly popular 3D direct modeling.
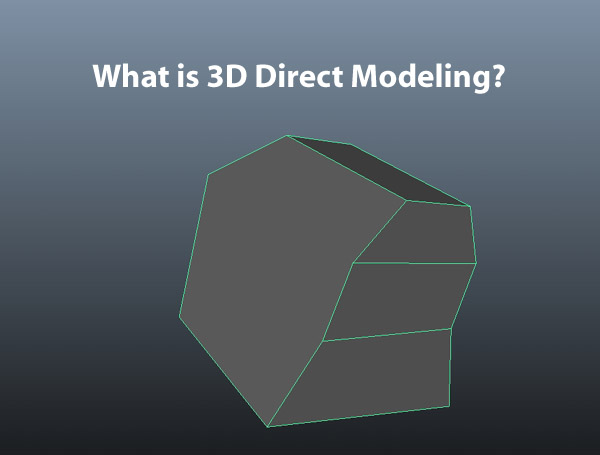
Three-dimensional (3D) direct modeling is a technique where the creator can interact directly with the geometric model on the screen in real-time to change its size shape, delete certain features, or combine different models until they have achieved the 3D model they want.
3D modeling has continued to grow and be put to use both in conjunction with parametric modeling and on its own. Take a look below to see how the two forms of 3D modeling differ and work together.
The Difference Between Parametric and Direct Modeling
Parametric modeling is a way of creating a 3D model in which you create a sketch of the model, give it different parameters and then input those parameters into the code itself, which then renders the 3D image. It is possible to change the 3D model by going in and adjusting the numbers in the system relating to size or curvature. Once you have changed one aspect, the rest of the numbers will adjust to stay within the guidelines or parameters already in the code.
What this means is that if there is a certain aspect of the model that you no longer want as part of the design, it needs to be removed from the code. This can become tricky and may not be possible in the long run.
On the other hand, direct modeling is more flexible, and the different parts of the model are independent of each other. Instead, the creator interacts with the model itself, adjusting it as they see fit. This means they can change the size of one part of the model drastically, and if they do not increase the size of the other parts, they will stay the same size, shape, etc., as before.
As stated, the main difference between parametric and direct modeling is where the edits or adjustments are made (to the parameters in an already established design for parametric or directly to the geometric model itself for direct modeling). This difference leads to a couple of other differences, such as the following:
|
Parametric Modeling |
Direct Modeling |
| Has to follow already established or historic guidelines.
If you adjust the parameters because the rest of the model also has to readjust, it will remake the model and takes much longer for the new image to load. |
Does not need to follow any historic guidelines.
If you adjust a certain part of the image, it will change it immediately. There is no waiting. |
Though you may start with a sketch idea for both parametric and direct modeling, because of the limitations of parametric modeling, there will be certain things you cannot do with parametric modeling that you can do for direct modeling where you can end up with a 3D image that is completely different in size, shape, and overall appearance.
A simple example is that you may have created the shape of a square, but due to different adjustments, you could end up with an octagon. Whereas if you tried to turn a square into an octagon in a parametric model, not only is it difficult to make the adjustments and time consuming but there is no guarantee that it will successfully render the new image without distorting it or pieces of the model being cut off.
It is much easier to break a parametric model when you make adjustments since each aspect of the model was designed mathematically to work together as a whole unit. The user has to have a strong knowledge of the math that goes into creating the shapes and their relationship to one another. It takes a lot of time, education, and training to become proficient and at ease with parametric modeling.
Direct modeling is much simpler, straightforward, and there is more room for error and testing things out, meaning that users can teach themselves and become proficient at it.
3D Direct Modeling and Its Uses
Because 3D direct modeling has gained popularity due to its simplicity and the ease with which users can learn how to create models, as well as the practicality of being able to adjust aspects of it as necessary to create unique models, it is used in a variety of fields, including the following:
Medical Animation
Due to its decreased memory consumption and faster rendering, direct modeling makes possible the creation of larger, more complex scenes and more optimized workflow, and as we all know time equals money. There is less worrying about the model falling apart due to its history after many modifications have been made to it when you are working on a tight deadline and there is no room for error.
Medical Manufacturing
Editing faces and other types of direct modeling can be as precise as parametric modeling, yet make the geometry lighter and simpler which means less complications when manufacturing parts. This is important for items such as boolean operations, where complexity and geometry issues often cause major problems in computation of the final model. The goal is often to create models that are unique to an individual patient’s anatomy and are not expensive to manufacture. Direct modeling helps cut down on costs and wasted material.
Here is a video to illustrate 3D direct modeling:
Conclusion
Direct modeling is different from parametric modeling in that the model can be interacted with and changed in real-time. There is no need to change the model’s history as required with parametric modeling, meaning that the user can change and adjust as they see fit without worrying about whether it will mess up the rest of the design.
3D direct modeling has become an increasingly popular and widespread way of creating 3D models and is used in a wide variety of fields from the more technical medical manufacturing field to assist in meeting the specific needs of each patient to artistic fields such as interior design, jewelry, and fashion where change often needs to quickly take place.
Click the following link to find out if 3D modeling is difficult to learn.
Amira vs. Imaris: What is the Difference?
3D reconstruction software is truly a game-changer for scientific visualization. As technology has improved over the past decade, medical professionals have seen huge advancements in the data sets provided by CT-Scans, MRIs, and medical ultrasounds as a result of this software.
Let’s discuss this topic in detail.
Two well-known names in biological 3D visualization software are Amira and Imaris. While very similar, Amira is superior when working with large data sets, and its strength is using source images from medical scans such as MRI or CT. Imaris offers great specialized options for different fields of study but still provides robust performance in 3D/4D imaging. Imaris excels when using microscopy data such as confocal.
With many 3D Visualization software programs available today, it can be overwhelming when trying to choose the right product to fit the specific needs of an organization, department, or researcher. Amira and Imaris are both solid choices for a variety of applications, as seen below.
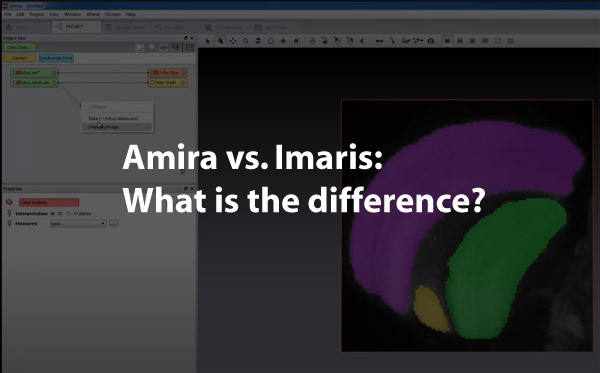
An Overview of Amira
Amira 3D visualization products were launched in October of 1999 by Thermo Fisher Scientific. The Amira product line includes 3D – 5D visualization tools and software for several industries, including medicine.
The Amira Life & Biomedical Sciences
This Amira product is the visualization tool used for auto-segmentation, object separation, automatic labeling. Amira does not offer package options for different areas of expertise. This all-in-one product is designed for a range of medical professionals, including
- Physicians
- Researchers
- Cell biologists
- Neuroscience professionals
Features and Capabilities of Amira’s Life & Biomedical Science Product
| Importing and Processing Image Data |
● Able to handle large data sets ● Offers image enhancement, comprehensive filtering ● Scales, calibrates, and converts data
|
| Visualization and Tracking |
● Interactive, multichannel visualization ● Molecular visualization ● Single-cell tracking
|
| Segmentation |
● Auto-segmentation, object separation ● Automatic labeling ● Automatic tracing of individual fibers and filaments ● 3d surface reproduction
|
| Analyzation/Quantification
|
● Convenient built-in measurements
● User-defined measurements can be created ● Results viewer with a spreadsheet and charting tool
|
| Presentation | ● Animation and video available
● Export images, 3d models, spreadsheets ● Single and tiled screen display |
Feedback from Amira Users
- Compatibility. Amira, like Imaris, is compatible with Python and MatLab.
- Ease of use. Users of Amira often cite ease of use as the primary benefit of the tool. With an extremely user-friendly interface, Amira is a great choice for researchers and professionals who may not be particularly computer savvy.
- Free trial. Amira offers an open-source, free trial period.
An Overview of Imaris
Introduced in 1993, Imaris has been an industry leader for many years, and its products have evolved over time to fit the needs of a variety of applications. They offer several different packages to meet the needs of their different clientele.
| Imaris Start | Imaris for Tracking | Imaris for Cell Biologists | Imaris for Neuroscientists | |
| Provides 3D/4D imaging
|
Yes | Yes | Yes | Yes |
| Provides detailed object measurements, reporting, and analysis
|
Yes
|
Yes | Yes | Yes |
| Visualizes and quantifies colocalized regions
|
Yes | No | Yes | Yes |
| Plots 1D-4D, allows for comparisons with statistical tests
|
Yes | No | Yes | Yes |
| Tracks motion in 2D/3D
|
No | Yes | Yes | Yes |
| Allows for tracing filaments, neurons, vessels
|
No | No | No | Yes |
| Allows for segmentation/analyzation of cells & cell structures
|
No | No | Yes | No |
| Customizable analysis with Matlab, Python, Java
|
No | No | Yes | Yes |
| Provides Alignment and stitching of tiles | Optional feature | Optional feature | Optional feature | Optional feature |
Feedback from Imaris Users
- Overall performance and flexibility. These strengths of the program often cited, especially in data analysis.
- Reporting and data analysis functions are fully customizable and compatible with users in Python, as well as Matlab.
- Free trial. New users can get a free trial of Imaris, with all available features to determine what product to choose and which features are useful for their specific application.
Note: Imaris also offers a product that features all of the capabilities listed above called Imaris Single Full for professionals who want all of the capabilities that exist for each product line.
Similarities between Amira and Imaris
The Amira Life & Biomedical 3D Visualization platform is very similar to the Imaris Single Full product.
Both programs offer an open-source, free trial period, where users can download the program and try out the features of the program(s) and determine which is the best fit.
Both Amira and Imaris are both highly rated programs that can provide physicians, researchers, and other medical professionals with a wealth of information and process large data sets, but each program has its individual strengths.
Why Choose Amira?
Amira provides users with a wide range of capabilities, and when compared to similar products, is superior when dealing with very large data sets.
The larger the data set, the more complex the end result, and across the board, from professionals in different Life/Science fields of study, Amira gets high marks in this area.
Pros and Cons of Amira
- Higher cost. Amira is definitely on the higher end in terms of pricing.
- Inflexibility. Without the flexibility of Imaris product offerings, some Amira end users may end up paying for a ton of features that they may not want or need.
- Good for large, varied organizations. In research roles, hospitals, educational institutions, or other large organizations, Amira provides users with a ton of options and capabilities.
- Ease of use. Amira is based on an interconnected node system where each new function graphically appears as a node, similar to Maya’s hypergraph. This way you always have a visual graph of your progress and can go back and delete or modify nodes.
Why Choose Imaris?
With several program options, users can select a product that gives them exactly what they need, without a lot of extra, unnecessary capabilities.
The specialization of Imaris options helps streamline staff training and keeps costs much lower, which can be a huge factor in some industries, particularly education.
Where Amira Excels
- 3D/4D visualization and tracking. Imaris gets top marks for their 3D/4D visualization, especially with tracking objects and single cells.
- High-quality graphics and visualization. The Imaris Cell Biologist program gets high marks from end-users due to the excellent tracking and overall visualization, as the program provides high-quality graphics and animations.
- Excellent for small subjects. For working with single cells, neurons, filaments, and other small subjects, Imaris is a wise choice.
Why the Right 3D Visualization Software Is Crucial
3D Visualization tools have helped lead advances in research, surgical procedures, radiology, and health education. With access to more information about the human body, from single-cell components to full-body systems and individual organs, 3D visualization tools provide physicians and researchers with a truly intimate look at the inner workings of their subject.
Accurate Diagnosis Achieved Faster
These tools have helped to reduce the time from presentation of symptoms to diagnosis, particularly in cardiac medicine, as well as oncology. With the ability to view and determine the texture of tumors in the body or recognize small abnormalities that would have previously been missed, physicians are able to diagnose faster and thus initiate treatment for patients quicker as well.
Improved Patient Safety
3D visualization programs also make scans safer for patients. Whether a CT, or MRI, or PET, much less radiation is needed to obtain the necessary scans. Also, in a worst-case scenario, if a physician does not have the exact scan he needs, rather than having to recall the patient in for additional x-rays, the visualization tools can be used to recreate any missed scans by the additional sampling of the raw data from the original scans as well as reslicing the data in a new plane..
More Detailed Information at a Cellular Level
From a researcher’s perspective, 3D visualization tools have also been revolutionary, providing researchers and biologists with more information at a cellular level than previously available. This can translate into quicker turnaround time when developing new treatments for disease or developing vaccines against serious and debilitating illnesses.
3D visualization tools have become indispensable within the medical community. Finding the right product is essential, so it is important to research each product thoroughly. Both Amira and Imaris are well-known platforms, and both are compatible with commonly used tools MatLabs and Python.
Below is a video on using Amira to turn a 2D image stack into a 3D print:
And here is one on using Imaris for 3D volume rendering:
Conclusion
For large companies with diverse research and broad needs, Amira is the best choice. A full and comprehensive package, it offers all the bells and whistles in a visualization tool and can be used for a variety of functions.
Imaris, however, is an excellent choice for specialized research; as an end, users can pick from a variety of program options, along with add-on services to create a visualization tool that provides exactly the data they need.
I hope this article has helped you understand the differences between the two visualization software packages. Click the following link to learn about the best software for 3d medical animation.
CV Curve vs. EP Curve: What’s the Difference?
If you work in medical animation, you will likely be charged with creating 3D models of the various organs, tissues, and nerves in the human body. Whether these models are used for illustration or will be the blueprint for a 3D print, it is vital to make the shapes as accurate as possible.
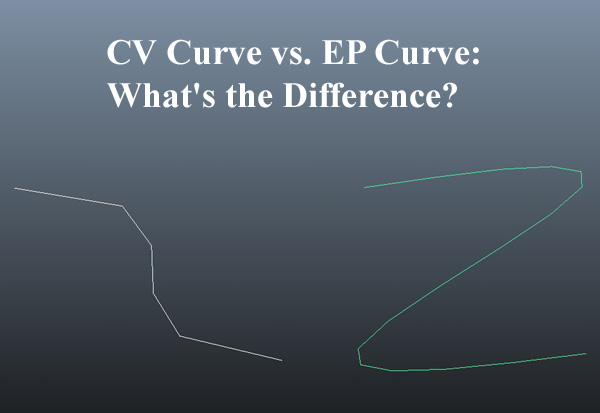
Therefore, when creating the models, you may wonder whether it is better to use CV or EP curves.
Continue reading “CV Curve vs. EP Curve: What’s the Difference?”
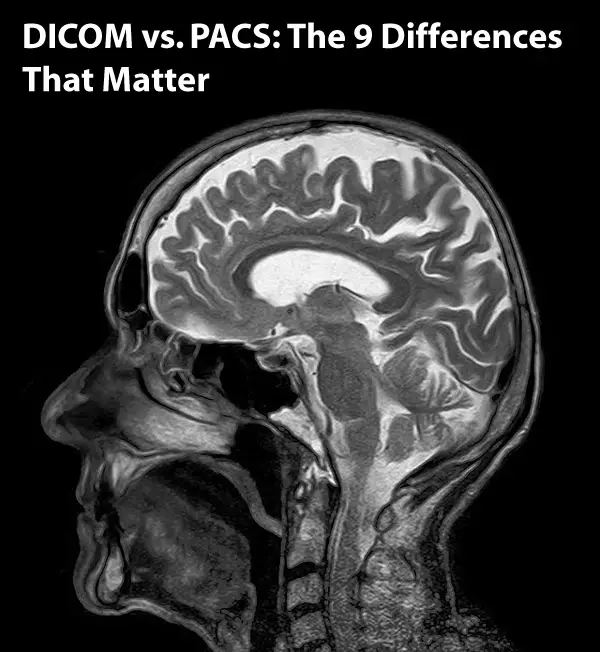
DICOM vs. PACS: The 9 Differences That Matter
Some of the core parts of working in the medical imaging field are managing, distributing, and analyzing medical images. Whether you are performing a CT scan, an MRI, or an X-ray, you need to be sure that your patient’s information is secure after the image acquisition and that all critical devices can display the images correctly.
To accomplish this, you must work with both PACS and DICOM. These are two types of software that work together and independently to give you optimal control over your medical images and related data. Since they’re so deeply connected, it can be challenging to understand what distinguishes them.
Below, you’ll find the key differences that separate the two and how these distinctions work together.
DICOM and PACS Have Different Medical Functions
Although they work closely together, PACS (Picture Archiving and Communication System) and DICOM (Digital Imaging and Communications in Medicine) are separate software programs that serve different functions for medical professionals. In the most basic sense, PACS is meant to store medical images taken from hardware such as X-rays and MRI (magnetic resonance imaging) scanners.
Note that all these images are digital since that is how they are primarily stored (technically referred to as “archived”) by the photographing or recording devices. The following functions represent how PACS manages these digital images, per the acronym:
- P – Picture refers to the digital imaging data shared between medical devices.
- A – Archiving refers to the transfer process by which the digital images are sent to the PACS.
- C – Communications represents the system’s ability to distribute these medical images to various connected devices, specifically DICOM-compatible devices, healthcare IT (information technology) systems, and more.
- S – System, of course, refers to all components responsible for carrying out the PACS functionality.
(Source: Healthcare IT Solutions)
On the other hand, DICOM is the global communication standard – not exactly the mechanism – through which medical professionals can handle, store, print, and transmit medical images. It also represents the file format in which these images can be saved. In this way, DICOM has several more applications in medical practice than PACS does.
Further Clarification on DICOM Functions
As previously stated, DICOM is a multifaceted system that presents a wide breadth of management, manipulation, storage, and distribution functions for medical images. Through DICOM, medical professionals can aggregate several sets of data, similar to how a JPEG tag can be embedded with metadata. (Source: Contribution)
In the DICOM’s metadata, you can store lots of critical information, including the patient’s identification, date of birth, and more. Because of the sensitive data in these files, DICOM has an anonymization security measure.
Images are not the only medical files that can be transferred between devices using DICOM. If you need to share reports and other medically relevant documents between systems and devices, DICOM can handle this as well.
DICOM and PACS Have Separate Purposes for the User
DICOM is the standard form of communication for nearly all things related to the acquisition, storage, and distribution of medical images. On the contrary, PACS is the management system itself. Because they are two distinct components of medical image management, the doctor, radiologist, or other medical professional experiences and uses the two quite differently.
PACS systems are capable of archiving medical image files received from scanning and photographing hardware. However, they are limited to separate functions without a method to exchange these files. That’s where DICOM comes in. DICOM is the communicative “bridge” that allows PACS systems to send the information stored within them. (Source: Healthcare IT Solutions)
DICOM and PACS Have Different Functional Components
PACS and DICOM contain different functional components. PACS has four major parts (Source: Ampronix Medical Imaging Technology):
- The imaging hardware (e.g., MRI, CT, X-ray, etc.)
- Secure network to exchange patient information between healthcare facilities
- Devices and workstations to view and analyze medical images
- The process of image and document storage and retrieval
These components all work together to enable PACS to digitally transmit medical images, eliminating the need for manual document processing and handling. Further, medical professionals can digitally acquire, store, and share film jackets both within and outside their departments and organizations.
DICOM requires the following “objects”* to function appropriately:
- AE title: Application Entity title (for example, “Cardiac CT”) is assigned to a device so it can be identified within a network. The AE is used alongside the IP.
- DICOM message service element (DIMSE): This element allows information exchange between associated AEs. (Source: pynetdicom)
- Service object pair (SOP): The connection of an IOD and DIMSE is the central defining factor of an SOP. It dictates either the IOD’s attributes or the rules by which the DIMSE may carry out communicative services. (Source: DICOM Library)
- Information Object Descriptor (IOD): This is a computer model that allows AEs to view object information before the exchange, shared between DICOM devices (as opposed to separate views).
- Entity-relationship (E-R): This refers to an IE (information entity) or a computer model of a tangible object (e.g., a study or image). (Source: OTpedia)
- IP (internet protocol) address
- Unique identifier (UID): This element ensures that an item will have a unique identity that will clearly distinguish it from other objects accessed through the same DICOM network. (Source: DICOM)
- Value Representation (VR): This represents the data element’s type and format. (Source: DICOM)
*Also referred to as IODs, objects are recipes of items that define instances of an entity such as CT, MR (magnetic resonance), US (ultrasound), etc. These objects’ attributes are defined in “modules.” For example, patient modules contain the patient’s name and other identifying information, while the study modules contain the study date, accession number, and unique identifier (UID).
DICOM and PACS Have Varying Levels of Functional Independence
Medical professionals can use DICOM and PACS in varying capacities, each with different levels of functional independence.
For example, on its own, DICOM ensures that files remain intact and that all metadata stays linked to the appropriate file. Depending on the type of PACS you have (i.e., local vs. cloud), you can access your DICOM data remotely or through a workstation. Therefore, it can be argued that DICOM is more functionally versatile than PACS.
In contrast, PACS can almost only be run in tandem with DICOM since the “universal format for PACS image storage and transfer is DICOM.” It is through the DICOM that PACS retain their capability of transferring data at all. (Source: PeekMed)
DICOM also refers to the file format, usually either a DCM or DCM30 (DCM3.0) file extension. Although it still requires specific devices for compatibility, this represents yet another facet of DICOM’s array of applications. It is not only a communication system and an image manipulation tool but also a component of file storage. (Source: LBN Medical)
DICOM and PACS Address Different Communicative Necessities
As two distinct components of image acquisition, storage, management, and distribution, DICOM and PACS address different facets of the file management process.
DICOM covers five main areas of communication- and distribution-related functionality:
- Transmission and persistence of medical images, waveforms, structured reports, and documents, each of which is referred to as a “complete object”
- Query and retrieval of the above objects
- Execution of requested actions for those objects
- Workflow management
- Quality and consistency of image appearance (for both digital display and print)
PACS is “but one part of a larger informatics infrastructure in an institution.” It connects all the following systems solely for data transfer (Source: UCSF RORL):
- Radiology information system, or RIS, for short
- Electronic medical record, also known as EMR0
- Speech recognition software
- Primary diagnostic reading workstations
- Enterprise display workstations
- Radiation dose engine (only in some cases)
PACS is primarily intended to ease image management, particularly images critical to the patient’s treatment and recovery. When using PACS, team members can search and retrieve data whenever they need to. DICOM is the method that allows the imaging devices to communicate with the server, which ultimately enables the medical staff to carry out these actions. (Source: Advanced Systems Corporation)
DICOM and PACS Interact Differently with Workstations
Most medical imaging equipment can be optionally operated through workstations, the functions of which are listed below:
- Workstations are not attached to the imaging console. This allows healthcare professionals to continually examine patients, thanks to the convenience and speed of remote operation.
- Workstations can re-process DICOM RAW data collected by imaging hardware.
- Healthcare professionals can remotely analyze and interpret gathered images.
So, what does this have to do with PACS and DICOM? Since the modalities must acquire and archive images for later distribution and analysis, they must interact with PACS and DICOM. The images would mainly need to be stored in the DICOM file format for smooth exchange between systems.
In the context of workstations, DICOM does not face as many functional dilemmas as PACS. For example, a hospital or clinic may face challenges with PACS, depending on their infrastructure. If each department has its own PACS infrastructure, images cannot be shared across all devices and systems. In contrast, DICOM would not be limited to specific departments if all devices are DICOM-compatible.
DICOM is More Flexible than PACS
PACS between health departments use DICOM to store and transmit medical images but can be functionally hindered by infrastructure differences between departments.
DICOM works in quite the opposite way, bringing separate systems together, especially when using VNAs (vendor-neutral archives). The VNAs decouple PACS to provide a single viewing experience instead of several different ones, regardless of the images’ origins.
This cannot be done with PACS, as it must be used with DICOM. However, DICOM can be used alongside VNA and PACS. At times, it performs better with VNA, as vendors typically agree on “the storage of DICOM images, a standard DICOM network interface, and administrative updates.” This allows the avoidance of common interoperability problems. (Source: HIT Infrastructure)
PACS Manages the DICOM Workflow, But Not Vice Versa
Although it has been demonstrated that DICOM is far more multifaceted than PACS, it can be argued that, in some cases, the two need one another equally. This primarily lies in the fact that PACS stores DICOM-compatible images and allows the execution of functions related to these images.
For a clearer understanding, imagine PACS as the “central coordinator” that hosts and oversees the following DICOM abilities:
- DICOM Grayscale standard display function (allows DICOM to calibrate and optimize images for viewing)
- De-identification, or anonymization, of medical images and HIPAA (Health Insurance Portability and Accountability Act) adherence to protect patient security
- DICOM Radiation dose structured report (a way to report a CT scanner’s dose metrics)
Although DICOM is “unequivocally the only standard for modality to PACS communication,” it still needs the PACS to execute the core workflow. PACS is one facet of the DICOM workflow that achieves the exchange of information between devices and systems. Without it, DICOM devices would not gain access to the desired medical documentation.
The Different Workflow Requirements Between PACS and DICOM
PACS and DICOM also differ in another significant way; they each have different workflow requirements. DICOM has more functionality and a simpler workflow, while PACS is more singular in function and has a much more complex workflow.
PACS requires the following components to support an ideal DICOM workflow:
| Component | Explanation |
| Source | The hardware that generates the medical image is known as the “source.” When the hardware detector recognizes the image, the data is then transferred to the computer, where the healthcare professional can view it. Upon receipt, the medical images are stored as DICOM files. |
| Medical Image Storage | The DICOM server works as a filing system that optimizes image storage organization. Depending on the type of DICOM server you are working with, you may be able to upload and share images online directly. |
| DICOM Workstation
(two variations) |
· Proprietary software: This is typically included with the source equipment and requires that the DICOM software and source equipment be used in the same place.
· Third-party software: This can be used remotely, separate from the source equipment. Hospitals with a high patient inflow would benefit significantly from this version of the DICOM workstation, as it helps speed up image acquisition, and thus, image interpretation and analysis. · Note: A PACS server should be capable of transmitting DICOM images to third-party DICOM applications. Since the DICOM receiver software is integrated into the app, the radiologist should be able to access imaging data from either the PACS server or external storage devices like CD or DVD drives. |
| DICOM File Sharing | This enables file exportation and anonymization, an essential part of distributing images for educational purposes, especially for journal publications. This prevents images from being traced back to specific patients. |
| DICOM Printer Software | When access to a PACS server is unavailable, you might want display films instead. If so, you must have DICOM printer software to print stored DICOM images. You might also need a DICOM-compatible printer as well. |
Since DICOM is not a “coordinator” but a standard for the multifaceted management of digital medical data, the workflow is more straightforward. At its core, the DICOM workflow includes the following (Source: US National Library of Medicine):
| Component | Explanation |
| Image Management | Both the study management and study component management SOP classes supply full-scale control over imaging procedures. |
| Network Communications | · Network image management: This refers to DICOM’s supervision of interactions between devices, namely sending image data and the two-step process of querying and receiving this data.
· Network image interpretation management: This defines the object and storage services to be managed and carried out under the DICOM standard. · Network print management: This allows compatible devices and associated workstations to share printers in the DICOM network. |
| Storage | Healthcare professionals can exchange DICOM files manually on storage devices like CD-ROM disks. |
DICOM Allows Image Manipulation, Whereas PACS Does Not
DICOM workstation software allows many different image manipulation options for radiologists that PACS is incapable of providing directly (Source: postDICOM), such as:
- Quality control: Even on the most basic DICOM viewers, compatible workstation software helps increase image quality by allowing the alteration of the images’ brightness, color, and contrast.
- Image manipulation: Healthcare professionals can manipulate and extract new information from medical images using advanced DICOM workstation software.
- One of the best examples of this is Multiplanar Reconstruction (MPR), where three separate files can be combined to create a 3D image.
- Pinpointing visual focus: Medical experts can better identify anatomical abnormalities based on maximum and minimum intensity projections (MIP and MINIP, respectively).
- Reports: Depending on your viewer, you may be able to generate a report directly from the transferred data and export it to a word processor.
DICOM allows for direct control and manipulation over the image and the extracted data. These controls are not available through PACS.
Below is a good video on DICOM and PACS:
In Conclusion
Although they are deeply intertwined with one another’s functionality, DICOM and PACS are two very different technologies, with separate (but related) applications in the medical field. DICOM acts as both a file format and the international communication standard through which PACS transfers medical image data, while PACS drives the DICOM workflow.
DICOM also allows direct control over the image and data, while PACS is a bit more hands-off, allowing only for the acquisition, storage, and transference of files in and between DICOM devices. Despite its significance, PACS is much more functionally limited than DICOM, as the latter can be used with other software, like VNS.
Click the following link to learn more about viewing DICOM on a Mac.
4 Ways to View a DICOM Image on Macs
Figuring out how to view a DICOM image on a Mac can be a frustrating process. It’s difficult to tell whether the inability to open your important scans is the result of a faulty computer, a defective file, or just a bad internet connection.

Like most files, it seems like DICOM files should just open as they are, but you’ve probably realized that it isn’t so simple.
There are many ways to view a DICOM image on a Mac: You could insert a disc containing the photos into your computer; you can also review DICOM images from an online database. However, the most common method is installing a DICOM viewing software for easy viewing and editing or using cloud-based PACS.
While there’s no wrong way for viewing DICOM images, some methods may be more attractive to you, depending on your needs. There are many different versions of the software that you can download to view DICOM images on a Mac, each coming with their own perks and tools.
DICOM Image Files
DICOM, or Digital Imaging and Communications in Medicine, are images that contain important medical information such as x-rays or CAT scans. They exist as both a file format and communications protocol, meaning that they store patient information and images in the same file.
In the 21st century, technology has crept its way into all aspects of life, including medicine. DICOM files were created to maintain standards and uniformity across different categories of medical images.
DICOM images are commonly used in medical applications, such as in med school, and in hospitals for sharing digital information with clients and patients. They are the file type in which people view important documents.
How to Access DICOM Images on a Mac
DICOM images cannot be opened like regular images on laptops or phones like other file types; DICOM images are very particular in their accessibility. Fortunately, there are various ways you can view your DICOM image on your Mac, but which method you determine to be the most feasible depends on your circumstances.
CD/DVD
Whenever you finish getting a procedure at the hospital that requires imaging to be done, your doctor will usually give you a disc that you can insert into your laptop or computer, allowing you to view the DICOM images/files for your leisure. On the CD, there can sometimes already be a medical imaging viewer included, but if not, some CDs will come with a link to the application that allows you to download an appropriate DICOM viewer.
Online Databases
Online databases serve as great options for students who are interested in learning or people who are simply curious. However, not all of these options are free for everyone, and they tend to be restricted to those with an account; some of the features may be locked behind a paywall, or your ability to access these files can be altogether prohibited unless you provide valid credentials.
DICOM Library
The DICOM Library is a popular database to view DICOM images from. It’s a place where you’re allowed to upload DICOM files from your laptop/mac (as long as they’re anonymized beforehand) and view the image without needing to download a DICOM viewing software.
Within this site, you’re allowed to modify the image and upload different photos to different screen quadrants.
For example, if you’re interested in an in-depth look at brain scans where you need to see multiple perspectives at once, the DICOM Library allows you to get a birds-eye view of scans and precise measurements of whatever it is that you’re looking at. You can even download the image as well.
OsiriX Viewer
Another online database for your viewing needs is OsiriX Viewer. With a valid account and access to a premium membership, you’ll gain access to the anonymized datasets and DICOM images that this site provides. It’s explicitly for researching and teaching purposes only, so if you fall within the categories of student, curious onlooker, or professor, then this option is great for you.
OsiriX Viewer is compatible with Mac as well, so you can view any DICOM images of your choosing. However, if you don’t have a DICOM image viewing software already installed on your device, then you’ll find yourself unable to open the files from this site.
How to View DICOM Images on a Mac
While accessing DICOM images is important, depending on where and how you access the photos, viewing the pictures on your Mac can be another issue. There are two ways you can view DICOM images: through “proprietary software” or third-party software.
Proprietary Software
Proprietary software is only available to medical imaging devices. It’s typically created by the same manufacturer and allows users to reconstruct and view the image at the same workstation immediately; this means that the photos can only be reviewed in the same location as the hardware.
While images can be transferred to an additional device through export, usually after this process is done, the ability to view and edit the original image is completely lost.
Without a DICOM CD that comes with a link to an image viewing software or proprietary software, chances are your Mac isn’t able to load and view DICOM images properly. With that being said, you’re going to need to install software that allows you to view any DICOM images you have on your Mac computer or laptop.
Third-Party Software
There are various third-party applications you can choose from when it comes to DICOM image viewing. There are both paid and free versions available, with paid versions typically offering more or enhanced features.
Which application you choose to use ultimately depends on how you plan on using the software; different people use DICOM images for various reasons. For example, an anatomy professor will have different needs than a medical professional.
DICOM image viewers generally allow users to:
-
- View images
-
- Export images (for teaching purposes or giving presentations)
-
- Save and store files
-
- Share images with other healthcare professionals
-
- Access Mini-PACS servers
-
- Research images and files
(Source: Post DICOM)
These applications are practically limitless, with many third-parties developing their own versions of the same DICOM image viewing function.
Below is a list of the different viewing software available for Mac devices:
OsiriX MD DICOM Viewer
OsiriX MD is a suitable option for practicing health professionals who need something fast and reliable for their work. Cleared by the FDA as a Class II Medical Device, OsiriX is renowned as the most widely used medical image viewer globally. Its overwhelming popularity is a testament to its quality.
After a quick five-minute installation, you’ll have access to a full workstation with the ability to access scans such as MRIs. Additionally, it lives up to DICOM viewing standards, providing 2D viewing, 3D and 4D navigation options, and many more features.
There is a free version of OsiriX MD, with limited features and slower processing, while the full version has a monthly fee to use.
Horos
Horos is designed to be a “mobile” application, offering similar features as the highly acclaimed Osirix MD mentioned above. The app runs successfully on Mac OS versions 10.8 or higher, so if your Mac isn’t up to date, you might want to consider running a different, less technologically demanding viewing software for your needs.
Horos has various tools that allow you to manipulate images, so if you’re a professor needing to make a presentation, this is a great option for you. It has the added benefit of coming with fleshed-out, comprehensive tutorials for using the software, so it’s also beginner-friendly.
Also, Horus comes with an optional plug-in that allows you to upload your images to Radiopedia, arguably the best free online resource for case studies and articles in radiology. Horos gives you the ability to:
-
- Manipulate and measure your images’ specs
-
- Render surfaces
-
- Use image fusion for scans
Post DICOM
Post DICOM is easily one of the best software to have downloaded on your Mac because it offers the majority of DICOM viewing/editing features not found on other applications. Not only is it available for Mac, but its compatibility extends to any operating system running Windows as well. It also offers convenience that many other DICOM viewing software don’t by being available for mobile iOS devices.
Post DICOM allows for image manipulation, 3D reconstruction, MIP, MRP, and image fusion. It also comes with an additional 50GB of free cloud storage; this is great because DICOM images are typically high-quality and take up a lot of memory to store.
3Dim Viewer
3Dim Viewer is a free application available to download on Mac OS X and Linux systems. This is a relatively basic DICOM viewing software intended only for those with a casual need for image viewing. It comes with a variety of features such as:
-
- 3D visualizing DICOM images
-
- Multiplanar and orthogonal views of images
-
- Ability to adjust density window
-
- Measuring scan density and size
-
- Importing DICOM datasets
-
- Rendering 3D surface and volume
-
- Tissue segmentation
-
- Surface modeling
(Source: 3Dim Viewer)
Note: 3Dim Viewer requires a solid graphics card to take advantage of its unique features, such as rendering 3D surfacing. For that reason, this application is only suitable for devices with an updated graphics card, which may or may not apply to your Mac device.
Miele-LXIV
Available for free installation from the Mac App Store, Miele-LXIV is a DICOM viewing software featuring an intuitive GUI, allowing for DICOM image displays with an accessible interface. It will enable you to view multiple layouts and export videos or images.
Miele-LXIV also includes multiple hardware improvements for Mac to improve your DICOM image viewing experience, such as:
-
- Multi-core processor support
-
- Asynchronous reading
-
- OpenGL for 2D Viewer and all 3D Viewers
-
- Accelerated graphics board, with 3D texture mapping support
(Source: Medevel)
Miele-LXIV is perfect for developers as well, as it grants the ability for you to build your own plug-ins because of its built-in architecture support.
SMILI
SMILI, which stands for Simple Medical Imaging Library Interface, is an open-source, easy to use DICOM program built to work on all devices, not just Mac OS. SMILI possesses many of the same features as the other applications listed here.
For one, it grants you control over measurements and editing DICOM images, as well as other advanced display options. There are easy drag and drop options for dealing with models and surfaces. SMILI also allows you to anonymize the image in question, which is important for working on, viewing, and presenting scans to other medical professionals or classes.
Other features of SMILI include:
-
- Image processing
-
- Surface/model processing
-
- Surface/model visualization
-
- n-D image visualization
-
- Deformation field visualization
-
- DICOM and DICOM RT support
-
- Shape modeling
-
- Python scripting
-
- Polygonal contouring
-
- Animating surfaces
(Source: Source Forge)
Using Cloud-Based PACS to View DICOM Images
PACS, otherwise known as a Picture Archiving Communication System, is a medical imaging technology initially designed to surpass physical medical imaging limitations.
PACS grant heightened efficiency in retrieving files. It mainly functions as a superior option for storage and makes it possible to retrieve images from multiple sites. PACS usually have display stations, which are external devices—specifically designed with confidentiality in mind to—view photos and videos. PACS systems are linked to a computer network that connects the system’s hardware and software components.
Cloud-based PACS overcome the challenge of the ever-increasing size of data and demand for hard drive and memory space. A decade ago, the number of images taken for a thorax CT amounted to 30-50 images and resulted in a measly 15-25 MB of space needed; today, the number of pictures taken has increased to up to 5,000 photos, demanding a greater 250-2,500 MB of space required.
Benefits of Cloud-Based PACS
Cloud-based PACS provides the storage that PACS normally offers but from the cloud, freeing up room for devices such as your Mac to act as display stations for viewing important data. Some of the benefits of using cloud-based PACS include, but aren’t limited to:
-
- Safer Storage: Ordinarily, since PACS are connected to the hardware that creates DICOM images, if something were to happen to the hardware, then so would the storage for the data. When information is saved to the cloud, you never have to worry about this issue.
-
- Easy Access for Macs: With everything in the cloud, doctors, patients, and anyone else granted access can view data outside of the hospital. As long as you have an internet connection, you can access and view DICOM images.
-
- Relatively Inexpensive to Use: Depending on its complexity, traditional PACS can cost a minimum of $5,000 for a simple system and easily up to $100,000 for a complex system. Cloud-based PACS typically offer a free trial version of the system, then more affordable monthly or yearly subscription payments.
-
- No Installations Needed: With a regular DICOM image viewer, you would have to either install the software on your Mac or download an app for your devices. With Cloud-based PACS, there’s no need for extra installations. A cloud-based DICOM viewer makes viewing DICOM images on Macs—and just about any device with a suitable internet connection—so much more accessible.
Cloud-Based PACS Platforms
Similarly to DICOM image viewing software, there are many different options available to you if you’re interested in cloud-based PACS:
- Post DICOM – In addition to the 50 free GB of storage offered with their image reading software, you have the option of expanding your storage as needed with Post DICOM’s different storage plans. Starting at $39.99 for 200 GB of cloud storage, you have the option of increasing the storage space, additional users, and monthly shares with each subsequent plan. Each plan comes with a free trial as well.
- Quickpacs – Quickpacs is a premium cloud-based storage platform for your DICOM image needs and works on Mac and PC. Your images will be available all the time, and Quickpacs offer a 24/7 customer support line with their service. They also provide individual image archiving. Quickpacs also has a free trial, though pricing is only determined after you’ve received a quote for your needs.
- Cloud 9 PACS – Offering a similar cloud storage solution as the previous two options, Cloud 9 PACS has a flat rate charge if you’re looking for an affordable option.
Below is a good video on PACS:
Conclusion
Accessing DICOM images on a Mac can be done through DICOM CDs post-operation or online DICOM databases.
Viewing DICOM images, unless you’re able to export a file into a more accessible file type, requires you to download a DICOM image reader software. If you’re not interested in that, there is also the affordable option of subscribing to a cloud-based PACS, which serves as both a storage solution and a DICOM reader.
Ultimately, when choosing a DICOM image software, it’s best to look for something that suits your specific needs as all image readers and cloud storage options offer something slightly different.
Click the following link to learn how to email DICOM images.
Does Solidworks use NURBS?
SolidWorks is a favorite modeling software in medical 3D printing, with unique solutions ranging from dental implants to prosthetic limbs being brought to life using this innovative suite. If you are a 3D modeler with experience in the NURBS modeling process, you may be wondering if you can use SolidWorks to make creations using NURBS.

SolidWorks does use NURBS—but that is not the process for which it is most well-known. SolidWorks is a modeling software specializing in parametric, history-based modeling, which differs from the direct, free-form surface modeling that has made NURBS a household name in 3D manufacturing.
Although SolidWorks does not have a long history as a NURBS-based software, it has responded to consumer demand for surface modeling options. Starting with its software update in 2017 and for all subsequent versions, users have the option of solid modeling or NURBS-based surface modeling when creating objects within the suite.
What is NURBS Modeling?
Non-uniform rational basis spline (NURBS) is a mathematical model used in computer-animated design (CAD) to create precise curves and surfaces for various shapes within a model that may be later used for 3D printing.
The advantage of NURBS modeling for medical purposes is that it allows for surfaces to be created that are not currently in existence. Its use of mathematical formulas to create curves and surfaces enables engineers to model unique and proprietary shapes; this is extremely advantageous when making objects such as custom prosthetics.
What is Solid Modeling?
Solid modeling—the process for which SolidWorks is named—is a parametric, or history-based, process. According to Kasten Marine Design, solid modeling assigns all its parts thickness and mass properties, along with parametric relationships to other parts in the model. As such, it is a much less “on-the-go” process than NURBS modeling.
Solid modeling’s strength lies in helping engineers create complex designs by using a “logic tree” that establishes and preserves complex relationships among the various parts of the model.
While it can be difficult for users to establish these complex relationships and form a logic tree before starting work on the model, the modeling process becomes infinitely easier once these relationships are created. With the proper model in place, creating complex products takes care of itself.
For example, when modeling the forearm, an increase in the radius would automatically be accompanied by the appropriate shift in the ulna thanks to the relationship established in the logic tree.
Does SolidWorks Use Both Solid and NURBS Modeling?
The most recent iterations of SolidWorks use both solid and surface (NURBS) modeling. With advances in technology, SolidWorks is no longer confined to being a solid modeling software industry leader.
Let’s look at some of the features modern designers can expect when using SolidWorks:
Creation on Multiple Surface Levels
According to Jeffrey Opel, professor of CAD/CAM and 3D printing at Tarrant County College, one of the most significant drawbacks of previous versions of SolidWorks was the inefficiency in creating surface-level geometry on shapes other than spheres or cones.
Now, surface geometry can be created in a few simple steps using the wrap feature, which allows you to drag along the desired NURBS points, drop the points once the desired curve is created, and project the geometry to the object’s surface.
Offsetting 3D Curves
SolidWorks users’ ability to offset a curve on the surface to create a unique inlay is another strong feature of the latest versions of the software. These offsetting 3D curves can be used to create raised and layered objects.
Solid Modeling vs. NURBS Modeling
Although many contemporary 3D modeling suites, including SolidWorks, will have solid and surface modeling capabilities, it is important to contrast these two primary forms of 3D models to have a clear understanding of when to use each for medical purposes.
In general, the solid models that SolidWorks is known for have the following characteristics:
- All parts of the model have a thickness and are assigned mass properties
- Operation in a history-based environment that requires the planning of features, constraints, relationships, and dependencies within the model
- A historical genesis, or logic tree, is maintained so that changing one of these predefined parameters changes all related and dependent portions of the model
- Direct changing of the model will also change the underlying constraints that guide the model
Surface modeling, on which the NURBS process is based, will have a different set of characteristics, including:
- The use of zero-thickness surfaces that have no mass properties
- Operation in a direct, free-form environment, in which a more flexible manipulation of the model is made possible without being tied to predetermined constraints
- When constraints are created, they do not affect the user’s ability to drag, pull, or otherwise manipulate other parts of the model
Based on these differences, solid modeling is best for designers who want accuracy and precision in replication. In contrast, surface modeling is best for those professionals who wish to have the creative freedom to design something completely new. Both functions are relevant to the medical field, making the updated SolidWorks a strong modeling software choice.
How SolidWorks Can Benefit a Medical Modeler
From start to finish, the combination of solid and NURBS processes available in SolidWorks provides practitioners with a unique blend of flexibility and precision when modeling medical implements. These capabilities make SolidWorks a valuable tool for practitioners, along with several areas in 3D medical manufacturing.
Design and Engineering
The SolidWorks platform allows teamwork and collaboration among many designers. It also allows for feedback from management and shareholders.
Using NURBS curve creation, engineers can quickly put new ideas into motion and layer and build upon 2D sketches. The solid modeling framework also lets the team quickly reproduce successful projects and keep new updates on a scale.
Manufacturing and Production
Files from SolidWorks can be extracted into several formats to ensure compatibility with a wide variety of machine printing devices; this allows for maximum efficiency and precision during object creation.
Service and Management
SolidWorks software allows engineers and practitioners to test their working products against the models. If the device is not functioning as planned, users can go back into the model and see which elements of the design affect operations and service these areas to improve future prints. The software also gives the user information as to how to maintain the printed objects properly.
Marketing and Sales
One of the most powerful aspects of SolidWorks is its capabilities in marketing and sales. Professionals can pitch proposed devices to customers while still in the model phase; this gives clients the chance to view the product in action beforehand.
The software can also use NURBS processes to make customized changes based on feedback received during the sales process.
Editing and Continuation
Using NURBS processes, the user can make changes to the current design without disrupting the overall model. If the product is successful as-is, duplicates can quickly be created or scaled to new dimensions.
Below is a good video on Solidworks modeling for medical product design:
Conclusion
Although SolidWorks is not known as a NURBS platform, the most recent iterations of the software allow for surface modeling that uses NURBS concepts. Therefore, when purchasing the updated software versions, users can expect to have both the solid modeling capabilities—for which SolidWorks is named—and the surface modeling functions characteristic of the NURBS process at their disposal.
The solid modeling capabilities are useful when building objects that require relationships and constraints between parts, while NURBS is more open and free-flowing to allow engineers creativity when making proprietary designs.
Click the following link to read about NURBS vs Polygons.