
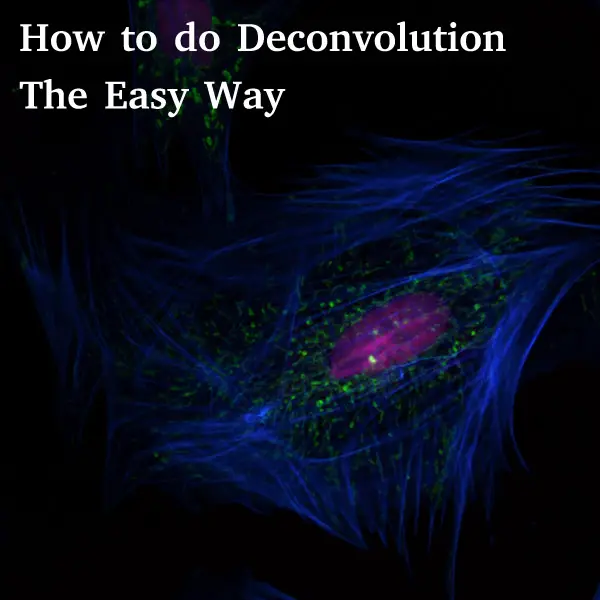
If you are having problems with blurring in your microscopy images, going through deconvolution is highly likely to improve your results.
Deconvolution is not as difficult as it sounds, you just need to understand a few basic concepts and know which software can perform the task. This article will answer such questions.
As a general rule, to perform deconvolution you use a calculated theoretical or extracted point spread function from your microscope, which you then apply in a deconvolution plugin to your image or image stack. The result which may take several iterations is a deconvolved image with less blur and more accurate object dimensions for data analysis.
But let’s start at the beginning by getting familiar with the terms and then describe the steps.
What is deconvolution?
Just to be on the same page if anyone is new to the term deconvolution, here are the basics needed to perform the process. Deconvolution is a computationally intensive process of clearing up a microscopy image which has undergone convolution or distortion due to the objective’s limited aperture. It makes the image appear closer to the actual real life subject being viewed. Deconvolution can involve increasing resolution, contrast, and deblurring.
Deconvolution can be used on images from various types of microscopes, including confocal, multi photon and light sheet. In addition, it can improve the quality of images which were affected by motion during capture. Deconvolution is performed on an entire Z series of images.

While it is said that the pinhole and nature of the confocal microscope eliminates the need for deconvolution later on by getting rid of the signal from other focal planes, this is often not the case. True deconvolution uses algorithms on existing images and can likely help with the quality of confocal photos. In confocal, deconvolution helps with elongation of spherical objects in the Z axis.
Deconvolution is important whenever image analysis will be involved (and in science that is most of the time). If not performed, the results of image analysis may contain a systematic error.
What is a Point Spread Function (PSF)
The Point Spread Function is a function or shape of your optical system which describes the convolution. It does so by describing the path light from a point source of light takes through the microscope. It has a different shape depending on the type of imaging used. The point spread function is much wider for air lenses and that is why they have lower resolution unlike oil immersion lenses.
If the point spread function can be measured, the image can be corrected. During convolution, the point spread function is applied to every point in the sample which as a result gives the final, altered image. Anotherwords the image you observe is a product of the point spread function times the real object. Deconvolution reverses this.
To perform deconvolution you need to generate the point spread function for your specific system. There are different ways to do this, discussed later.
Here is an online calculator if you are interested in calculating a PSF (not needed for the process of deconvolution itself).
2D or 3D Deconvolution?
Deconvolution can be performed on single images or 3D stacks (file with multiple images at different depths). 3D deconvolution is more computationally intensive. However, as with many procedures that take more time, the results are often more accurate. 3D deconvolution works through iterations with better quality images resulting from each subsequent cycle. Blur is treated on every layer available.
In terms of what you need for 2D vs 3D deconvolution, for a 3D stack you have to enter the Z spacing of your stack as well as the number of images in stack.
When you are acquiring your 3D stack, be sure to go beyond your object of interest so that deconvolution results are the best possible. This is because you want to cover the PSF of not only the subject of interest but also other points in the slide.
What you need for deconvolution
To perform deconvolution you need one of the following:
- image/stack of point like objects/beads taken on the same scope as your image of interest to extract the PSF via a plugin
- full specs of the imaging system/scope used including excitation/emission wavelength, refractive index of lens, and aperture to compute theoretical PSF via a plugin
Plugins for deconvolution
There are several programs and plugins out there specifically made for deconvolution which will make the process much easier. Some work with ImageJ, others with Matlab, and still others are stand alone Java programs. In certain cases, a single program can run on all of these. You can experiment with which ones work best for you.
Point Spread Function Plugins:
PSF Generator
Mentioned earlier, PSF Generator is a Java program that can be used to generate a point spread function. It has more than a dozen models and can work with ImageJ as a plugin.
Diffraction-PSF-3D plugin
Diffraction PSF 3D creates a theoretical z stack of the theoretical point spread function. All you need to do is enter data into various windows based on the raw image, including specs such as slice spacing, image pixel spacing, width, height, wavelength used, numerical aperture and index of refraction of your media.
Deconvolution Plugins:
Parallel Spectral Deconvolution
Parallel Spectral Deconvolution is an ImageJ plugin for deconvolution which takes advantage of higher spec hardware and multi core processors.
Deconvolution Lab
DeconvolutionLab is nicely laid out open source GUI plugin with various deconvolution algorithms including Naive Inverse Filter, Tikhnonov Inverse Filter, and Richardson-Lucy. It can be linked to ImageJ or Matlab and runs as a stand-alone.
Iterative Deconvolve 3D plugin
The Iterative Deconvolve 3D plugin is an ImageJ plugin for both 2D and 3D deconvolution. It is iterative and has a built in Wiener filter as a preliminary step. The plugin uses a point spread function image Z stack. It is an iterative plugin which works much better for noisy microscopy images.
Deconvolution in ImageJ
Deconvolution may be performed using ImageJ and associated plugins adequately depending on the condition of the source material and other factors. It is best to try it and see if it meets your expectations.
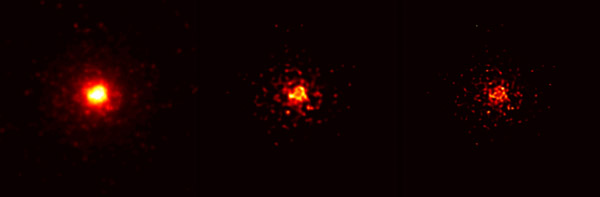
“File:Blind deconvolution illustration.png” by Huo Zhuoxi is licensed under CC BY-SA 3.0
Keep in mind that some plugins for deconvolution only work on grayscale images. If you are using one of these plugins, you need to go in ImageJ to Image/Type/8 bit to convert your image to grayscale. If you have a color image, you just have to split the color image into a layer for each color channel and then put it back together after the deconvolution is done.
This is easier than it sounds. With color image open, go to Image/Color/Split Channels, save the resulting images with names to remember which was which color, deconvolve them separately as described below, then go to Image/Color/Merge Channels.
Below are steps for performing deconvolution in ImageJ using theoretical PSF:
-Open your image dataset
-Go to plugins/3D/Diffraction PSF 3D
-Enter your microscope and specimen values to create PSF
-Go to plugins/Parallel Spectral Deconvolution and choose 3D or 2D
-Choose source image and created PSF file
-Select options such as algorithm (experiment with it) and click Deconvolve
-Compare deconvolved slice with original one
-Repeat deconvolution with different settings if necessary
Below are steps for performing deconvolution in ImageJ using PSF extracted from a stack:
-Open your stack of point like objects/beads
-Go to plugins/PSF Generator and run it
-Save PSF
-Open your image dataset
-Go to plugins/Parallel Spectral Deconvolution and choose 3D or 2D
-Choose source image and created PSF file
-Select options such as algorithm (experiment with it) and click Deconvolve
-Compare deconvolved slice with original one
-Repeat deconvolution with different settings if necessary
It is that simple. In addition to experimenting with the various algorithms, you can try different plugins and free vs commercial software packages if you are not happy with the results. So basically you can substitute plugins in the steps where plugins are mentioned to see what works best for you.
Deconvolution speed
Deconvolution can be very hardware intensive. The deconvolution process takes several iterations. You may need a high spec workstation and GPUs for certain stacks and deconvolution procedures. It also matters which software you are using. A GUI heavy program with easy to navigate graphics may not be your optimal solution, keep that in mind.
Below is a useful video on deconvolution from the Howard Hughes Institute which gives a more detailed explanation:
I hope this article made deconvolution easier to understand and took away any fear of the process.
Click the following link to learn how to improve MRI quality.
Recent Posts
Mastering point cloud to 3d model conversion can feel like translating whispers from another dimension into vivid sculptures. You've got this cloud of data points, a chaotic concert of coordinates...
Let's say you've got a drawing, something you sketched out during a burst of inspiration, and now you're itching to see it leap off the page into three dimensions. Well, that’s exactly what I did...