
If you work in medical animation, you will likely be charged with creating 3D models of the various organs, tissues, and nerves in the human body. Whether these models are used for illustration or will be the blueprint for a 3D print, it is vital to make the shapes as accurate as possible.
Therefore, when creating the models, you may wonder whether it is better to use CV or EP curves.
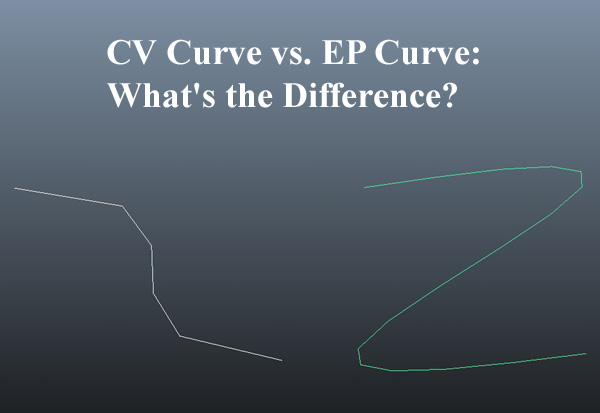
The only difference between the CV curve or EP curve when creating 3D models is where points are placed. The control vertices (CV) will be points outside the curve line that help control the figure’s shape, while the edit points (EP) will be points along the curve that become set as they are placed.
In general, using CV curves will give you better control when making your lines, as the software will hold the vertices in place and allow you to shift the curve without pulling your previous work from its anchor. EP curves, on the other hand, do allow you to plot specific points along the edge of the shape, but you will be left “eyeballing” it a bit more, which can be a bit difficult if precision is your end goal.
CV Curves vs. EP Curves in 3D Modeling
While there are several ways to draw curves in modern 3D software (Maya is one of the most prevalent software options used for creating 3D models), the two most widely used methods are by employing CV curves or EP curves. CV curves use CVs or control vertices which often lie away from the curve, while EP curves use edit points directly on the curve.
When creating a CV curve, you have to choose what curve degree/smoothness you want to use, such as linear or cubic, as well as the knot spacing. When creating an EP curve, you also will need to choose the curve degree and knot spacing, although you will have a little less options.
Although the CV and EP methods are slightly different, they both can get you to the same place. The choice of which type of curve to use depends mainly on the preference of the user.
The breakdown in the next sections can give you a clear idea of how the process of drawing with each type of curve differs.
A Note Before Continuing: In the language of 3D modeling, the shapes you create will be referred to as NURBS or Non-Uniform Rational B-Splines. In traditional geometry, you will hear terms such as edge, side, or polygon, but a lot of 3D modeling software uses the phrase “NURBS” as a broad category to define the lines, curves, and models you make. NURBS modeling is based on curves, whereas polygonal modeling is based on straight line segments and polygon faces.
How to Create a Shape Using CV Curves
When opening your 3D modeling software, there will be several ways you can create NURBS.
You will initially be met with a blank plane that features an orthographic grid (a fancy term for a standard (X, Y) grid). This will be the canvas on which you can create your shape.
If you want to create your NURBS using CV curves, take the following steps:
- On the ribbon at the top of your software, click the option that says “Create.”
- This will give a dropdown menu of the various types of tools used for creating NURBS. Typically, the “CV curve tool” will be the first option.
- After clicking on the CV curve tool option, the curve settings will pop up. For starters, make sure all settings are reset to default as you get a feel for how to draw with CV curves.
- A small crosshair will be present on the grid; this will be your tool for plotting your control vertices.
- Use your crosshair to plot the various CVs of your NURBS. You will need at least four points when plotting with CVs to draw your curve successfully.
- You will notice that your curve only intersects with vertices at the first and last points. The other vertices sit on the outside of your curve and “control” your curve’s angle and/or degree as you drag it along the last point. To give yourself more control of the shape, plot more CVs.
- Once you have a curve you like, press “Enter” to finalize your creation. The CVs will disappear, and you will be left with a solid line denoting your curve.
At any time, you can click on your curve to reactivate it if you need to make any changes or add some additional CVs.
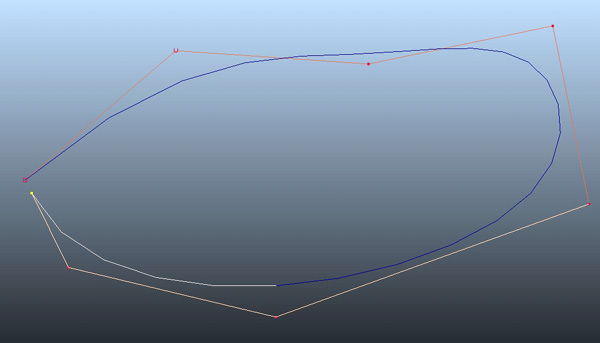
The important concept to remember when drawing with CVs is that all the points between the initial anchor point and the endpoint are not actually along the curve line but are simply vertices on the outside that influence the curve’s shape.
Here is a video illustrating this:
How to Create a Shape Using EP Curves
The other widely-used method for creating NURBS in 3D modeling software is through edit points, or EPs.
Unlike CVs that plot points outside of the curve line to influence the curve shape, edit points will be points along the curve line.
If you want to create NURBS using EPs, take the following steps:
- On the ribbon at the top of your software, click the option that says “Create.”
- This will give a dropdown menu of the various types of tools used for drawing NURBS. Typically, “EP curve tool” will be the second option.
- After clicking on the EP curve tool option, the curve settings will pop up. Like with CV, just use the default settings as you get a feel for how to draw using EP.
- A small crosshair will be present on the grid; this will be your tool for plotting your edit points.
- Use your crosshair to plot your EPs. While CVs require at least four points to create a curve, you only need to plot two EPs when using this method.
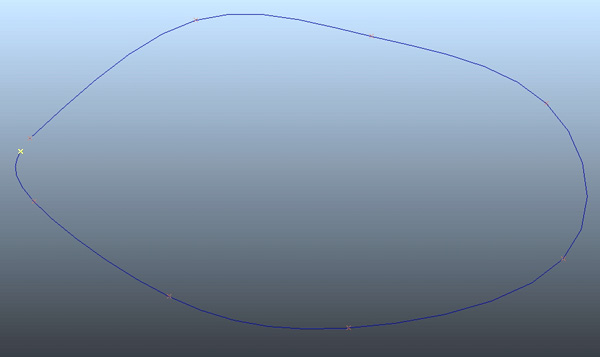
- While the CVs only intersect with the actual curve line at the first and last point, every EP you plot will be along the curve line.
- When you have a curve you like, press “Enter” to finalize your creation. The EPs will disappear, and you will be left with a solid line denoting your curve.
As with drawing using CVs, you can click on your curve at any time to go back and make further edits.
The primary concept to note when drawing with EPs is that as each point is plotted along the actual curve line itself, it can be a little more challenging to get a smooth, gradual curve. You may need to plot a comparatively high number of EPs to gain the same effect attained when drawing with CVs.
However, if pinpoint control is what you are looking for, using EPs may be the best choice.
Here is a video illustrating this:
Conclusion
When creating 3D medical animations, you will likely have to use Maya or some other 3D software to create your models. When drawing organs, nerves, or other bodily tissues, you will probably choose between either CV curves or EP curves to help you in your creation.
For the most part, both curve options will get you to the same place, with only slightly different means of getting there.
CV curves will require the user to plot at least four points on the orthographic grid, with only the first and last points intersecting with the curve line. The points in between will serve as anchors on the outside of the line that hold the vertices in place as you drag the endpoint and define the shape of your curve.
EP curves can be formed from as little as two points, with each subsequent point remaining on the curve’s actual line. While this creates a more literal basis for drawing a line, it can be slightly more difficult to soften the curve compared to using CVs, possibly requiring more points to be plotted.
In the end, there is no right or wrong method to use for creating your image, with the choice boiling down to the personal preference of the user.
Click the following link to learn the difference between NURBS and Bezier.