
Biology as a branch is a huge field of study and therefore it is divided into many branches that deal with different areas of study. Microbiology and molecular biology are two such fields of study.

So what’s the difference between microbiology and molecular biology?
Microbiology is the field of science that deals with the study of microorganisms like bacteria, viruses, fungi, prions, and Protozoa. On the other hand, molecular biology deals with the study of the molecular basis of the cells, especially the study of DNA and proteins.
Macromolecules are the heavy molecules within a cell. DNA, RNA, proteins, lipids, and carbohydrates are the macromolecules, and molecular biology studies the interaction of these macromolecules inside a cell and the various processes they are involved in. Things like the location of a gene on a specific location of a chromosome, the synthesis of specific proteins, and what they all do— all come under molecular biology. There are many modern techniques of molecular biology that we currently use in various fields of study.
Some of these techniques are:
- PCR (polymerase chain reaction)
- Various blotting techniques (Western, Southern, Northern, Eastern blotting)
- Microarray techniques
- Probing
- Gel electrophoresis
- Allele-specific oligonucleotides.
From a medical point of view, molecular biology helps understand the molecular and genetic basis and diagnosis of various diseases. Additionally, newer methods of treatment like gene therapy also use molecular biology methods to treat specific conditions. For example, Zolgensma is a gene therapy medication for spinal muscular atrophy (SMA)— an incurable condition previously can now be treated with this gene therapy. Although affordability is a big issue in gene therapy currently, it is a great achievement that was possible because of molecular studies of the cells.
Microbiology on the other hand deals with the organisms that can only be seen under the microscope. It deals with studying the structure of an organism, its behaviour, its survival methods, its mechanism of pathogenicity, reproduction, mutations, etc. Microbiology is an essential branch to understanding any organism and plays a very important role in understanding the behaviour of an organism inside and outside the host’s body and how it may cause disease— making it an essential branch for medicine and research.
Is Molecular Biology Harder Than Microbiology?
Whether molecular biology is harder or not is a subjective matter. At the end of the day, it all comes down to the basics and the interest to learn. Microbiology is way more vast though and will require knowing molecular biology and cellular biology aspects as well.
In simple terms, microbiology is a vast subject, whereas molecular biology is a very niched branch of biology. The application of molecular biology is in both microbiology and biochemistry.
Learning and remembering various steps in the molecular processes can be a tedious job. Since it requires a lot of memorization of various pathways and processes, people who are not that great at memorization might find it challenging. But the same is the case with microbiology. A lot of memorization is required in this branch as well. However, if you have an interest in either of the subjects, this is something you’ll learn to enjoy and is not a deal breaker.
Microbiology is a vast branch and you’ll have to touch on molecular and cellular biology, in addition to other aspects of the various microorganisms, like their pathogenicity, life cycle, reproduction, culture, reactions they cause in a lab setting, differences between various species of organisms, etc. You may find some parts of microbiology easy and some challenging.
So, speaking in terms of which is harder— microbiology is harder than molecular biology. This is because you’ll have to study a lot of individual microorganisms (bacteria, viruses, Protozoa, prions, fungi), their various species under a genus, their similarities, their differences, how to grow them in the lab, what reactions they cause, and a lot more. It’s a much more bulky branch when compared to molecular biology.
In terms of picking the branch as a field of study, it’s better to keep in mind what kind of career is desired. Both microbiology and molecular biology will allow you to work in a lab. So, taking a few classes in each might help you figure out whether you enjoy learning about microorganisms as a whole or if you are interested only in the molecular and genetic aspects of cells.
Which has a brighter future: Microbiology or Molecular Biology
Molecular biology is a relatively newer branch of biology and has a lot of possible applications that need to be explored, especially in the field of research, pharmaceuticals, and medicine. So, the future of molecular biology is pretty strong.
That said, microbiology is going to be around too. Its applications are in the field of medicine, pharmaceuticals, and research as well. We are always going to share this planet with microorganisms and that makes microbiology an essential field of study to understand the good, the bad, and the ugly of these microscopic organisms.
In the most recent turn of events, microbiologists quickly studied the coronavirus (SARS-CoV- 2) involved in the COVID-19 pandemic. Based on their findings the origin, pathogenicity, infectivity, how they cause infection, and the mutations were understood. It was based on microbiological and molecular findings rapid development of vaccines was possible.
With the advancement of technology, it is expected that molecular biology studies and techniques may become a more commonly used method for understanding various diseases and even for treatment. That said, both microbiology and molecular biology are essential branches of science and both have bright futures.
Is Molecular Biology Same As Biochemistry
No, molecular biology is not the same as biochemistry. However, molecular biology has applications in biochemistry. Just like microbiology, there is some overlap.
Biochemistry is a broad subject, just like microbiology. It deals with the chemical processes that occur in any cell/organism. For example, how the metabolism of various macronutrients happens, the synthesis of proteins, the breakdown of nucleic acids, chemical processes behind the survival of any cell, biochemical changes/differences in different disease conditions, etc. Biochemistry is a broader field of study, and molecular biology has some applications in it.
Cell Biology Vs Microbiology
Microbiology is the study of microorganisms. On the other hand, cell biology is the study of cells irrespective of species (plants, animals, microorganisms). The structure of the cells and the various mechanisms that occur in the cell as a whole are studied in this branch of biology.
Cell biology is again a niched-down branch of biology when compared to microbiology.
Microbiology Vs Molecular Biology Salary
As per the US Bureau of Labor Statistics, the median salary of a microbiologist is around $79,260 per year. The range is usually between $47,000 to $136,000– depending on the experience level.
There is no such data available for the salary of molecular biologists from the government. But unofficially, the average salary of a molecular biologist is around $63,000 per year, and ranges between $45k to $95K per year, depending on experience.
Microbiology Vs Molecular Biology: What You Should Remember
Microbiology is the study of microorganisms, whereas molecular biology deals with the DNA, RNA, and proteins within the cell. Both molecular biology and microbiology are interesting fields of study. Both have applications in the field of medicine, research, and pharmaceuticals, and therefore both have a good future in terms of scope.
You can see in the following video what molecular biology involves:
You can see the following video to get an idea of how microbiological studies are done:
Click on the following link to learn about histology vs pathology; their similarities and differences.
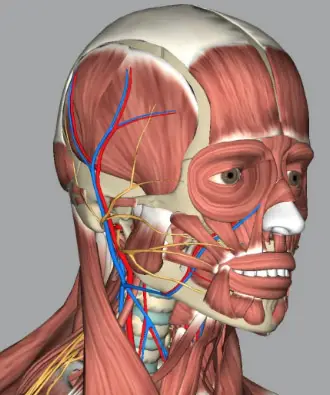
What are the Best 3D Anatomy Apps and Why (Free and paid)? A Review
Anatomy can be tricky to learn and remember. The most important factor when it comes to learning anatomy is the visual aid. Seeing the organs or the structures either in the cadaver or in the images is essential for understanding and remembering anatomy in the best possible way. However, cadavers may not always be accessible and images do not give a 3D representation of the body part.
The role of a 3D anatomy app comes into play here— accessible any time of the day and in 3D form. It is like having a digital cadaver at your fingertips. Below are the best free and paid 3D anatomy apps available on the market today.
I have chosen these apps based on their ease of use, graphics, content quality, availability of models, availability on multiple platforms and other factors I mention in the article. Having experience with both studying cadavers in medical school and the creation of virtual 3D anatomy models, Im qualified to review 3D anatomy apps. Read on to learn why these are the best apps out there for 3D anatomy.
11 Best Paid And Free 3D Anatomy Apps Are:
- Essential Anatomy
- Skeleton | 3D Anatomy
- Human Anatomy Atlas
- Complete Anatomy
- 3D Anatomy
- 3D Anatomy Learning
- 3D Bones and Organs
- BioDigital Human— 3D Anatomy
- Teach Me Anatomy
- Anatomyka- 3D Anatomy Atlas
- Anatomy and Physiology
I’ll explore these apps in detail, but first let’s see what to look for in an anatomy app.
What To Look For In An Anatomy App
Anatomy can be a little complicated, confusing, and at times difficult to memorise if not seen in either a cadaver or a specimen/sample/model. Here comes the role of a 3D anatomy app which can be accessed anytime and can be carried on the phone or tablet.
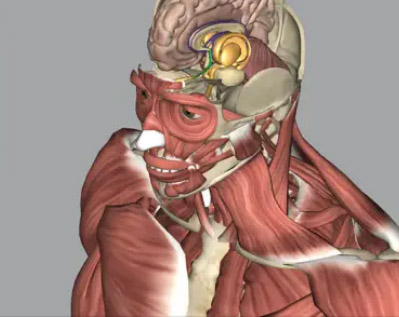
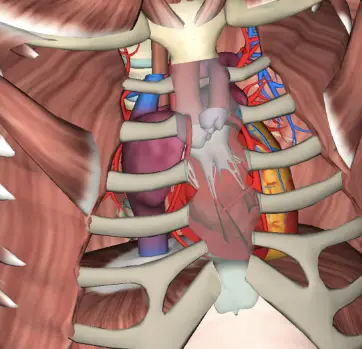
While 2D images are helpful, in the 21st century, an ideal anatomy app should have a 3D model of the organs and the structures (with proper labelling) which allows the user to see the anatomy from multiple perspectives. A 3D model will also allow the user to see the relations of the organ/structure under study. In addition to having a 3D model, 3D apps should also have the function of being able to dissect/remove the overlying muscles, bones, and organs to see the underlying structures.
Studying body parts in correlation with the surrounding structures makes it easier to understand and remember. Seeing things is always the best way to study anatomy.
Any feature more than this— like quizzes, articles, animations— would be a great addition.
Benefits Of Paid Apps Vs Free Apps
There are a variety of 3D anatomy apps available in the app stores. Some of them are free, some are paid, and some offer both free and paid versions. There are pros and cons of both paid and free apps.
The most important pro of a free app is that it’s free! But quite frequently the quality may be inferior to paid apps— although this may not be true for all free apps. It’s also likely that the free apps may not have all the systems of the body covered or in great detail. But free apps are a great place start for those who will be trying out anatomy apps for the first time.
The con of a paid app is that they are paid, but paid 3D anatomy apps would be a great investment for anyone who needs to know anatomy well. Paid apps usually contain every body system and in much more detail. There are also other additional features included in paid apps like quizzes, illustrations, articles, and animations that would make learning even more fun and easy.
Certain apps allow both free and paid versions of the same app. The free version usually comes with limited open systems/organs and the paid version gives full access to the app. A free version is a great place to explore the app and to see if the app contains everything that you are looking for, before buying the app for the full version.
Best 3D Anatomy Apps
1. Essential Anatomy
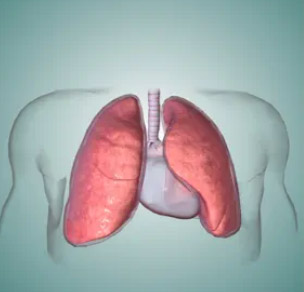
Essential anatomy is one of the most popular anatomy apps out there. It is not free, however, it covers organs and structures in great detail. The app covers 4100 anatomical structures and 11 systems, including the cardiovascular system, respiratory system, digestive system, musculoskeletal system, connective tissues, nervous system, urogenital system, and skin.
The 3D model can be rotated and can be studied in detail in layers as the app allows the user to strip the various layers of the muscles and other structures. Additionally, structures can be seen in their anatomical position, as well as in isolation to look for the details more closely.
There are different 3D models for the male and female bodies, and therefore the gender-specific differences can be studied well.
There is also an option to take a quiz where you can test your knowledge.
I found this app to be comprehensive and easy to use. It runs smoothly and the graphics are very well done. It is very user friendly. It can be used for many things, from studying in school to physical therapy, healthcare professions, for your patients or even a gym. It allows you to see individual bones and isolate them.
Price: $14.99
Rating: 4.7/5
You can follow this video to see how you can get started with this app:
2. Skeleton | 3D Anatomy
This app only deals with the skeletal system and is available in both free and paid versions.

It allows studying the bones individually as well as in the anatomical position. This app would be a great option for someone who is only looking for an app to study only the skeletal system and doesn’t want to invest in any complete anatomy app.
We found this app to be very good for the skeleton, with a useful pin feature and isolated bone studies in addition to the bones looking very realistic with detailed features. It is easy to use. It can be useful for nursing students, gross anatomy, medical students. Its great for drawing skeleton references. It does not have annoying ads. Paying for the paid version is worth it.
Price: Free and paid
Rating: 4.1/5
3. Human Anatomy Atlas by Visible Body
This is a paid app as well, but again, a popular 3D anatomy app covering anatomical structures in great detail.
In addition to the 3D models, there are also cadaveric images as well as diagnostic images to correlate the information. Additionally, there are also 126 histology slides which will future help the user understand the anatomy of various cells at the microscopic level.
This app also allows for studying the structures layer by layer and includes gender differences.
The movement of bones and muscles can also be seen in real-time.
This app also allows the user to dissect models on screen, and prepare a presentation that can be shared with others.
I found it to be very good. Its a useful app for both students and teachers.
Price: $24.99
Rating: 4.7/5
Supported in: iOS and Android.
4. Complete Anatomy by 3D4Medical
This is yet another popular 3D anatomy app that allows users to study anatomical structures layer by layer.
This also includes gender-specific differences and some other additional features like real-time movements and functions, like an animation of a beating heart. The cross-sections of the structures can be studied.
There are additional courses within the app covering abdominal dissection and female anatomy.
Another important feature of this app is that the radiological images are also available alongside the anatomical structure— making it easy to correlate. There are also more than 1500 clinical videos and cadaver images that will help the user apply the learned anatomy in actual cases.
This app is available in English, Spanish, French, German, and Chinese, and it has a 3-day free trial available to test the app.
I found this app to make visualizing anatomy simple and effective. It is a great anatomy reference. The different systems and radiology imaging combine to help you memorize the content. It is good both for teaching and learning anatomy. While it has a bit of a learning curve, it is well worth it.
Price: Free trial and paid
Rating: 4.3/5
Supported in: iOS and Android.
Follow this video to see how you can get started with this app:
5. 3D Anatomy
3D Anatomy is a relatively cheaper alternative when compared to most paid apps.
This app also allows users to rotate the structures to any angle. Structures can be seen in the anatomical position and can be removed to see the underlying structures.
Separate male and female reproductive system models are available, along with more than 100 real-time muscle movements, quizzes, and audio pronunciations of the names of the structures.
This app covers the skeletal system, ligaments, nervous system, cardiovascular system, bones, and their markings, muscles (145 detailed muscle models), respiratory system, urinary system, and ear.
Despite the low cost, I like this app. It is easy to navigate on tablet or phone and is adequate for anyone needing to learn about their body or an artist. It can be used as an anatomy reference or to discuss anatomy with clients.
Price: $2.99
Rating: 4.6/5
Supported in: iOS, Android
6. 3D Anatomy Learning
This app is yet another great addition to this list especially because this app is free. However, the systems that come unlocked in the free version are limited.
The free version has bones and joints of the head and neck, trunk, lower limb, certain parts of the cardiovascular system, muscles of a certain part, and eyes in the sensory system. The rest of the systems come locked which can be unlocked after upgrading. The free parts give a good point to get started and explore the app a little bit before upgrading.
The app also allows you to rotate the structures and zoom in and zoom out. Structures can be eliminated to expose the underlying structures. Quizzes are also available to test the knowledge.
This app is available in English, Spanish, German, French, Polish, Russian, Portuguese, Japanese, and Chinese.
I think despite it being free its great for visualizing in 3D what you cannot see in textbooks.
Price:
Free— limited features
In purchases available to unlock other features
Rating: 4.3/5
Supported in: IOS
7. 3D Bones and Organs by Education Mobile
This app is great for people with a low budget, as this app is free. It covers all the bones and all the organs.
Just like the other apps, this also allows users to rotate and zoom in and out. You can also dissect the layers of the various structures and eliminate the structures to reveal the underlying structures. It also allows the user to take quizzes and bookmark information.
It has the audio pronunciation of all the bones and supports German, Spanish, and French other than English.
This app includes the 3D skeletal system, ligaments, respiratory system, cardiovascular system, muscles, nervous system, reproductive system, urinary system, and ear.
I like the fact that its detailed and easy to use. Just dont expect the quality or features of an expensive anatomy app. The quiz mode is useful.
Price: Free
no in-app purchases
Rating: 4.6/5
Supported in: Android.
8. BioDigital Human— 3D Anatomy
This anatomy 3D app is available in both free and paid versions. In addition to the 3D anatomical models, this app also covers physiology, medical conditions associated, and relevant treatment, making it a good app for medical students.

The free version of this app provides 10 model views each month. Users can also store up to 5 models in the library. The paid version gives unrestricted access to the whole of the app.
There are 700 3D models, covering all the systems. The content is divided based on the systems (cardiovascular, respiratory, etc), as well as based on specialty (allergy, cardiology, dentistry, nephrology, etc). This makes navigation in the app easy. The app allows yearly subscriptions with an auto-renewal option.
It is available in 8 different languages.
I like this app, it looks like it would be helpful for surgery planning. Graphics are great and diseases and pathology are a welcome extra not included in many apps. The dissect feature is unique.
Price: Free and Paid
Rating: 4.5/5
Supported in: iOS and Android.
Follow this video to peek inside the app:
9. Teach Me Anatomy: 3D Human Body
Teach Me Anatomy is another great option for medical students as this app covers 3D anatomy along with clinical integration. This app can also be downloaded for free, but in-app purchases are available to access the app completely.
There are 3D anatomical models, a question bank, >1700 quiz questions, >400 articles covering anatomy, and even >1200 images and HD illustrations.
The app covers all systems and specialties. The app covers both systemic anatomies as well as regional anatomy (head and neck, neuroanatomy, etc).
I like the fact that it can be accessed offline. This app is like a textbook in a digital format so it includes images and diagrams. The quizzes are helpful.
Price: Free and Paid
Rating: 4.6/5
Supported in: iOS and Android.
10. Anatomyka- 3D Anatomy Atlas
Available as a free and paid option, this app is yet another great app to study anatomy. They offer a 5-day free trial as well.
The free version of the app includes the skeletal system and general anatomy of more than 80 body parts and regions. There are also audio pronunciation and classification of the bones available.
There are some special features in this app, like the different styles (classic atlas, dark atlas, etc), and the ability to set specific colors for the organs and other structures as per choice. Users can also put labels and highlights.
I like the quality of the graphics and the amount of features of this app. The landmark feature is great. This is one top notch 3D anatomy app.
Price: Free and paid
Rating: 4.3/5
Supported in: iOS and Android.
11. Anatomy and Physiology by Visible Body
This android app covers every system with the help of 3D models, illustrations, animations, and quizzes on anatomy and physiology.
3D models can be viewed from any angle, and various processes can be understood easily with the help of animations. There are 12 units, 50 modules, more than 500 3D views of models, and more than 150 illustrations and animations.
This app also covers definitions and audio pronunciations. It also allows users to create flashcards, bookmark, and track their progress.
I like the fact that this app teaches you both anatomy and physiology. The videos and quizzes are useful. The graphics and content are impressive.
Price: $34.99
Rating: 4.4/5
Supported in: Android
What to Remember When Choosing
Choosing a 3D anatomy app can be very subjective, as different learners may have different requirements and learning styles. This is why exploring various apps is important, to know what’s best for you.
It is always a good idea to try the free version of the app before buying the full version so that you can see if the app offers everything that you are looking for. Many paid apps also have a free trial period, which should be used to explore the app as well.
Click on the following link to see my list of the best interactive biology games.
Can You 3D Print a 3D Printer?
Essentially, 3D printing is a manufacturing technique in which material is placed down in layers to build a three-dimensional object. While 3D printing has been around since the 1980s, its use and popularity have grown in recent years.
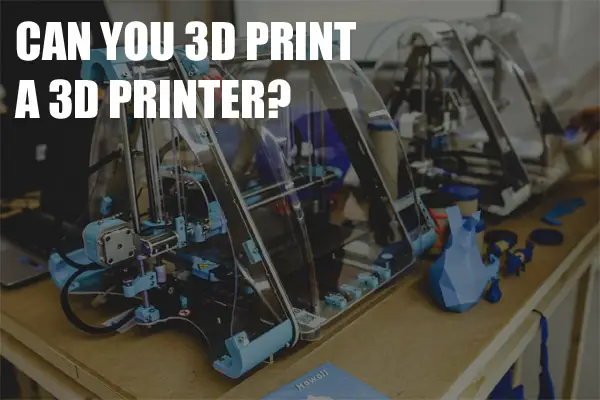
A significant reason for the recent rise in the use of this technology is that it is a simple technology that can be employed in a wide range of areas. In the past, 3D printer materials were very costly. However, costs have been decreasing in recent years due to advancements in 3D printing technology and materials.
Taking this into consideration, many people ask, can you 3D print a 3D printer?
Continue reading “Can You 3D Print a 3D Printer?”
Is It Safe To Use a 3D Printer Inside?
At present, 3D printing is used in a number of places, such as libraries, hospitals, workplaces, and laboratories. Different print materials like metals, rubbers, and plastics are used by 3D printers. 3D printing is getting more popular as it provides a variety of benefits to both organizations and people.
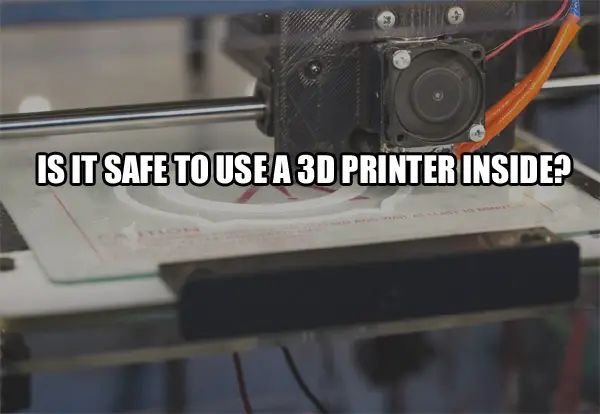
But is a 3D printer safe to use indoors? Read on to find out.
In general, it is safe to use a 3D printer inside. The good news is that the majority of accessible filaments do not release any toxic chemicals and are safe to print indoors. But there are certain filaments that do produce dangerous fumes, so it is recommended to be aware of the dangers before 3D printing any material.
Let’s discuss 3D printing in detail and the best places to put a 3D printer indoors.
3D Printer Dangers
The dangers associated with 3D printing differ based on the kind of material and printer utilized. 3D printers using lasers pose different risks than printers that melt materials at high temperatures.
Powdered print materials are more likely to be breathed in or cause skin issues than other print materials.
Materials used in 3D printers range from ceramics to metals to thermoplastics. Many materials contain hazards that you need to be aware of and be prepared to handle.
The raw material used in 3D printing to produce a final object is called feedstock.
It is heated and then jetted through a nozzle. Polyamide nylon, powder, PLA plastic filament, and UV-cured resin are some examples of feedstock. Continuous exposure to some materials’ vapors can be harmful.
Polylactic Acid (PLA) and Acrylonitrile Butadiene Styrene (ABS)
According to studies, harmful gases and vapors are released throughout the process of printing. It was found that Polylactic Acid (PLA) and Acrylonitrile Butadiene Styrene (ABS), the two widely used thermoplastics, produce volatile organic compounds (VOCs) and ultrafine particles (UFP).
UFPs
UFPs, or nanoparticles, are particles that are between 1 and 100 nanometers in size. They are comparable in size to several biological molecules and can be readily taken up by living organisms.
According to reports, nanoparticles that are breathed in can reach your heart, liver, and blood and cause inflammation. The effects of breathing ultrafine particles into your body may include heart issues and inflammation in your lungs.
Nanoparticle exposure has been linked to many chronic and acute effects, including carcinogenesis, fibrosis, inflammation, and asthma exacerbation. Research shows that nanoparticles inhaled into the body can penetrate the systemic circulation and move to various tissues and organs.
VOCs
Organic compounds with a high vapor pressure at room temperature are called VOCs.
Because of the high pressure, a substantial number of molecules can evaporate and enter the surrounding air.
The materials used in 3D printing, such as nylon, PLA, and ABS, have been found to contain harmful VOCs. These include ethylbenzene, cyclohexanone, and styrene. VOC emissions can cause organ damage, nausea, and irritation to the throat, nose, and eyes.
Explosions and fire
The possibility of explosions and fire, skin exposure to hazardous solvents, and inhaling toxic compounds are all potential dangers of 3D printing. 3D printers emit toxic compounds that could be harmful to your health. You may come into contact with risky materials like solvents, metal particles, and other chemicals through your skin.
3D printing uses a variety of materials, such as titanium, aluminum, and plastics. Nearly all of these compounds are flammable and can create explosive dust in your area.
Some 3D printers operate at very high temperatures, putting you in danger of being burned.
Are 3D printer fumes harmful?
The vapors from 3D printing are quite toxic. It is recommended not to use a 3D printer in an environment with no ventilation. The fumes get concentrated in an unventilated area, but they are scattered and have minimal effect in a ventilated room.
Furthermore, some filaments release a strong chemical smell that is extremely unpleasant.
Some, on the other hand, release a sweet smell.
Some folks are also more vulnerable to the vapors generated by 3D printers than others. If this applies to you, you should have more ventilation when operating your 3D printer to reduce the gases created.
Are enclosed 3D printers safer?
Enclosed 3D printers are far safer than other kinds of 3D printers. In fact, there are many benefits to an enclosed 3D printer. Let’s take a look.
Reduction of noise and heat loss
Enclosed printers are usually much quieter. This makes them substantially more suitable for use in business settings.
Enhanced print quality
A 3D printer that is enclosed has a more stable frame than an open 3D printer, which boosts print quality. Print quality might differ based on the quality of an enclosure, especially with ABS and larger items.
A variety of printable materials
An enclosed print chamber keeps the print environment warmer than an open print chamber and prevents unwanted airflow from changing your print. In addition to this, it also decreases warping. Warping is one of the most common issues with 3D printing. A 3D printer warping issue arises when a printed object cools suddenly after printing.
An enclosure aids in the production of steady output, making it great for printing specialty materials.
Protection from dangerous fumes
A 3D printer produces toxic gases during the printing process that can spread throughout the area where your printer is located. An enclosure offers protection against or shields you from the vapors’ direct effects.
Do you need ventilation?
Ventilating your 3D printer is recommended in general. While not all filaments are hazardous, 3D printers can produce tiny particles that can be toxic if breathed. Keeping your printer in a place with sufficient ventilation is an ideal way to prevent breathing in toxic chemicals.
Best place to put a 3D printer inside
It’s best to keep your 3D printer in a well-ventilated place, out of reach of your pets and kids, and away from combustible materials. As a matter of fact, you should put your printer in a separate space, such as a laundry room, garage, or hobby room if we are talking about a house, and in a separate room in a workplace away from your work desk.
Garage
Your garage is probably the best location for your printer if it has sufficient space. A garage usually has ample room for your materials and equipment.
Plus, you can easily ventilate your garage. Opening the door of the garage is a great way to ventilate your garage space. A well-ventilated garage also helps to keep the temperature cool and humidity low.
Usually, this area is separate from the remaining house. It means that while your device is running, the vapors and noise will not trouble your family.
A basement or home office
If you don’t have a garage, you should consider other alternative spaces within your house. Your home office may be ideal because these are less frequented areas of the house.
If you have sufficient space, a basement is another great alternative. You or your family won’t hear sounds from the printer because it’s far away from your house. However, you should ensure that your basement doesn’t contain any combustible materials.
However, don’t worry if you don’t have access to an open area workspace. There are a few solutions you can try to remove the fumes produced by a 3D printer.
Use air extractors
A good way to increase the ventilation of an enclosed space is to use an air extractor.
It works by pulling in warm air and replacing it with cool air from outside the room. Suction pipes and a fan are used to accomplish this.
Work with only PLA
Because of its composition, PLA is more eco-friendly than other filament types. Also, it’s worthy to note that the number of tasks you work on and working hours will have to be decreased in the enclosed space.
Is sitting next to a 3D printer safe?
It is not safe to sit next to your 3D printer. As a matter of fact, you should not stay in the same place as a 3D printer while it is operating. This decreases the chances of breathing in dangerous fumes and particles.
Unless you have an excellent ventilation system with a HEPA filter, it’s not recommended to keep your 3D printer in your bedroom. Make sure to enclose your printer to prevent hazardous particles from spreading. It’s not advised to put a 3D printer in your kitchen, living room, or bedroom.
Have a look at the video below to know more about the health hazards of 3D printers:
Final Thoughts
While it is okay to 3D print indoors with most filament types, you should ensure the room that you’re 3D printing in is well-ventilated. Most importantly, if you’re using ABS filament, ensure you have sufficient ventilation.
You can put your 3D printer in your home office, basement, or a separate room at home or at work. If you experience side effects, such as a headache, increase the ventilation in the area or choose a different filament type.
Remember, 3D printers, like any other technology, have risks that you should be aware of.
Click the following link to learn how long a 3D printer lasts.
Why are 3D Scanners So Expensive?
Have you ever wondered why 3D scanners are so expensive? After all, they are just a camera, right? Well, it turns out that there is a lot more to it than that. In fact, 3D scanners are quite complex pieces of technology, and the high price tag reflects the extensive research and development that goes into them.
In this article, we’ll take a closer look at what makes a 3D scanner this expensive and the different types so you can buy the one that isn’t bank-breaking for you. Let’s begin!
What are 3D Scanners, and what do they do?
A 3D scanner is a device that is used to make a virtual 3D object out of a real-world object.
3D scanners can be used to create accurate models of just about any type of object, from small consumer products to large industrial parts. They are also mostly used in manufacturing, engineering, and industrial designs. In medicine they can be used to scan objects to be used in animation, surgery simulation, or product development.
There are a number of different applications for 3D scanning technology. One common use is for quality control and inspection, where scanned objects can be compared to digital models to look for defects.
3D scans can also be used to create rapid prototypes of new products or parts, which can be invaluable for testing and development.
Additionally, many heritage sites and cultural institutions use 3D scanning to create digital records of valuable artifacts and environments. By capturing the intricate details of these objects and spaces, 3d scanning can help preserve them for future generations.
In biology, medicine and science, 3D scanners are used for anything from replicating accessories in the lab, to scanning bones in order to make a virtual database, to preparing prostheses.
Why are 3D Scanners Expensive?
3D scanners can be pretty expensive, ranging from a few hundred dollars to $100,000 dollars. There can be a few reasons for this.
First, 3D scanners are expensive because of their machinery, working complexity, and time to put them all together. Also, the software that makes it all work is also very expensive to develop and maintain.
Second, manufacturers of 3D scanners do not get paid the total amount as they produce in a more extensive network. So different people from different areas selling the scanner might also set the rates higher to gain profit.
Thirdly, there are some hidden costs built into the price of the 3D scanner, which causes it to appear costly. Some 3D scanners are also designed to scan and produce a model of larger objects like an aircraft, which doesn’t come any cheaper.
Finally, the technology, parts, and materials used in 3D scanners are also why they cost more as the 3D scanner produces a real 3D object into a virtual one, and the working, and machinery involved cause it to be quite expensive.
How Do 3D Scanners Work?
The working of the 3D scanner depends on the type of scanner; usually, the main functioning of the scanner is almost the same. Basically the 3D scanner first takes multiple snaps of an object, and then those shots are fused into a model, which is the exact 3D copy of the object.
The model can be rotated, and it can be viewed from various angles on the computer.
Can You Scan Something and then 3D print it?
The 3D scanners scan the object that is to be made into a 3D model. It can be any object as long as the scanner can read it. A 3D printer can take the scanned files and (after some cleaning) print it in a 3D form to be analyzed further. It is a thorough process that leads up to a perfect 3D object.
Which Types of 3D Scanners are Most Expensive?
Depending on the technology used in a 3D scanner, it can vary in price, each having its advantages and limitations. The size of the 3D scanner is one of the reasons; the bigger the scanner is, the higher the price will be.
The scanner’s quality is also essential in this matter; the home 3D scanner ought to be cheaper than the 3D scanners used in industrial, manufacturing, or medical settings.
There are also some types of scanners that include more than one feature, such as full color texture acquisition; those will probably cost more than a simple 3D scanner that only does one task at one time.
The accuracy and speed of the 3D scanner can also be taken into account; the high-end scanners will provide more accuracy and do the work faster than any cheaper 3D scanner.
Some of the expensive 3D scanners are as follows:
Industrial 3D Scanners
These 3D scanners are usually a little expensive; their average price can go up to $40,000. Some of these 3D scanners might also come cheaper.
Projected or Structured Light 3D Scanners
These 3D scanners project light to make patterns onto an object; they have high resolution and fast speed. Their price can vary from low cost to expensive depending on the accuracy and resolution.
Arm-based 3D Scanners
Arm-based 3D scanners use a mechanical arm to produce a 3D object. These can be pretty expensive; the average cost can be $50,000.
Laser-based 3D Scanners
These are the most expensive scanners on the market but they can also be found at a lower price. Laser-based 3D scanners use trigonometric triangulation, which captures a 3D shape and then makes the model by reflection; it projects multiple laser lines to make an exact copy of the 3D object.
This scanner is easy to use, but it can cost between $20,000 to $100,000. The laser-based 3D scanners used for larger purposes are usually up to $200,000 or even more.
Does the Price Make 3D Scanners Less Popular?
3D scanners usually being used by experienced users in professional settings makes it possible for them to be less accessible. Although the popularity of the 3D scanner is not as much affected. The demand for 3D scanners might be only in business settings, but it is enough to make it popular in different specialty areas. In the business field, 3D scanners can be found everywhere.
From Forensic labs to Engineering industries, 3D scanners are also used in many manufacturing industries. Some 3D scanners are also used at larger corporations to make 3D copies of large objects, but people can use some at home 3D scanners outside of industries and businesses.
So, we can say that 3D scanners are popular at both professional and nonprofessional levels.
Are Low-cost 3D Scanners Worth it?
When it comes to the price of 3D scanners, the most expensive ones don’t always stand out. Some low-cost 3D scanners also have a decent performance (depending on your specific application).
There are a lot of 3D scanners that are of low cost. Although the 3D scanner is designed to give a perfect result and accuracy, the low-cost scanners might not live up to those expectations because of the low price factor.
Low-cost 3D scanners may fall under $1,000. These scanners might not be durable, and the result will not be as perfect as an excellent 3D scanner makes. However, you can use these scanners for fun.
These scanners are also used by budget-conscious people who don’t regularly use a 3D scanner to spend a lot of money on a bank-breaking scanner.
The Revopoint is a popular one. You can learn more about it here.
Are Medium Cost 3D Scanners Better?
If you want to get a better 3D scanner with better and more precise results, you might invest in a medium-cost scanner.
The medium-cost 3D scanners usually give a satisfactory result. Their prices range from $1,000 to $10,000. But the quality and size of the scanner can cause variation in its price.
These types of 3D scanners include medium-range and long-range 3D scanners.
These 3D scanners have good resolution and accuracy; they are also much faster than low-cost 3D scanners. Overall they produce a good result.
Laser-based portable 3D scanners or handheld 3D scanners also fall in this category. They are for those people who like to travel with their equipment. These 3D scanners have a simple design, and they are effortless to use. Some of the medium-cost scanners can also be used in professional settings.
Best 3D Scanners Under $10,000
This is a low-cost laser 3D scanner, which comes at around $1,000. It is compatible with both Windows and Mac. One problem that can be found in this is that it has a vague calibration. Other than that, the overall performance is acceptable.
It is one of the best 3D scanners that are also affordable. It costs only around $2,000. It is a tablet with a built-in scanner; the speed and accuracy of this 3D scanner are also quite good.
This is a medium-cost 3D scanner that costs $9,800. It can also be used in a professional setting. Artec Eva Lite is a valuable portable scanner for small objects, and the results are also up to the expectations.
Best Higher-end 3D Scanners
Artec Ray 3D Scanner
This 3D is a well-known higher-end 3D scanner; its price is $60,000. It is a handy scanner for professional settings; it is also small and portable.
This is also a professional 3D scanner, and it provides much better quality and fast speed. Its price is $79,900. This 3D scanner can be used to scan larger objects as well.
Creaform MetraScan 750 provides professional and accurate 3D scanning. It can cost between $50,000-$100,000. It is precise and fast, and the accuracy and resolution are also remarkable.
Here is a video on which scanners are used for prosthetics:
Final Thoughts
To sum it up, yes, 3D scanners are expensive, and unless you are not using them in a professional setting, you can go for medium-cost 3D scanners.
Although medium-cost scanners can also work in a few professional settings, their performance is quite up to mark. In comparison, low-cost scanners might not be a good choice if you actually want to have top-notch results.
The use of a 3D scanner also matters in this case; always go for the 3D scanner that is appropriate according to your use, not just price. We hope this article helped you out with this question of why “3D scanners are so expensive,” and now that you have the idea of different 3D scanners with the varying tag of prices, you can surely pick one that’s best for you. Thanks for reading!
Click here to learn how long a 3D printer lasts
3D Animation of Human Brain Cortex Development
In this 3D animation we go over the development of the human brain cortex, including formation and differentiation of nerve cells from precursor cells, migration of immature nerve cells to their eventual positions, growth of axons building a network and formation of synapses.
Review:
Click here for an animation on human brain anatomy as well as physiology.