
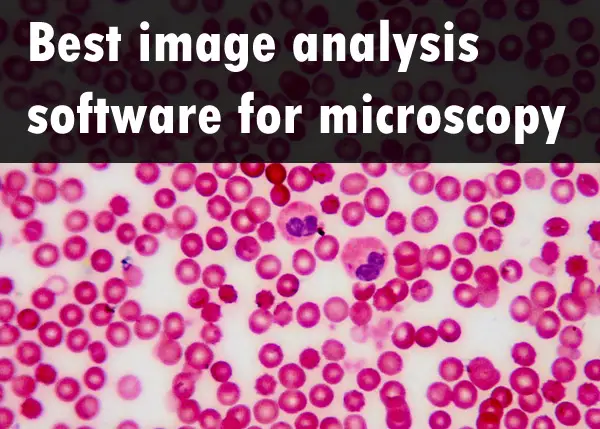
Discovering the best image analysis software programs for microscopy is crucial for students and professionals in the scientific imaging field. As technology advances, so do the tools available to enhance our understanding of microscopic structures and processes.
When it comes to microscopic image processing and quantitative analysis, there are various software solutions available. In this blog post, we will delve into a comprehensive comparison of top contenders in the field of microscopic image processing and quantitative analysis.
We will look among others at powerful options such as CellProfiler, which offers a versatile platform for identifying cell phenotypes; ImagePro, known for its comprehensive suite of features; Volocity, a leading choice for 3D imaging applications and Microscope Image Processing Toolbox (MIPT), a MATLAB based solution that caters to various microscopy techniques.
CellProfiler
If you’re looking for a powerful, user-friendly software program to analyze microscopy images, CellProfiler is an excellent choice. CellProfiler, developed by the Broad Institute of MIT and Harvard, is widely used in various disciplines such as cell biology, neuroscience and bioinformatics.
Main Features of CellProfiler
-
- Automated image analysis: CellProfiler can automatically identify cells or other objects within your microscopy images using advanced segmentation algorithms.
- Pipeline-based workflow: The software allows users to create custom pipelines that streamline the processing of large datasets with multiple steps like preprocessing, object identification, feature extraction, and data exportation.
- Built-in modules: With over 100 built-in modules available for different tasks such as filtering noise or measuring object size/shape/intensity; users have access to a wide range of tools without needing any programming skills.
- User-friendly interface: The graphical user interface (GUI) makes it easy even for beginners to build complex pipelines by simply dragging-and-dropping desired modules into place.
Pros & Cons of Using CellProfiler
To help you decide if this is the right tool for your needs let’s discuss some pros and cons associated with using CellProfiler in your research projects.
Pros:
-
-
Fully customizable workflows:You can tailor-make each pipeline according to specific project requirements ensuring optimal results every time.
-
Free & open-source: CellProfiler is completely free to use and can be easily extended or modified by the user community.
-
Active support & resources:The software has an active online forum where users can ask questions, share ideas, and access a wealth of tutorials/documentation for guidance.
-
Cons:
-
-
Limited 3D analysis capabilities: While CellProfiler does offer some basic tools for analyzing three-dimensional (3D) microscopy images, it may not be sufficient for more advanced applications such as volumetric rendering or time-lapse imaging.
-
Performance limitations on large datasets: Processing very large image sets with high-resolution data might require significant computational power that could slow down your analysis if you’re using a standard desktop computer.
-
In summary, CellProfiler offers an excellent balance between ease-of-use and powerful functionality making it ideal for both students and professionals in scientific fields like cell biology or neuroscience who need automated image analysis tools without breaking the bank. However, if your research requires more advanced 3D imaging capabilities you may want to consider other options such as ImagePro or Volocity discussed later in this article.
CellProfiler is an excellent choice for image analysis software and offers a comprehensive suite of tools to help researchers achieve their goals. ImagePro presents a range of sophisticated functions, making it well-suited for intricate imaging tasks.
ImageJ
ImageJ is a powerful, open-source image analysis tool produced by the NIH that offers extensive capabilities and versatility across various scientific disciplines such as microscopy. It is widely used in various scientific fields, including microscopy, for its versatility and extensive range of features.
Overview
ImageJ can handle a wide variety of image formats and offers numerous tools for processing and analyzing images. With an active community contributing to its development, it boasts hundreds of plugins that extend its functionality even further. The software supports 2D as well as limited 3D image analysis capabilities.
Pros and Cons
Pros:
-
-
Free and open-source.
-
A large number of available plugins for extended functionality.
-
Frequent updates from an active community.
-
Cross-platform compatibility (Windows, macOS, Linux).
-
Cons:
-
- User interface may be less intuitive compared to other programs on this list
- Limited built-in 3D analysis capabilities
Pricing
ImageJ offers a budget-friendly option for those in search of an image analysis tool, with its no-cost availability attractive to students and professionals.
ImageJ is an excellent choice for microscopy image analysis, offering a wide range of features and flexibility. CellProfiler provides similar capabilities with some additional advantages that may be worth exploring.
ImagePro
ImagePro is a comprehensive image analysis program for microscopy, specifically designed to cater to the needs of students and professionals in the field. With its advanced 3D capabilities and automated tools, this software allows users to easily analyze complex images obtained from various types of microscopes.
Developed by Media Cybernetics, Image Pro is a widely used tool for various scientific fields such as biology, materials science and geology due to its support of multiple file formats including TIFFs (Tagged Image File Format), BMPs (Bitmap Images) and JPEGs (Joint Photographic Experts Group). It supports multiple file formats including TIFFs (Tagged Image File Format), BMPs (Bitmap Images), JPEGs (Joint Photographic Experts Group) among others which makes it versatile for different types of microscopy imaging data.
Main Features
-
-
Advanced 3D visualization: ImagePro provides powerful rendering options that enable users to visualize their data in three dimensions with ease.
-
Automated segmentation: The software includes robust algorithms for automatic identification and separation of objects within an image, streamlining the analysis process.
-
Its user-friendly interface provides a smooth transition between the automated segmentation algorithms and customizable workflows, making it accessible for users of all levels.
-
Customizable workflows: Users can create custom workflows tailored specifically to their research needs by combining different processing steps together into a single pipeline.
-
Pros:
-
-
User-friendly interface that’s easy to navigate even for beginners.
-
A wide array of tools available for image processing such as filtering noise reduction algorithms or enhancing contrast levels on captured images.
-
Built-in support for 2D/3D measurements making it suitable not only in biological research but also other applications like material sciences where depth perception plays an important role during analysis processes.
-
Pricing Information & Comparison with Other Programs
The cost of ImagePro varies depending on which version you choose (Standard or Premier) as well as whether you opt for a perpetual license or subscription-based model. Prices start at $1,995 USD per year for subscriptions while perpetual licenses begin at $5,495 USD. Compared to other programs like CellProfiler (free) or Volocity (paid), ImagePro falls somewhere in between when it comes down price range; however, its unique combination of user-friendliness and advanced functionality make it worth considering if your budget permits. For those looking for free alternatives without compromising too much on quality, consider trying out open-source solutions such as Fiji/ImageJ (https://imagej.net/software/fiji/) or CellProfiler (https://cellprofiler.org/).
3D Analysis Capabilities & Unique Features
ImagePro offers a range of three-dimensional capabilities that make it stand out from other programs, such as volume rendering through maximum intensity projection (MIP), surface renderings, and orthoslice views. These include:
-
-
Volume rendering: Users can visualize their data in three dimensions using various volume rendering techniques such as maximum intensity projection (MIP), surface rendering, and orthoslice views.
-
3D object measurement: The software allows for accurate quantification of objects within a 3D dataset by providing measurements like volume, surface area, sphericity, and more.
-
Stereology: ImagePro supports unbiased stereological methods for estimating the number and size distribution of particles within a sample based on systematic sampling principles.
-
To sum up, ImagePro is an excellent choice for researchers seeking advanced microscopy image analysis with both 2D and 3D capabilities. Its user-friendly interface combined with powerful features make it suitable for professionals at any level in the scientific field. While it may not be the most budget-friendly option available on the market today compared to free alternatives like Fiji/ImageJ or CellProfiler; however if you’re willing to invest in your research endeavors then this program might just be worth considering.
ImagePro is an intuitive and powerful image analysis software program that provides users with the tools to analyze microscopy images quickly and accurately.
Volocity Imaging Software
Volocity Imaging Software is a powerful and versatile image analysis program designed specifically for microscopy applications. This software offers a comprehensive suite of tools that enable students and professionals to visualize, analyze, and quantify their data with ease.
Overview
Volocity is an advanced solution for processing multidimensional images acquired from various types of microscopes. It supports widefield, confocal, multiphoton, spinning disk confocal microscopy techniques as well as high-content screening systems. With its intuitive interface and robust 3D visualization and analysis capabilities, Volocity Imaging Software has become a popular choice among researchers in fields such as cell biology, neuroscience, developmental biology, and more.
Features
Volocity Imaging Software boasts a wide range of features that cater to the needs of researchers:
-
-
Support for multiple imaging modalities, including confocal, multiphoton, and spinning disk microscopy.
-
Advanced 3D visualization tools such as volume rendering, surface rendering, and orthoslice views.
-
Dedicated modules for specific applications like colocalization analysis or object tracking over time.
-
Built-in algorithms for quantifying parameters such as intensity measurements or morphological properties of objects in the images.
-
Fully customizable workflows using Python or MATLAB scripting languages to tailor image processing pipelines according to individual requirements.
-
Pricing
The pricing information for Volocity Imaging Software is not publicly available on their website. However, it is known that licensing fees can be quite expensive compared to other software programs in this list. To obtain an accurate quote tailored to your specific needs and usage requirements, you may need to contact the manufacturer through their official website’scontact form.
Volocity Imaging Software is an excellent choice for microscopy image analysis, offering powerful features and a user-friendly interface. For those looking to explore other options, Fiji (ImageJ) may be worth considering due to its wide range of features and affordability.
Pros and Cons
Pros:
-
-
User-friendly interface suitable for both beginners and experts alike.
-
Built-in support for multiple microscope platforms.
-
Dedicated tools tailored specifically to 3D imaging applications.
-
Precise quantitative measurements can be obtained using built-in algorithms or custom scripts written in Python or MATLAB languages.
-
Cons:
-
- Expensive licensing fees may not be afforadable for all users
- Limited compatibility with some file formats and proprietary microscope systems.
Fiji (ImageJ)
Fiji, which stands for “Fiji Is Just ImageJ,” is an open-source image processing package that builds upon the popular ImageJ software. It includes a wide range of plugins and tools specifically designed to assist researchers in life sciences and microscopy fields. This powerful program offers numerous features for 3D analysis, making it an ideal choice for students and professionals.
Overview
Fiji enhances the functionality of ImageJ by bundling it with many useful plugins tailored towards biological image analysis. The software provides extensive support for various file formats used in microscopy, such as TIFF, LSM, OME-TIFF, and more. Additionally, Fiji comes with a user-friendly interface that simplifies complex tasks like registration or segmentation.
Pros and Cons
Pros:
-
-
Free and open-source software.
-
A large collection of pre-installed plugins specific to life sciences research.
-
Built-in support for scripting languages like Python or BeanShell allows users to automate their workflows easily.
-
User-friendly interface streamlines common tasks in biological imaging applications.
-
Cons
-
- Less intuitive user interface than paid programs
Fiji (ImageJ) is a great image analysis software program for microscopy, offering an extensive range of features and affordability. Moving on to Imaris, it provides powerful 3D visualization capabilities that can be used in many scientific fields.
Imaris
In the world of microscopy image analysis, Imaris stands out as a powerful and versatile software program designed to cater to the needs of students and professionals. This section will provide an overview of Imaris, its pros and cons, features available in the program.
Overview
Imaris, developed by Oxford Instruments, is a comprehensive microscopy image analysis software that offers advanced 3D visualization, segmentation, tracking, and measurement capabilities for researchers working with confocal or widefield fluorescence images. With its user-friendly interface and extensive range of tools for both qualitative and quantitative analyses, Imaris has become a popular choice among scientists studying various biological processes at cellular or subcellular levels.
Pros and Cons
Pros:
-
-
User-friendly interface suitable for beginners and experts alike.
-
A wide array of advanced features including 3D rendering options.
-
Precise object identification through machine learning-based algorithms.
-
Frequent updates ensure compatibility with new imaging technologies.
-
Cons:
- High cost compared to some other alternatives.
- Requires significant computational resources.
- Steep learning curve due to numerous functionalities.
Microscope Image Processing Toolbox (MIPT)
The Microscope Image Processing Toolbox (MIPT) is a MATLAB toolbox designed to facilitate the processing of microscope images. MIPT offers a plethora of utilities, from segmentation to registration and filtering, plus feature extraction. This software program is ideal for students and professionals who are looking for an accessible and cost-effective solution for their microscopy image analysis needs.
Main Features
-
Segmentation: MIPT provides various algorithms for segmenting images based on intensity values or other features such as edges or textures.
-
Registration: The toolbox allows users to align multiple images using different techniques like rigid transformations or non-rigid deformations.
-
Filtering: Users can apply filters to enhance image quality by removing noise or emphasizing specific features within the image data.
-
Feature Extraction: MIPT enables researchers to extract quantitative information from their microscopy images through methods like object counting, shape analysis, texture measurements, etc.
User-Friendly Interface
The user-friendly interface of MIPT makes it easy even for beginners with limited programming experience to navigate through its various functions. The well-documented code also serves as an excellent learning resource for those interested in delving deeper into image processing concepts and techniques.
Diverse Applications
This versatile toolbox caters to a diverse array of applications in fields such as biology, materials science, geology among others. Its compatibility with MATLAB ensures seamless integration with other toolboxes and functions, providing users with a comprehensive platform for advanced image analysis.
Community Support
MIPT’s open-source nature allows for a global collaboration of users to continuously update the toolbox and provide support. This means that new features and improvements are constantly being added to the toolbox by researchers worldwide. Users can also seek help through forums or contribute their own code to enhance the functionality of MIPT further.
In summary, Microscope Image Processing Toolbox (MIPT) is a valuable resource for students and professionals who require a powerful solution for microscopy image analysis. MIPT’s extensive features and user-friendly design make it an ideal choice for those seeking to streamline their research.
Conclusion
Choosing the best image analysis software programs for microscopy can be a daunting task. However, with our comprehensive overview of ImageJ, CellProfiler, Image Pro, Volocity Imaging Software, Fiji (ImageJ), MIPT and Imaris – you are now equipped to make an informed decision based on your specific needs.
Each program has its advantages and disadvantages in terms of capabilities and cost-effectiveness. We hope this overview can assist you in narrowing down the choices and locating the ideal software for your microscopy requirements.
Click the following link to learn the best 3D anatomy apps.
What’s the Difference between Adobe After Effects and Adobe Premiere and which do you Need?
A frequent question among creators of motion graphics is the comparison between Adobe After Effects and Premiere. To help you decide which program is right for your needs, we’ll compare the key features, pros and cons, as well as overlapping capabilities of Adobe After Effects and Adobe Premiere.

Moreover, we will discuss scenarios where substituting one program for another might be beneficial or even necessary. By examining their suitability for 3D animation work and general use cases, you’ll gain valuable insights on how to make an informed decision when choosing between Adobe After Effects vs Adobe Premiere for your projects.
Adobe After Effects Overview
Adobe After Effects is a digital motion graphics platform designed for creating either simple animations or intricate graphic sequences. For graphic designers looking to create dynamic content, Adobe After Effects is an ideal choice due to its capability of adding motion graphics and text to videos. However, this program has a steep learning curve; it’s often described as “hard to learn but easy to master.”
Creating Motion Graphics and Visual Effects
The primary function of Adobe After Effects is the creation of motion graphics and visual effects. This powerful software allows users to develop stunning visuals that can be added seamlessly into video projects. From animating logos and designing title sequences, all the way up to generating complex particle systems or realistic special effects like fire and smoke – there are virtually no limits when working with this versatile application.
-
Motion Graphics: Create eye-catching animated elements such as lower thirds, infographics, or even entire explainer videos.
-
Visual Effects: Enhance your footage by adding advanced VFX like green screen removal (chroma keying), rotoscoping (isolating subjects from their backgrounds), or simulating real-world phenomena using physics-based simulations.
Text Animation Capabilities
In addition to its prowess in motion graphics creation, Adobe After Effects also offers robust text animation capabilities. Users can quickly design engaging kinetic typography sequences that bring words on-screen in creative ways while maintaining full control over timing, positioning, and scale changes throughout each individual character within any given word/sentence structure they choose – effectively turning plain static text into something much more visually appealing.
Adobe After Effects provides an extensive suite of tools for crafting captivating motion graphics and visual effects, making it a must-have tool for any 3D animator. Adobe Premiere Pro provides the ultimate in video editing, enabling you to take your projects to greater heights.
Adobe Premiere Pro Overview
Adobe Premiere is an NLE (nonlinear editor) that allows you to edit video clips together in a sequence. This scalable software enables users not only to cut videos but also to place transitions between clips and polish short films efficiently. In comparison with After Effects, Premiere Pro has basic transition effects built-in along with color grading options, which make it easier for beginners who want quick results without delving too deep into complex processes.
Video Editing Tools and Features
Premiere Pro is a preferred choice for many professionals due to its extensive selection of video editing tools and features, which span from YouTube content creation to large-scale film production. Some of its key functionalities include:
-
Multicam editing: Easily sync multiple camera angles and switch between them during playback.
-
Lumetri Color panel: Access professional color grading tools directly within the program.
-
Audition integration: Seamlessly work with Adobe Audition, another member of the Adobe suite, for advanced audio editing capabilities.
-
Motion Graphics templates: Customize pre-built motion graphics or create your own using the Essential Graphics panel.
Built-in Transition Effects
Premiere Pro offers a wide selection of pre-built transition effects to help you create a seamless story. These transitions help enhance storytelling by smoothly guiding viewers from one scene or shot to another. Examples of these basic effects include cross-dissolve, dip-to-black/white, slide left/right, and more. For those looking to add even more flair to their projects, the Adobe Premiere Pro transitions library can be expanded with third-party plugins or custom-made presets.
In comparison to After Effects, which excels in creating complex animations and visual effects from scratch, Adobe Premiere Pro is designed for a smoother video editing experience that caters specifically to filmmakers and content creators who need an efficient way of piecing together raw footage into polished final products. Its user-friendly interface combined with its extensive range of features makes it an ideal choice for beginners and professionals alike.
Overlapping Features of Both Programs
Adobe After Effects and Premiere Pro, both part of the Adobe Creative Suite, share a few commonalities which enable them to be interoperable. These overlapping functionalities facilitate a seamless workflow for video editors and motion graphics artists alike. Let’s explore some key aspects where these two powerful programs intersect.
Timeline-based Editing System
Both After Effects and Premiere Pro utilize a timeline-based editing system, allowing users to arrange video clips, images, audio tracks, and other elements in a chronological sequence. This feature is essential for creating cohesive narratives or visual stories from raw footage. The timeline interface provides an intuitive way to edit videos by dragging-and-dropping assets onto it while also making adjustments such as trimming clips or changing their order easily.
Keyframing Capabilities
The ability to add keyframes is another shared functionality between the two applications. Keyframing enables users to create smooth animations by defining specific values at different points in time for various properties like position, scale, rotation or opacity among others within any given layer – be it text layers in After Effects or video clips inside Premiere Pro itself. By interpolating between these set values over time, one can achieve organic-looking movements/effects without having extensive knowledge about traditional animation techniques themselves.
Masks & Layering Systems
-
Masks: Both programs offer masking tools that allow you to selectively hide portions of your content based on shape paths drawn directly onto layers themselves – perfect when wanting control over which areas should remain visible during playback.
-
Layering Systems: Similarities extend beyond just masks though – both platforms support multiple-layered compositions wherein each individual layer can be manipulated independently from others within the same project file, providing immense creative freedom when working on complex scenes or animations.
Integration with Adobe Suite
As part of the Adobe Creative Cloud family, After Effects and Premiere Pro are built to integrate with other applications in the suite. This integration allows users to easily import assets created in programs like Adobe Photoshop or Adobe Illustrator, as well as collaborate more efficiently using shared libraries and cloud storage options provided by Adobe itself. Additionally, you can dynamically link projects between After Effects and Premiere Pro so that changes made in one application are automatically updated across linked instances – a feature particularly useful for those who frequently switch back-and-forth during their editing process.
The overlapping features of both programs are an essential foundation for any 3D animation or imaging project, and these exclusive features allow users to further customize their workflows. Building upon the commonalities between both programs, let’s go into their unique abilities to gain an understanding of how they can be leveraged in tandem.
Exclusive Features of Each Program
Both Adobe After Effects and Adobe Premiere Pro offer unique functionalities tailored towards specific project requirements. While After Effects specializes in advanced animation work through its powerful scripting language expressions engine alongside third-party plugin support, Premiere stands out by providing professional-level color grading/correction scopes plus direct access links into other audio-centric programs like Audition, developed by the same company behind these two popular platforms.
Advanced Animation Work in After Effects
In the world of advanced animation, After Effects truly shines. Its robust set of tools allows users to create complex animations with ease, thanks to features such as shape layers, puppet pins for character rigging, and a wide array of effects presets. Additionally, it offers extensive compatibility with third-party plugins like Element 3D from Video Copilot, which further expands its capabilities for creating stunning visual effects and motion graphics.
-
Shape Layers: Create vector-based shapes that can be animated using keyframes or expressions.
-
Puppet Pins: Rig characters or objects easily with this intuitive tool that adds points on your layer to control movement and deformation.
-
Effects Presets: Apply pre-built effects combinations to save time during the editing process while still achieving professional results.
Professional-Level Color Grading/Correction Scopes in Premiere Pro
Moving on to video editing software powerhouse – Adobe Premiere Pro – it offers a comprehensive suite of color grading and correction tools, making it an ideal choice for filmmakers looking to achieve professional-level results. With features like the Lumetri Color panel, users can easily adjust various aspects of their footage’s appearance such as exposure, contrast, saturation, and more. Additionally, its integration with other Adobe Suite programs allows seamless workflows between applications.
-
Lumetri Color Panel: A powerful tool that provides advanced color grading options in an easy-to-use interface.
-
Color Correction Scopes: Monitor your video’s colors accurately using built-in scopes such as waveform monitors or vectorscopes.
-
Integration with Adobe Suite: Work seamlessly across multiple Adobe applications thanks to direct access links and shared file formats.
In essence, both After Effects and Premiere Pro have exclusive features tailored towards different project requirements. Whether you’re working on intricate animations or polishing raw footage from your latest shoot – these two platforms offer specialized tools designed specifically for each task at hand.
After Effects offers a greater range of animation tools than Premiere Pro, allowing users to create more complex animations. Premiere Pro is the superior pick for those wanting a simpler program with pro color grading/correction capabilities.
Ease of Use Comparison
When it comes to ease of use, Premiere Pro is often considered more user-friendly due to its intuitive interface and basic built-in effects. On the other hand, After Effects can be overwhelming for beginners but offers greater control over animation once mastered. This is also due to the nature of animation and working with existing video footage vs creating animation from scratch.
User-friendly Interface in Premiere Pro
The video editing software Adobe Premiere Pro has a straightforward layout that allows users to easily navigate through their projects. The workspace includes panels such as the Project panel, where you can organize your assets; the Timeline panel, which displays your sequences; and the Program Monitor, where you can preview your edits. Additionally, there are numerous tutorials available online that help beginners learn how to edit videos using this powerful tool effectively. For instance, Adobe’s official website provides an extensive library of Premiere Pro tutorials, catering to different skill levels.
-
Project Panel: Organize assets within your project.
-
Timeline Panel: Display and edit sequences on a timeline-based system.
-
Program Monitor: Preview edits in real-time while working on them.
Greater Control Over Animation in After Effects
In contrast with Premiere Pro’s focus on editing raw footage efficiently, After Effects excels at creating motion graphics and special effects from scratch or enhancing existing video clips with advanced animations. However, this added functionality comes at a cost: mastering After Effects requires dedication and practice due to its steep learning curve. Adobe After Effects provides support for users just starting out, with a wealth of materials such as tutorials and discussion boards offering useful knowledge about the program’s tools.
Some key aspects to consider when learning After Effects include:
-
Expressions: Write scripts to automate animations and create complex motion graphics with ease.
-
Third-Party Plugins: Expand your creative possibilities by incorporating specialized tools such as Element 3D or Trapcode Particular into your projects.
-
Preset Animations: Utilize built-in presets for text animation, shape layers, and more to streamline the creation process while still achieving professional results.
For advanced professionals who require greater control over animations and visual effects, After Effects is the superior choice. For those who prioritize an easy-to-use interface with basic effects capabilities, Premiere Pro is likely the better choice. However, if you’re looking for advanced control over animations and visual effects work in your videos, then mastering After Effects will be well worth the effort invested in learning its intricacies.
Overall, Premiere Pro offers a user-friendly interface for editing and creating videos while After Effects provides more control over animation. Considering the above, let’s explore how these two programs compare in terms of 3D content manipulation.
Working with 3D Content
When it comes to working with 3D content, both Adobe After Effects and Premiere Pro offer some features. However, each program has its strengths in this area. Comparing the 3D capabilities of After Effects and Premiere Pro, we will evaluate which program best meets your needs.
Camera Tracking Capabilities in After Effects
Adobe After Effects excels at creating and manipulating 3D elements through features like camera tracking. Camera tracking allows you to analyze a video clip containing moving objects or scenes and generate a virtual camera that matches the original footage’s movement. This technique enables seamless integration of new 3D layers into your composition, giving you greater control over animation work involving complex visual effects.
In addition to its built-in camera tracker tool, After Effects also supports integration with popular third-party plugins such as Element 3D from Video Copilot. Element 3D provides advanced tools for importing and animating high-quality models within the software environment itself – making it an ideal choice for those looking to create intricate animations featuring realistic three-dimensional objects.
Editing Pre-existing 3D Footage in Premiere Pro
Adobe Premiere on the other hand, focuses primarily on editing existing video footage that may include embedded three-dimensional objects within them. While it does not have native support for creating or manipulating complex animated sequences like its counterpart (After Effects), Premiere Pro can handle basic editing tasks such as trimming, cropping, and adjusting the playback speed of 3D clips. This makes it a suitable choice for users who need to work with pre-rendered three-dimensional content but do not require advanced animation capabilities.
Furthermore, Premiere Pro offers built-in support for editing VR (Virtual Reality) video, allowing you to immerse your audience in an interactive 360-degree environment. With this feature, you can edit and stitch together multiple camera angles into a single panoramic view – perfect for creating immersive experiences that showcase your scientific 3D animations or imaging projects from every angle.
Choosing the Right Program for Your Needs
-
If you are looking to create complex animated sequences involving realistic three-dimensional objects or scenes, Adobe After Effects is likely the better choice due to its advanced animation tools and third-party plugin integration options.
-
For those working primarily with pre-rendered 3D footage requiring only basic editing tasks like trimming or cropping without needing intricate animations, Adobe Premiere Pro may be more appropriate given its focus on efficient video editing processes.
-
In cases where both programs’ features might be beneficial (e.g., combining live-action footage with animated elements), consider using them in tandem through Adobe’s Dynamic Link functionality which allows seamless communication between these two powerful platforms within their shared ecosystem – ultimately providing greater flexibility when handling diverse project requirements across different stages of production.
Creating 3D visuals can be a laborious and intricate task, yet with the proper programs like Premiere Pro or After Effects one can craft stunning images. With that said, let’s explore which program is better suited for YouTube videos.
Which Program is Better Suited for YouTube?
For YouTube content creators who require quick turnaround times without sacrificing quality, Adobe Premiere Pro might prove advantageous because it allows efficient editing processes coupled alongside basic transitions/effects options readily available at their disposal. On the other hand, those looking into producing highly stylized animations would benefit greatly by opting instead towards utilizing specialized tools found exclusively within After Effects.
Efficient Editing for YouTube Videos Using Premiere Pro
Premiere Pro, being a video editor designed primarily for cutting and arranging raw footage, offers an intuitive interface that makes it easy to edit videos quickly. This is particularly useful when creating content on tight deadlines or when working with large amounts of video clips.
-
Edit videos faster using timeline-based editing system.
-
Add visual effects and transitions directly from the built-in library.
-
Easily adjust color grading and correction settings to enhance your footage.
-
Create simple animations using keyframing capabilities in Premiere Pro itself.
Highly Stylized Animations Achievable Through After Effects
If you’re aiming to create more complex animation work or add advanced special effects to your videos for your channel, then turning towards After Effects may be a better choice. With its robust features tailored specifically for motion graphics artists and animators, After Effects provides greater control over every aspect of your project:
-
Create intricate text animations easily using the built-in text animator.
-
Design and manipulate 3D elements with camera tracking capabilities.
-
Integrate third-party plugins like Element 3D from Video Copilot for enhanced 3D functionality.
-
Add advanced visual effects using expressions scripting language or through a vast library of available presets and templates.
In essence, both Adobe Premiere Pro and After Effects have their strengths when it comes to creating content for YouTube. It ultimately depends on your specific needs as a creator – whether you prioritize efficiency in editing videos or seek more advanced animation capabilities. Understanding the differences between these two applications will help you choose which one is most appropriate for your creative approach and helps show your vision on YouTube.
FAQ
Which is better: Adobe Premiere Pro or After Effects?
Both Adobe Premiere Pro and After Effects have their strengths. Premiere Pro excels in video editing, while After Effects specializes in motion graphics and visual effects. The choice depends on your specific needs for a project; professionals often use both programs together to achieve desired results.
Is Adobe Premiere harder than After Effects?
The difficulty level of each program depends on the user’s familiarity with video editing and motion graphics software. Some may find Adobe Premiere more straightforward due to its focus on video editing, while others might prefer the flexibility offered by After Effects for creating complex animations.
Which is more difficult: After Effects or Premiere Pro?
This largely depends on individual preferences and experience levels. For those with a background in video editing, they may find that learning Premiere Pro comes easier compared to mastering the complexities of animation within After Effects.
What is the disadvantage of Adobe After Effects?
A significant disadvantage of Adobe After Effects is its steep learning curve for beginners due to its numerous features, tools, and capabilities designed primarily for advanced users working with motion graphics and visual effects. Additionally, it can be resource-intensive when rendering complex projects, which could slow down performance.
Conclusion
After reading this comparison of Adobe After Effects and Adobe Premiere, it is clear that both programs have their own unique strengths and weaknesses. While they share some overlapping features, each program has exclusive features that make them better suited for specific tasks. Determining which program to use ultimately depends on your specific needs and the type of work you do. When dealing with 3D animation, the benefits of either program will depend on what components you need to concentrate on.
Click this link to learn about importing 3d models into After Effects.
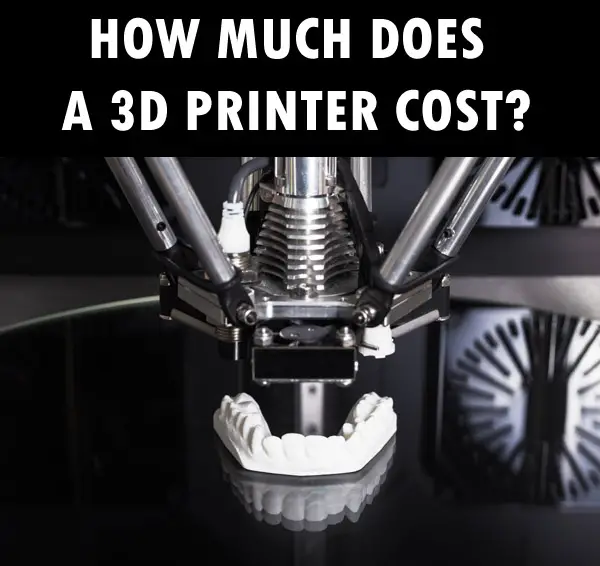
How Much Does a 3D Printer Cost? Look at Printers and Related Costs
The world of 3D printing is expanding every year with new technologies, new printer models, and even new printer makers appearing all the time. With all this happening, printer prices are dropping due to competition, changes in technology, and cost of production.
In the following article we will describe what 3D printers can cost based on type, application and the other several factors which determine price. Let’s get started.
The price of a 3D printer can range depending on its type, size, place of manufacture, brand, printing technology, etc. But the cost of owning 3d printer does not stop there. We will discuss material costs for various filament and resin types used in 3D printing projects, maintenance costs, repairs, operator time, and energy costs involved. Various printers have their particular “cost per part printed”, and this again depends on many factors, some of which include cost to print the part and material cost.
Types of 3D Printers
Having a reliable and efficient 3D printer is crucial for students and professionals alike. With various types of printers available in the market, it’s essential to understand their differences, advantages, and disadvantages before making an investment.
Fused Deposition Modeling (FDM)
FDM is one of the most popular methods for desktop 3D printing. It works by melting thermoplastic filament material layer-by-layer onto a build platform to create a solid object based on digital design files. The primary advantage of FDM printers lies in their affordability compared to other technologies while still offering decent print quality.
- Advantages: Affordable; wide range of materials; user-friendly operation.
- Disadvantages: Lower resolution than SLA or SLS; limited geometric complexity due to support structures needed during printing.
Stereolithography (SLA)
Stereolithography uses ultraviolet light projected into liquid photopolymer resin that hardens upon exposure, forming each layer as it builds up from bottom-to-top within a vat filled with resin (source). This technology offers higher precision prints with smoother surface finishes compared to FDM, making it ideal for intricate designs and prototypes.
- Advantages: High resolution; smooth surface finish; capable of printing complex geometries without support structures.
- Disadvantages: More expensive than FDM printers; limited material options (mostly resins); post-processing required to remove supports and cure prints.
Selective Laser Sintering (SLS)
SLS technology utilizes a high-powered laser to fuse powdered materials such as nylon or metal into solid layers based on digital design files (source). This method allows for the creation of highly detailed parts with excellent mechanical properties, suitable for functional prototypes or end-use products in various industries like aerospace, automotive, and medical devices.
- Advantages: High precision; strong mechanical properties; no need for support structures during printing process.
- Disadvantages: Expensive equipment and material costs compared to other technologies; higher energy consumption during operation;
Cost of 3D Printer Itself
The expense of owning a 3D printer can differ significantly depending on the type, size, place of origin and any extra features or capabilities it may have. To ensure you are making an informed decision when selecting a 3D printer for your scientific projects, we will explore the various factors influencing cost such as type and size of the printer, its place of manufacture, and any additional features or capabilities.
Printer Category
Beginner 3D printers
Beginner 3D printers are usually the most affordable, with prices ranging from around $200 to $500. These printers are generally designed for home use and hobbyists, and they typically have smaller build volumes and lower print quality than professional or medical-grade printers. They may require more setup time for each print and more playing around with the output to get the best results. Examples of beginner 3D printers are the Creality Ender 3 and the Anycubic Cobra Neo.
Professional 3D printers
Professional 3D printers are designed for businesses and organizations that require high-quality prints and larger build volumes. Prices for these printers can range from around $2,000 to $10,000 or more. Professional-grade printers are capable of printing with a wide range of materials and can often produce highly detailed, intricate parts, with greater reliability. Examples of professional 3D printers include the Ultimaker S5 and the IEMAI HT-L.
Medical 3D printers
Medical/scientific 3D printers are designed for the healthcare industry and are used to produce medical implants, prosthetics, and other devices, as well as use bioresins which may be utilized to print scaffolding for living tissue. Prices for medical-grade printers can range from $10,000 to $100,000 or more, depending on the specific application and features required. Medical 3D printers must meet stringent regulatory requirements, which can contribute to their high cost. Examples of medical 3D printers include the Stratasys J750 Digital Anatomy Printer and the Formlabs Fuse 1.
Printer Type and Size
As mentioned earlier, there are three main types of 3D printers: Fused Deposition Modeling (FDM), Stereolithography (SLA), and Selective Laser Sintering (SLS). Each type has its own unique set of features that affect their price range:
- FDM Printers: These are typically the most affordable option among all types, with prices starting from around $200 for entry-level models like the Monoprice Select Mini , up to several thousand dollars for professional-grade machines such as those offered by Ultimaker.
- SLA Printers: SLA printers tend to be more expensive than FDM printers due to their higher resolution output capability. Prices start at around $1,000 for beginner-friendly options like the Peopoly Moai Kit, while high-end models from companies like Formlabs can cost upwards of $5,000.
- SLS Printers: SLS technology is generally reserved for industrial applications, and as such, these printers are the most expensive among all types. Prices for SLS machines start at around $10,000 for smaller desktop models like the Sintratec Kit, while larger-scale systems can cost hundreds of thousands of dollars.
In addition to printer type, size also plays a role in determining cost. Larger printers with bigger build volumes will typically be more expensive than their smaller counterparts due to increased material and manufacturing costs. Some 3D printers may be 10 by 10 feet in size, and the ones used to 3D print houses are much larger than that. An example of a large costly 3D printer is the CREATBOT F1000 Large Scale Industrial 3D Printer, with a cost of $35,000 and a build envelope of 1000x1000x1000mm.
Printers used in the medical and scientific field, although not the largest in size, are often some of the most expensive due to their applications, precision and material constraints. For example, the UpNano NanoOne Bio printer has a build envelope of only 120x100x40 mm but costs much more than 3d printers for personal/commercial use. It allows the user to print 3D structures with living cells taken from a culture plate inside the printing resin. Medical/Scientific printers can cost in the tens or hundreds of thousands of dollars.
Place of Manufacture
The origin of production may affect the cost of a 3D printer, with those made in countries with cheaper labor costs being more affordable than those manufactured in regions where wages and regulations are higher. Producers in countries with cheaper labor could have 3D printers that are less expensive than those manufactured in places where salaries and rules are stricter. For example, Chinese-manufactured printers like the Creality Ender 5 Pro often offer competitive pricing compared to similar models from US or European manufacturers.
However, it’s important not to base your decision solely on price when considering where your 3D printer is manufactured – factors such as quality control standards and customer support should also be taken into account before making a purchase.
The expense of 3D printers can differ extensively depending on their model, dimensions and place of origin. In addition to the price of the printer, you should factor in the cost of necessary materials for successful 3D printing.
Cost of Materials for 3D Printing

The cost of materials plays a significant role in the overall expense associated with 3D printing projects. The type and quality of materials used can greatly impact the final product’s appearance, durability, and functionality. In this section, we will examine the most common types of materials used in 3D printing: filaments for FDM printers and resins for SLA printers.
Filament Types and Prices
Filaments are thermoplastic materials that are heated and extruded through a nozzle to create layers in an FDM printer. There is a wide variety of filament types available on the market today, each with its own unique properties:
- PLA (Polylactic Acid): PLA is one of the most popular filaments due to its low cost ($20-$30 per kg) , ease-of-use, biodegradability, and availability in various colors.
- ABS (Acrylonitrile Butadiene Styrene): ABS offers higher strength than PLA but requires higher temperatures during printing; it typically costs between $15-$40 per kg.
- PETG (Polyethylene Terephthalate Glycol): PETG combines the ease of use of PLA with the strength and durability of ABS, making it a popular choice for many applications. It is priced similarly to ABS at around $20-$40 per kg.
- Specialty Filaments: These include materials like wood-filled, metal-filled, carbon fiber-reinforced, and flexible filaments. Prices can range from $30 up to $200 per kg, depending on the material composition.
Resin Types and Prices
Resins are liquid photopolymers that harden when exposed to UV light in an SLA printer. There are several types of resins available for different applications:
- Standard Resins: Suitable for general-purpose printing; prices typically range between $50-$150 per liter.
- Tough & Durable Resins: Designed for parts requiring higher impact resistance or flexibility; these resins cost between $100-$250 per liter.
- Casting & High-Temperature Resins: Used primarily in jewelry-making or engineering applications where high-temperature resistance is required; they generally cost between$200-$300 per liter.
- Dental & Biocompatible Resins: These specialized resins are designed for dental and medical applications, with prices ranging from $150 up to $400 per liter.
The cost of the materials can differ, contingent on components such as brand, quality and locality. Additionally, some 3D printers may require proprietary materials or cartridges which can further impact material costs. Therefore, it’s essential to research your specific printer model and its compatible materials when determining overall project expenses.
The expense of supplies for 3D printing can be greatly disparate depending on the kind and caliber of filament or resin used, so it is wise to examine your choices before buying.
Maintenance Costs for 3D Printers
Maintenance is an essential aspect of owning a 3D printer, as it ensures the longevity and optimal performance of your device. In this section, we’ll look at the expenditure linked to frequent cleaning and maintenance, as well as repair expenses for malfunctioning parts or software issues.
Regular Cleaning and Upkeep Costs
Regular maintenance tasks include cleaning the print bed, nozzle, extruder gears, fans, and other components to prevent dust buildup or clogging that can lead to poor print quality or even damage to your printer. Depending on how often you use your printer and its complexity level (FDM vs SLA vs SLS), these tasks may need to be performed weekly or monthly.
- Filament-based printers: For FDM printers using filament materials like PLA or ABS plastic, expect to spend around $10-$20 per month on supplies such as rubbing alcohol (for cleaning the print bed) and replacement nozzles if they become worn out over time.
- Resin-based printers: SLA printers require more frequent cleanings due to their use of liquid resin material; this involves replacing disposable gloves ($5-$10 per box), paper towels ($1-$2 per roll), isopropyl alcohol ($15-$25 per gallon) for rinsing prints after printing process completion.
- Powder-based printers: SLS machines have higher maintenance requirements because they utilize powdered materials which can create additional messes during operation; expect additional expenses in air filters replacements ($30-50 each).
In addition to these consumable items needed for routine care, calibrating your 3D printer and updating its firmware are also essential to maintain optimal performance. These tasks can usually be done for free, as they only require time and effort on the user’s part.
Repair Costs for Malfunctioning Parts or Software Issues
While regular maintenance helps prevent many issues with 3D printers, there may still be instances where parts fail or software glitches occur that necessitate repairs. The cost of these repairs will depend on several factors:
- Type of printer: FDM printers generally have lower repair costs compared to SLA or SLS machines due to their simpler construction and more readily available replacement parts.
- Availability of spare parts: Some manufacturers offer warranties covering certain components, while others sell individual replacement parts; this can affect overall repair expenses significantly.
- Degree of damage: Minor fixes like replacing a worn-out nozzle might cost just a few dollars, whereas repairing a damaged print bed could set you back $100-$200 depending on the model.
It may be more sensible to purchase a newer printer instead of spending money on costly repairs for an older one. To help mitigate potential repair costs, proper care and preventative maintenance tactics should always be employed by users regardless of their chosen type of 3D printing technology.
In comparison to the cost of buying and running a 3D printer, upkeep expenses are generally quite low. However, time, energy and labor costs should also be taken into consideration when budgeting for 3D printing projects.
Time, Energy, and Labor Costs for 3D Printing Projects
Considering the time, energy, and labor associated with 3D printing projects is necessary for determining their total cost. It is critical to factor in these elements when computing the general cost of utilizing a 3D printer.
Setup Time
The setup time for a 3D printing project includes preparing the design file (CAD model), slicing it into layers using specialized software like Cura, and configuring print settings such as layer height and infill density. The time required for setup can vary greatly depending on the intricacy of your design.
Printing Time
Printing time varies greatly based on factors such as printer type (FDM vs SLA vs SLS), print speed settings, part size or volume, layer height resolution selected in slicer software etc., For example an FDM printer might take longer than an SLA or SLS due to its slower deposition rate but may be more affordable in terms of material cost.
- FDM: Can range from few hours up to days depending on part size & quality requirements.
- SLA: Generally faster than FDM but still depends on part size & desired level of detail.
- SLS: Faster compared to both FDM & SLA but requires additional post-processing steps which add extra time consumption.
Post-Processing Time
All types of printers require some degree of post-processing to achieve the desired finish on printed parts. This can include support removal, sanding, polishing, painting or other finishing techniques. The time required for post-processing depends on the printer type and desired quality of the final product.
Energy Consumption During Printing Processes
Energy expenditure is a component that can add to the total cost of 3D printing jobs. Different types of printers have varying energy requirements; FDM printers typically consume less power compared to SLA & SLS machines due to their simpler mechanical design and lower operating temperatures. To estimate your energy costs accurately you should check your local electricity rates as well as manufacturer specifications for each printer model under consideration.
Labor Costs Related to Operating Printer or Post-Processing Prints
Labor costs are an important aspect when calculating total project expenses especially if you are outsourcing print jobs or hiring staff specifically for this purpose in a professional setting like a Fab Lab. These costs can vary depending on factors such as hourly wages paid, number of hours spent per job (setup + printing + post-processing), employee benefits etc., It’s essential not only consider material & equipment costs but also account labor expenses when evaluating true ROI from investing in 3D printing technology.
Considering the financial outlay of any 3D printing endeavor, time, vigor and labor all constitute necessary components.
Cost Per Part Printed
In this section, we’ll assess the expense of each part printed taking into account all elements examined in prior sections, for instance material cost, upkeep expenditure, energy/labor costs and so on., to decide how much it would take to fabricate a single piece with a given 3D printer.
Material Costs
The first factor that contributes to the overall cost per part is the material used for printing. Different materials have different prices depending on their quality and compatibility with various types of printers. For example, PLA filament is generally cheaper than ABS or PETG filaments but may not be suitable for high-temperature applications or parts requiring higher strength.
Printer Efficiency and Speed
Another important aspect affecting the price per print is your chosen 3D printer’s efficiency and speed. Printers with faster print speeds can produce more parts within a given timeframe, reducing labor costs associated with operating the machine. Additionally, efficient printers consume less energy during operation which translates into lower electricity bills over time.
Maintenance and Repair Costs
Maintenance and repair expenses also play a significant role in determining your final cost per printed part since these costs are spread across each piece produced by your machine throughout its lifespan. Regular cleaning , software updates/upgrades, replacement parts (such as nozzles), and other necessary repairs should be factored into your calculations when estimating total production expenses.
Post-processing and Labor Costs
Post-processing steps, such as support removal, sanding, and painting also contribute to the cost per part printed. These tasks often require manual labor which can increase your overall production costs if not managed efficiently. It’s important to consider these additional expenses when determining the true cost of each 3D printed piece.
Quantity Produced
The number of parts you plan on producing will greatly impact your final cost per print since many fixed costs (such as machine purchase price) are spread across a larger quantity of items produced over time. Economies of scale come into play here; printing more parts in one batch typically results in lower individual item costs due to reduced setup times and material waste.
To get an accurate estimate for the cost per part printed with your specific 3D printer model and materials, it is recommended that you use a cost estimation tool or calculator. By factoring in the various elements discussed, you can make well-informed decisions to get the most out of your 3D printing and save money.
The cost per part printed is an important factor to consider when selecting a 3D printer. The next heading will discuss the various factors that should be taken into account when choosing a 3D printer for your needs.
Factors to Consider When Choosing a 3D Printer
When choosing a 3D printer, there are various factors to consider such as budget, features, accuracy and speed requirements, material compatibility, ease-of-use and maintenance needs. These include budget constraints, desired features, accuracy requirements, speed requirements, material compatibility, ease-of-use, maintenance needs and more. In this section we will discuss some of these key factors in detail.
Budget Constraints
The cost of a 3D printer can vary greatly depending on its type and capabilities. Before making a decision about which printer is best suited for your needs, it’s important to establish a budget that takes into account not only the initial purchase price but also ongoing costs such as materials and maintenance expenses. To get an idea of what different types of printers may cost you can refer back to Section: Cost of 3D Printer Itself.
Desired Features
Different types of printers come with varying features that cater to specific applications or user preferences. Some examples include dual extruders for multi-material printing or advanced software options like automatic support generation or slicing settings customization. Be sure to research each type’s unique offerings so you can choose one that aligns with your project goals.
Accuracy Requirements
- FDM: Fused Deposition Modeling (FDM) printers typically offer lower resolution prints compared to other technologies like SLA or SLS due their layer-by-layer deposition process; however they still provide sufficient accuracy for many projects especially when considering their relatively low cost.
- SLA:Stereolithography (SLA) printers use light-curing resins which result in high-resolution prints suitable for detailed models or intricate designs. This technology tends to be more expensive than FDM, but the increased accuracy may be worth it for certain applications.
- SLS: Selective Laser Sintering (SLS) printers use lasers to fuse powdered materials together, resulting in high-resolution prints with excellent mechanical properties. Like SLA, these printers are generally more costly than FDM options but offer a higher level of precision and strength.
Speed Requirements
The speed at which a 3D printer can produce parts is another important factor to consider when choosing your device. Different types of printers have varying print speeds due to their unique processes and capabilities; however faster printing times often come at the expense of lower resolution or quality results. Be sure to weigh the importance of speed against other factors like accuracy and material compatibility before making your decision.
Material Compatibility
Different 3D printer technologies utilize different materials such as filaments for FDM, resins for SLA or powders for SLS. It’s crucial that you choose a printer that supports the specific materials you plan on using in order to achieve desired outcomes from your projects. Refer back to Section: Cost of Materials for 3D Printing for an overview on various material types and prices associated with each type of printer.
Ease-of-Use & Maintenance Needs
Selecting a user-friendly 3D printer will help ensure smooth operation throughout its lifespan while minimizing frustration during setup or troubleshooting procedures. Additionally, some devices require less maintenance than others so make sure you’re aware of any ongoing upkeep needs prior making your purchase decision – refer back to Section: Maintenance Costs for 3D Printers for more information on this topic.
By considering these factors and conducting thorough research, you’ll be better equipped to choose the right 3D printer that meets your specific needs and requirements. Remember to take into account your aims, budget restrictions, and preferred characteristics when settling on a choice.
Frequently Asked Questions- How Much Does a 3D Printer Cost
Is 3D printing cheap or expensive?
The cost of 3D printing varies depending on factors such as the type of printer, materials used, and maintenance costs. While some affordable printers are available for under $200, professional-grade models can cost tens of thousands of dollars. Additionally, material costs and ongoing expenses like maintenance can add up over time.
How much does a cheap 3D printer cost?
A budget-friendly 3D printer typically costs between $100 to $500. These entry-level machines may have limited features and capabilities compared to more expensive models but can still produce decent quality prints for hobbyists or beginners in the field.
How much does 3D printer plastic cost?
The price of 1kg spool of filament (the most common plastic used in FDM printers) ranges from around $20 for basic PLA to upwards of $50 for specialty materials like flexible TPU or carbon fiber-infused filaments. The actual cost per print depends on factors such as size, infill density, and support structures needed.
Conclusion
From the cost of the actual 3D printer itself, materials used for printing, maintenance and repair fees as well as time spent on projects should all be factored in when looking at total cost. Moreover, each 3D printer may feature diverse characteristics and capacities that could have an effect on the cost. Before committing to a 3D printer, ensure that it is the most suitable model for your requirements and budget.
Click the following link to learn whether 3d printers are hard to use.
Can You See DNA with a Microscope?
Microscopes have come a long way since they were first created. From a simple compound microscope to an electron and atomic force microscope—there are a variety of microscopes available to choose from, depending on the purpose. We can see our own cells or other microscopic organisms and their components under a microscope.

But can we see DNA using a microscope?
DNA cannot be seen in the regular compound microscope. But DNA can be seen with the help of more advanced methods like electron microscopy and atomic force microscopy. You can see the nucleus with a compound microscope, but not the DNA. Chromosomes can be seen only during cell divisions.
Compound microscopy is great to see a cell, its components and various organisms. Details of the various organelles can be seen with the maximum magnification of a compound microscope.
Nucleus and chromatin can be easily seen with a compound microscope.
Chromosomes can be seen only during cell division. They are first seen during the prophase of cell division. Chromosomes can be visualised at 40X magnification.
However, DNA is very small and therefore cannot be seen with a regular compound microscope. To see DNA, you need more advanced techniques like electron microscopy.
What Kind Of Microscope Can Be Used To See DNA?
At present, DNA can be best visualised with an electron microscope.
DNA was discovered in 1952 based on the X-ray diffraction image, known as photo 51. It was more of an indirect way of looking at the DNA and concluding that it is helical in shape. The conclusion was based on the X-pattern produced on the X-ray diffraction and the mathematical understanding that a helical structure would produce an X-pattern on X-ray diffraction. The DNA helix itself was not directly seen.
It wasn’t until very recently that we actually had the images of the DNA helix. In 2012, using an electron microscope, the image of the DNA helix was captured for the first time. It was captured by stretching the DNA strands between silicone nanopillars and then firing a beam of electrons on it to visualise and capture the images of the actual DNA helix.
However, even with electron microscopy, we can’t see a single DNA. What we see with an electron microscope is a “cord” of DNA, containing a minimum of 6 DNA molecules wrapped around a 7th DNA molecule (acting as a base). This is because a single can’t withstand the energy produced by the beam of electrons.
Another method that has been used to see the DNA is atomic force microscopy(AFM).
AFM uses scanning probes to see the images. The probe touches and “feels” what the structure looks like and based on that an image is produced. It doesn’t use any lenses or beam radiation to produce an image.
Can You See Chromosomes And Genes With A Microscope?
The chromosomes, genes and DNA are present within the nucleus of a cell. The chromosome contains the DNA along with other proteins. On the other hand, genes are the segments of DNA. It is the difference in the molecular sequence of these segments (i.e. genes) that give us our individual characteristics.
Chromosomes can be seen with a compound microscope only when the cell is dividing. This is because during cell division the chromosomes condense at a certain place with the nucleus, making it easier to see the collection of chromosomes.
Chromosomes can be first seen on a light microscope during the leptotene stage of the prophase. This is when the chromosome begins to condense at a point.
The best microscope to see a chromosome, however, would again be with electron microscopy, like a scanning electron microscope.
Genes are studied by studying the sequence of the nucleotides in the DNA. To study a gene, various molecular methods are used. Very commonly fluorescence microscopy and FISH are used to see the gene sequence. Gene is a small part of DNA, and therefore cannot be seen with a compound microscope.
DNA, as mentioned earlier, can be seen with an electron microscope, and atomic force microscopy has also been tried to see the DNA helix.
Methods To Check The DNA Yield In The Sample
Once the sample is collected for DNA visualisation or testing, to check whether the sample has a good amount of DNA or not certain quantification methods can be used.
Agarose gel electrophoresis is one such technique using which the DNA in the sample can be separated from the proteins using agar and electrodes. On passing the current, as DNA is negatively charged, it moves towards the positive electrodes. This way we can see the quantity of DNA in the sample, as well as separate the DNA from other proteins.
Fluorescent DNA-binding dyes can also be used to visualise DNA fragments, and when shown UV light, they fluoresce, making it easier to see the presence of DNA.
UV absorbance is another method to quantify DNA. The sample is exposed to 260nm of UV light. This is because the nucleic acids have maximum absorbance at 260nm wavelength. However, this isn’t the best method for DNA quantification as it only works for pure DNA samples. The presence of other proteins can interfere with the results.
So, these are some common ways to check for the yield of DNA in a sample. The separated DNA can then be used for various purposes— to visualise under a microscope, DNA fingerprinting, and other molecular studies.
What To Remember About Visualising DNA Under A Microscope?
DNA is very small in size and therefore it cannot be seen with a light microscope. However, they can be visualised using more advanced microscopes like electron microscopes and atomic force microscopes.
Chromosomes are best seen under electron microscopes as well. But they can also be seen with a compound microscope during certain phases of cell division.
Genes, on the other hand, can be studied with the help of various molecular methods like FISH to identify the location of a particular gene on the chromosome.
You can read about the types of microscopes that produce 3D images here.
Can you Import 3D models into Adobe After Effects?
Adobe After Effects (AFX) is one of the popular tools used by videographers and video editors for creating special effects and animation in videos. It comes with lots of features that can bring your projects to life. One of the best ways to do it is by using 3d models.
In this guide, we will see how we can import 3D models into Adobe After Effects. We will also look at the capabilities of After Effects when working with different 3D model types.
There are many software programs out there that are capable of creating 3d models. Most of these programs generate 3d models in their proprietary format. You may find it difficult to use these files in Adobe After Effects if you don’t know how to import them correctly.
So, let us have a look at the various types of 3d models supported by After Effects and how to import them.
How to import 3d models into AFX?
Now, I will describe how you can import 3d files from programs like Adobe Photoshop, Illustrator, Maya, and other popular 3D creator applications into After Effects.
1. 3D Models from Photoshop
You can use Adobe Photoshop to create 3d objects. Here, if you save the final file as a “PSD” file, you will not be able to import it as a 3D object in After Effects. You need to save the file in a different format. This format is called the “Vanishing Point Exchange” format. Files in this format will come with the extension “.vpe”. It is actually a collection of PNG files. A 3d object will have information in 3 planes. Here, the .vpe file will have png files for each of these planes. Each of these PNG files will come with camera data. To save the file in .vpe format, you need to go to Files and select the “Export for After Effects” option. You can drag and drop this exported .vpe file to After Effects.
There is also a script available that can convert PSD files into 3d objects in After Effects. You can download the script from here. It is developed by Paul Tuerseley. This script will make the different layers of the PSD files look like a 3d object in the Active Camera View.
2. 3D Models from Illustrator
You can also create 3d objects in Adobe Illustrator. Tools like Extrude, Bevel, and revolve will help to produce a 3d view of the subject in Illustrator. You can import this 3d file directly into After Effects.
3. Maya 3D Files
It is possible to import 3d files from the popular Maya software into After Effects. If you follow the right procedure, it will be easy for you to animate these 3d files easily with keyframes. You need to bake the 3d file before exporting it from Maya. This process of baking is essential to ensure that each of the keyframes is positioned correctly for the animation.
You need to have a fixed number of keyframes for each camera angle. It is the baking process that helps to keep the keyframe on each of the animation frames. Suppose you have not done any animation for the property in Maya, there may not be any keyframes, or there will be one keyframe at the start of the animation. If the number of keyframes is more than one for a property, then the same number of keyframes needs to be maintained for all other properties.
Also, Adobe After Effects does not support a few transformation flags. So, if the Maya 3d file contains these transformation flags, they will be skipped after importing them in AFX. There will not be any warning messages shown for skipping these flags.
You can directly import the camera information from the .ma Maya file. This camera information can be used in a single or double composition. Whenever you import a .ma extension file in After Effects, AFX will make single or double compositions. This imported Maya file can contain either a square or non-square pixel aspect ratio. If the aspect ratio is a square one, a single composition will be created by AFX. This computation will have square pixel data and associated camera angles.
If the aspect ratio in the .ma file is a non-square one, the AFX will create double compositions. The camera data will be there in the first composition. It will be a square pixel composition. There will be a “Square” prefix for this filename. The second composition will be called the parent composition. It will have a non-square aspect ratio. The actual dimensions of the original file will be retained in this file.
When you import a Maya 3d file into AFX, you need to work with 3d layers and square pixel footage if the composition is a square pixel one. If the composition is a non-square pixel one, use the footage in the composition.
The imported .ma file might be with a single node camera. In this case, the AFX will create a square pixel composition. The focal length of the camera, the transformation data, and the film size will be there in this imported file. If the imported .ma file has a double node camera, the AFX will create an extra parent node. This node will be in square pixel composition. Only the transformation data of the camera will be present in this node. If you try to import a .ma file with 3 node cameras, AFX will not be able to read such a file. Thus, you can import only up to a 2 node file.
The imported Maya file will contain locator nodes. AFX is capable of reading these nodes. The tracking of the objects in After Effects is possible only through these locator nodes. Also, you need to ensure not to parent the locator nodes to each other in Maya. You need to parent the locator nodes to the geometry of the 3d structure.
4. 3D Models from Other Applications
Many other applications are also capable of generating 3D objects. Adobe After effects does support many of the 3d file formats also. Some of the popular 3d file formats supported by AFX include OpenEXR, Electric Image (EI), RPF, RLA, and SoftImage PIC. You can drag and drop these files into After Effects. There will be lots of information stored inside these 3d files. It includes the color channels blue, red, green, and alpha. Other information includes the depth, ID of the object, texture, and coordinates.
Whatever compatible 3d files you try to open in After Effects they are treated as a single 2D layer by AFX. In order to access the 3d information in these files, you need to check the 3D channel effects. For opening the popular OpenEXR files, Adobe has integrated the 3D channel effect plugin from fnord software.
If you have Softimage PIC files, you can see a ZPIC file in the folder. The z-channel information (depth) will be stored in this file. It is not possible to import the ZPIC file in AFX. But make sure that the ZPIC file is stored in the same folder as the PIC file. It will allow you to read the depth information for the PIC file.
Another popular 3D file format is the Electric Image file (EI). Here the data for the z-channel will be stored in the EIZ file. You cannot import the EIZ file into After Effects. But keep the EIZ file in the same folder as the EI file. It will allow you to read the z-channel data.
If you plan to create a 3D model using any software and use it in Adobe After Effects, it is a good idea to insert null objects wherever necessary. It can be null locator nodes or null lights. When you import these 3D files with the null objects, these null objects will act as the reference while placing other subjects.
FAQ
Can you import OBJ files into AFX?
Yes, it is possible to import OBJ files into AFX. If you want to import an OBJ file, you need to drag and drop the file into Adobe After Effects. But, currently, there are some limitations to this imported OBJ model. You will not be able to apply any textures to the imported OBJ model. So, ensure that the texture is already applied to the model before importing it into After Effects.
Are plugins required for importing 3d files into AFX?
In the older versions of Adobe After Effects, plugins were needed to import 3d models. But in the newer versions, it is possible to import 3d models without any plugins.
Can you modify 3d models in AFX?
It is possible to open multiple types of 3d files in After Effects. But it is not possible to create or modify any of these 3d files directly using Adobe After Effects.
I hope you found this article useful. Click on the following link to learn if an iPad is good for 3D modeling.
What are the Best Websites to Learn Human Anatomy?
In this article, I will discuss some of the best websites for studying human anatomy. These were selected from a multitude of sites available on the web.

With these websites that explore the mystery and genius of the human body, college students as well as adults will have no trouble learning human anatomy. Students can get a thorough understanding of human anatomy thanks to online interactives on the human body.
Anatomy is a branch of biology and medicine concerned with the study of the structure of living things. It is derived from a Greek word that means to take apart or cut up. Anatomy investigates cells, bones, and organs that exist in humans and animals. It is often split into two parts: histology (microanatomy) and gross anatomy.
Gross anatomy involves studying bigger structures of the body, and microanatomy is the study of the smaller structures of the body. Those who study histology utilize equipment such as microscopes to observe tissues and cells.
Let’s get started.
AnatomyZone
With more than 200 videos and a fresh selection of interactive 3D anatomy models, AnatomyZone is an excellent site for clear and succinct 3D anatomy lessons. The site
includes topics such as physiology and advanced anatomy. These topics are categorized by body parts:
- Nervous System Organization
- Tutorials on Lower Limb Anatomy
- Tutorials on Upper Limb Anatomy
- Tutorials on Pelvic and Abdominal Anatomy
- Tutorials on Neck Anatomy Instructions
- Tutorials on Thorax Anatomy
Innerbody.com
This informative website is created for people who want to learn about the intricacies of human anatomy. It uses pictures, animations, and tutorials to explore various systems of our body.
This site is perfect for learners who are able to understand things mostly through reading. The 2D section enables you to isolate body parts and discover particular information about different parts of the human body. You can isolate any organ and can obtain precise information. With the 3D rotation and zoom feature, you can see the system as a whole from any direction.
There is a video describing how to use the website and other sections that have similar information, like occupations relating to anatomy, diseases, and diet. For pupils in middle and high school who study anatomy, this is a useful resource.
The site extensively covers the human body and the interactions between its various systems. The body is divided into systems, and then each system is further divided into its tiniest components.
Anatomy Atlases

Anatomy Atlases is a digital library that offers free education to students, healthcare professionals, and patients with the aim of improving patient care, outcomes, and lives. The goals of this website are to create a thorough digital anatomy library for use by healthcare providers and patients and ensure a top-notch educational experience by keeping things simple and uncomplicated. Anatomy Atlases is designed for physicians, fellows, and medical students studying anatomy. It should be helpful to other healthcare professionals who are researching anatomy.
GetBodySmart
Scott Sheffield started GetBodySmart in 2000. He made beautiful animations and illustrations along with easy-to-understand explanations. GetBodySmart is an attempt to make an eBook about human anatomy that is completely engaging and animated. Based on years of teaching experience, the content and layout of this website were developed.
GetBodySmart’s quizzes and free tutorials are available to healthcare professionals, pupils, teachers, and anyone else who wants to understand the body’s intricate physiological interactions.
Anatomy.tv
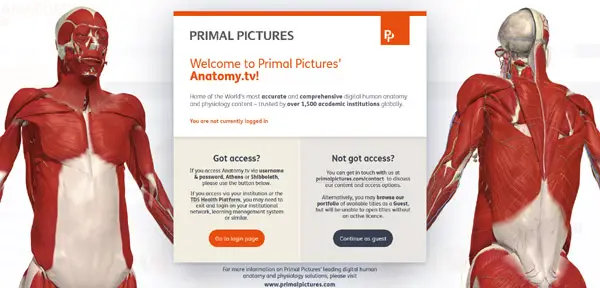
This website is an engaging educational resource on anatomy. It contains video clips, slides, text, and interactive 3D models. You can use this resource to find pictures to use in presentations and coursework, watch interactive videos and photos, and take quizzes to assess your knowledge. There are numerous modules on this educational website that cover clinical specialties, general anatomy, and in-depth subjects like comparative physiology and neuroanatomy.
Histology-World

Histology-World is more than just a place to have fun with histology. This website is rich in authentic educational histology content. Students in a histology class who are either attending their college classes online or in a traditional setting can access this histology website. This site is for you if you are interested in studying histology in order to earn a healthcare degree. The activities and information at Histology-World can be used to enhance the content of histology online college classes or online healthcare classes. The material at Histology-World can also be used as a supplement to their histology class by traditional medical training programs.
Microanatomy Web Atlas
There are a number of study guides, tests, and pictures in this resource. It features a large number of illustrations. For each subject, the website also includes self-study guides and practice tests.
It covers the topics like male reproductive system, female reproductive system, digestive system, kidney/urinary system, respiratory system, cardiovascular system, and endocrine system. Other topics include Nerve, Ear and Eye, Muscle, Skin, and Cartilage and Bone.
The descriptions are sufficient and the illustrations are understandable. These could be used by a teacher to lead students through the images and provide any necessary explanations and details.
TeachMeAnatomy

This website is used by more than 6 million healthcare professionals and students each year to help them study. TeachMeAnatomy is a smartphone and tablet app that is available right now to help you get the most out of your study.
The educational website features more than 1000 brilliant, full-color photographs and is presented in an easy-to-read and visually appealing manner.
Each topic, developed by a group of medical students and medical practitioners, combines anatomical expertise with high-yield clinical pearls.
WinkingSkull

For individuals who like to study health science and medical pupils, this website is a very useful resource. Back in 2008, Thieme Publishers introduced it. The website contains more than 4000 anatomy pictures and more than 7000 questions and answers in otolaryngology, anatomy, biochemistry, physiology, and pharmacology.
Gale Interactive: Human Anatomy
Gale Interactive: Human Anatomy lets students study virtual 3D dissections and participate in interactive research. These potent tools can be used to assist with research projects and homework assignments and demonstrations in the classroom. Gale collaborates with global librarians to gather and organize rare content as part of their vast collection of educational databases. This allows them to provide the classroom with resources created specifically for online learning. Gale creates crucial curriculum-aligned content that keeps pupils interested in their studies and equips teachers with the tools they need to overcome curriculum obstacles.
Visible Body

Visible Body develops software and apps that are utilized by many healthcare providers, teachers, and pupils worldwide. The site uses game-like interactivity, small lessons, and 3D visualizations to make learning science fun, easier, and fast. Teachers and pupils that utilize this educational website report grade improvement, improved retention, and increased student engagement.
The website’s in-house team comprises software architecture experts, programmers, educational publishing executives, and biomedical visualization experts.
BioDigital
The BioDigital Human is a 3D platform where physicians, students, and teachers can explore, customize, and share 3D views of diseases, physiology, and human anatomy. This cloud-based software is accessible in eight languages for use in any educational or clinical workflow, on any desktop, or mobile device.
Zygote Body
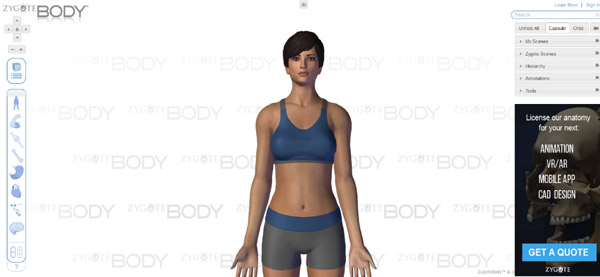
Zygote Body is a 3-D human anatomy website that allows you to easily annotate, resize, and rotate human body parts.
The ear, skull, and heart all have more in-depth views. With the use of an opacity slider, pupils can remove layers and concentrate on particular organ parts. The company has been creating the world’s top 3D anatomical products since its inception in 1994. Zygote’s 3D anatomical products have been used in medical animation and illustration projects, video games, movies, and educational software.
3d4medical
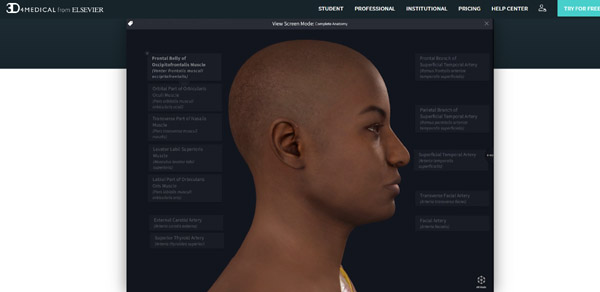
3D4Medical is a cloud-based education platform that enables students, teachers, and professionals to investigate the small details of human anatomy in 3D. The award-winning software is often used in healthcare facilities and universities all over the world and has been highlighted on stage at Microsoft and Apple events. Since 2009, the company has been creating anatomical and health products. It collaborates with a global group of academic experts to assure the highest level of medical accuracy.
I hope this article has given you plenty of anatomy website resources. Click the following link to learn the best 3d anatomy apps.