
Wouldn’t it be great if you could do all your 3D modeling work on an iPad and not be tied to your workstation location? Imagine the freedom to model anytime and anyplace like on a train, on vacation, at a coffeeshop. But is this a reality today?

In this article, I will explain what can and cannot be done in terms of 3D modeling on an iPad, including what 3D software options are available for this platform.
Pros And Cons Of an iPad For 3d Modeling
If you are looking to do 3d modeling on the iPad, there are both pros and cons to consider. While 3D modeling is not an easy task, there are a few advantages to using an iPad that should be taken into account.
Pros:
Easier to Learn
3d modeling on the ipad is easy to learn and use with the touch controls which means less time investment in learning 3d modeling software. This can also help you reduce the learning curve for new users as well.
Flexibility and Portability
With a single app you are able to switch between different types of modeling for different tasks; whether it be simple basic modeling and surface-drawing to advanced polygon-based modeling techniques. Being able to take your iPad with you wherever you may need it means you can model on the go which makes it ideal for people who want to model outside of their home or work space.
Powerful Features
The iPad’s hardware allows you to do 3D modeling with more comfort and detail due to the iPad’s high DPI display which means a sharper image on your screen with fewer distractions while working in the apps. It can also allow users to make more detailed models with textures and effects allowing for greater realism.
Easily Shareable
The Pad’s connectivity makes it easy to share your models with others. Whether it is using Instagram to post your work or just emailing the link to a friend who wants to see your work, the iPad makes it easy and convenient to share your work with others.
Cons:
Limited 3D Modelling Capabilities
If you’re a professional 3D modeler, you’ll know that using a laptop or desktop computer is the best way to create high-quality 3D models. However, if you’re looking to learn 3D modeling, or you’re working on a tight budget, an iPad might be a good alternative. Although iPads are great for browsing the internet and playing games, they don’t necessarily provide the best tools for 3D modeling.
Difficult To Transfer 3D Models
The files created by the iPad are not compatible with 3D printer compatible software like Rhinoceros or Solidworks. This means that you can’t upload the files to your 3D printer later without many extra steps. So, if you’re thinking of getting your designs 3D printed, you need to export them beforehand. This can get quite complicated and time-consuming so it’s best to use a PC for this purpose.
Poor Processing Power
On the iPad Pro in particular, the processing power of the GPU is very limited. That means that complex 3D modeling and rendering can take a very long time to complete. You might find yourself getting frustrated with the slow processing times that you get on an iPad Pro. For this reason, we recommend that you use a computer for complex modeling work rather than an iPad.
Many users believe that an iPad is great for basic 3d work, but many find that it doesn’t have the power to handle more complex tasks. This may one day change with advances in technology.
Software Options for 3D Modeling on the iPad
There are several 3d modeling apps available for the iPad that can be used for 3d modeling tasks. Some of the popular apps include:
Forger
Forger provides a range of tools for creating 3D models. This includes advanced modeling, texturing, lighting and rendering capabilities that give you full control over your project.
You can quickly sculpt out the shape of your model with its intuitive multi-touch interface. Forger also helps you add detail to the model by giving you access to realistic textures and materials. And if you need more help in understanding how things work then there are plenty of tutorials available online too.
Once your model is complete, Forger lets you render it into 3D images or videos which can be exported as gifs, jpgs or movie files thus allowing you to share them easily on social media platforms such as Instagram and YouTube.
Furthermore, thanks to augmented reality integration within Forger’s platform, users have the ability to walk around their creations by using an AR headset or mobile device camera lens enabling people from all walks of life to create immersive experiences. Overall, Forger offers powerful but easy-to-use features for creating 3D models for film projects, game development projects or just simply having fun with artistry without requiring a long learning curve .
Whether it’s something completely new or making improvements upon existing pieces, this app ensures that everyone has the chance at expressing themselves in unique and innovative ways.
Shapeyard
Shapeyard is the first platform to offer decentralized hosting of 3D models.
Furthermore, Shapeyard offers an interface for peer-to-peer content exchange and collaboration. Shapeyard also provides modules for easy synchronization with external services like Dropbox or Google drive.
This means working on projects in groups and sending links out for review becomes a breeze. On top of this, artists have access to powerful tools: from animation tools to automatic retopology and auto UV mapping, exporting at any resolution or extension you wish – even exporting 3D-ready character rigs directly into animation software such as Maya or Blender.
Overall, using Shapeyard simplifies workflow so you can focus on creating beautiful work quickly and easily while saving time and money in the process.
Shapr3D
Shapr3D is a professional-grade 3D modeling software specifically designed for the iPad. It is based on the Parasolid geometric modeling kernel, also used in industrial CAD software such as SolidWorks.
One of the main features of Shapr3D is its easy-to-use user interface, which is designed to be intuitive and work well with the touchscreen and Apple Pencil. The interface is optimized for use with the Apple Pencil, which is used to control the position of shapes and manage details while pivoting around the work plane is done with the user’s fingers.
Shapr3D offers a range of features for 3D Modeling, including solid modeling and parametric modeling, as well as tools for collaboration. It is well-suited for professional designers and engineers who need powerful and easy-to-use 3D modeling software on their iPad. It is available for purchase as a subscription-based service on the App Store.
Can you 3d animate on the ipad?
Yes, 3D animation is possible on the ipad. There are a few 3D animation apps available that can help you create 3D animations with realistic 3D characters, backgrounds, lighting and effects. Some of these 3D animation apps include:
Iyan 3D
Iyan 3D is an animation app suitable for many users, including filmmakers, 3D animators, and those interested in creating still images or pose Modeling. It allows users to import characters and props from the app’s store, import photos from their personal albums, and create scenes or animating short films.
One of the standout features of Iyan 3D is its ability to render text in 3D font styles, which can add an extra level of depth and interest to animations. The app also offers a range of tools and features for animating and editing 3D scenes, making it an excellent choice for anyone looking to create professional-quality animations on their iPad.
Overall, Iyan 3D is a fun and easy-to-use animation app suitable for many users, from filmmakers to casual animators. It is available for purchase on the App Store.
Anim8
The Anim8 animation software enables users to create 3D character animation quickly and easily. It is a great way for first-time animators to learn the basics of 3D character modeling, rigging, animating and rendering.
With its intuitive interface and simple drag & drop workflow, it makes learning 3D animation fun and easier than ever before. The library of 5 poseable characters provides the perfect starting point for any project.
On top of that, there are also various tools incorporated into Anim8 like camera control panel which can be used to capture dynamic shots or add effects such as filters and lens flares to an existing scene.
Even more features include motion tracking technology so animations can be matched with live footage for a truly unique experience.
Anima Toon
Integrate 3D models into your project with the integrated asset library, or drag and drop in custom assets to add realism. Anima Toon also helps you to create vibrant and memorable experiences with special effects like explosions, fire and smoke.
You can even adjust the speed of specific aspects such as particle systems for natural looking animation. Bring your creations alive by adding dialogues featuring different characters and lip-syncing them to audio files from a library of sound fx samples.
Share your work on social media directly from Anima Toon or export it to other platforms.
Wrapping Up!
In conclusion, the ipad is a great device for 3d modeling if you are looking to do basic 3d models or 3D printing projects. However, if you are looking to create more complex 3d models or 3D animations, it may be best to invest in a laptop or desktop computer that has the processing power and 3D modeling software to handle these tasks. Weigh your 3d modeling needs against the ipad’s capabilities before making your purchase decision.
Click the following link to learn if 3d modeling is harder than drawing.
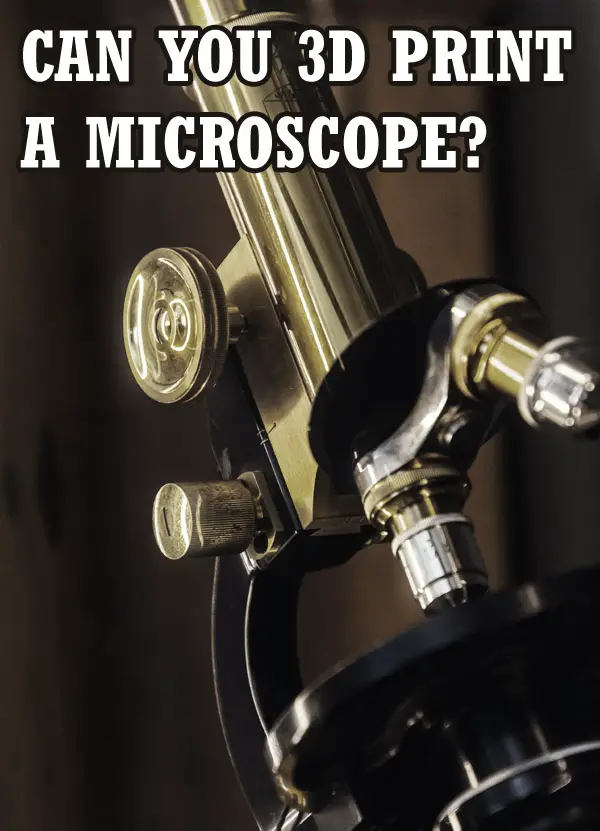
Can You 3D Print A Microscope?
3D printing is one of the most exciting technologies of modern times. It may seem like all you can create with 3D printing are simple things made of plastic. But since innovation has no limit, people from various backgrounds are making serious efforts to use 3D printing to solve major problems. One such example is 3D printing organs.
Yet another scientific problem that the world is facing is the lack of accessibility to technologies like a microscope, worldwide.
So, can you 3D print a working microscope?
Yes, a microscope can be 3D printed. Every part of a microscope can be 3D printed, assembled and used for academic and research purposes. In fact, certain companies sell 3D-printed microscopes specifically, to make microscopes affordable and accessible to everyone.
Certain open-source projects specifically produce 3D-printed high-end microscopes for people who need a good quality microscope for any reason. 3D printing a microscope brings down the cost of a microscope significantly, making them more affordable.
What Are The Benefits Of A 3D Printed Microscope?
The purpose of a 3D-printed microscope is simple— to make microscopes more accessible to the common man.
It’s no secret that lab equipment, especially high-end ones like a microscope can be extremely expensive. This makes it difficult for most people to be able to afford high-end equipment. Researchers often heavily depend on funding to be able to buy this equipment, but someone with limited funding or someone who is a hobbyist may not be able to afford the kind of microscope that will serve their purpose.
Additionally, many countries don’t have access to much essential lab equipment, including microscopes. And imported brands may cost a fortune. Lack of access to the required technology is one of the major reasons why the field of research only thrives in a few select countries— which is not good as many potential candidates with great ideas can never execute their research.
This problem can be solved with 3D printing a microscope.
3D-printed microscopes are much cheaper than regular microscopes. It has been noted that the price of 3D printed microscope parts is 50 to 90% less than the cost of commercially made microscopes— depending on the parts. That’s a huge difference for anyone with a limited budget.
Many open source projects, like openflexure, miCUBE and UC2, also allow customisation of the microscope as per the requirement of the consumer.
So, 3D printed microscopes are more affordable and customisable, and you can get the customised 3D printed microscope made in a relatively less time. This way better technology can be made accessible to many.
Additionally, certain other open source projects like cellSTORM are making an effort to make microscopes more portable, by using a cellphone camera.
What Parts Of A Microscope Can Be 3D printed?
Currently, every part of the microscope can be 3D printed— except the lenses and mirror. Technically, even the lenses can be printed using a 3D printer, but usually requires some additional effort and technology to make it completely transparent. So, if you are planning to 3D-print a microscope yourself, it’d be easier to get the lenses from disposable cameras or purchase them separately.
A 3D printer is capable of printing highly complex microscopic parts easily and allows rapid prototyping. The parts of the microscope can be printed individually and then assembled.
Additionally, various open-source projects make 3D-printed microscopes, like OpenFlexure and UC2. Their microscopes are extremely affordable, but they don’t necessarily look like the traditional microscope. These open-access projects are creating non-traditional designs to make the microscopes affordable, portable, and accessible.
Various 3D-Printed Microscope Open-Access Projects
- OpenFlexure— A UK-based open-access project, they produce 3D printed microscopes and make them available for as low as $18. They produce 3D-printed simple microscopes to the more complex fluorescence microscope. They are currently working with a health institute in Tanzania and contributing to making the diagnosis of malaria at the ground level possible. Their lightweight and cheap microscopes are making a real change in the healthcare sector of Tanzania. Their microscopes are small, can position the sample with an inbuilt computer and take images for later analysis.
- UC2– Their microscope does not look like the conventional microscopes and they also use a computer system to position and see the images. They create the microscope using off-the-shelf materials (like a mirror) along with 3D-printed cubes— which can be easily assembled by anyone. You can see their unconventional design and how to assemble them in the following video, to get an idea.
- miCube— This is yet another open-access project which allows anyone to have access to 3D printed microscopes, but they specifically aim to make fluorescence microscopes more accessible to people. The fluorescence microscope is an important part of both the medical and research sector. But traditional fluorescence microscopes can cost around 100,000 euros, but you can build a fluorescence microscope at around 20,000 euros with miCUBE. You can see their component list along with their pricing here.
- cellSTORM— This open-access project uses 3D printed parts and a cellphone camera to create a microscope that is capable of taking pictures. The fact that smartphones are relatively accessible to most and the fact that cell phones now come with really powerful cameras gave birth to the idea that even a cell phone can be used for basic microscopic exams. This is not only very accessible but also quite portable. The camera attached to a microscope is usually one of the most expensive parts of that microscope and it’s often quite fragile and easily damaged in certain situations, like conditions with high humidity. So, the fact that cellSTORM uses the camera of something that you may already own helps significantly bring down the cost of the microscope. You can read about the components and pricing over here.
- The €100 lab— If you specifically work with certain model species like the zebrafish, Drosophila, and C.elegans— some organisms of importance in neuroscience, then the €100 lab microscope would be a better option for you. As the name suggests, this microscope costs under €100, and if you wish to have a fluorescence microscope then that would be under €200. Their microscope comes with a Raspberry pi computer, a camera, and an Arduino-based optical and thermal control system— which makes this microscope ideal for the study of the behaviour of the above-mentioned organism. These microscopes are also quite cheap and portable, and anyone interested in doing microscopic studies can have the pleasure of owning a microscope.
So, Why A 3D Printed Microscope?
3D printing can be used to solve many problems. In the field of research and education, 3D printing can make microscopes more affordable and accessible to anyone interested in the field of science.
A researcher with a low budget, a country with less access to modern technology, a school or a hobbyist— all can now have access to a good quality microscope that produces good quality images and is affordable.
I hope that this article has given you some inspiration on what is possible in the world of 3D printing in the world of biology.
You can read more about 3D modelling for 3d printing here: A guide to 3D modelling for 3D printing.
Why is Adobe Premiere Pro not exporting video?
Adobe Premiere Pro is one of the most widely used video editing platforms for both amateur and expert editors. This application can turn your unedited footage into amazing video products for social media, films, and television. You can edit the music, add effects, adjust the filters, and output to many formats. The options are unlimited when it comes to producing dynamic videos.
However, sometimes Adobe Premiere Pro can stop exporting videos.
In this article, we will discuss ways to resolve the Adobe Premiere exporting problem, and more. Keep reading.
Given below are some reasons why your Premiere Pro is not exporting video.
- Old versions of Adobe Premiere Pro interfering
- Permission problems
- An issue with the video codec format
- You don’t have the most recent version of Premiere Pro
- There isn’t sufficient storage on your computer
Solutions For Resolving Adobe Premiere Exporting Problem
Use the Adobe cleaner tool
You should try the Adobe cleaner tool if you cannot export your video from Premiere Pro. This essentially removes outdated and damaged versions of Premiere Pro, addressing any underlying problems with the program. This will clean up your Adobe Cloud and delete any old versions of Premiere Pro.
Install the latest version
Your current version is most likely outdated because Adobe continuously upgrades its software. This could be the source of your export issues. Users often forget about this, so you should download the most recent version and check if the bug has been fixed.
Check the folder permissions
Check Adobe Premiere Pro for folder permissions. Here is how to do this.
- Simply locate the folder where the exports are kept, right-click on the folder, and select Properties.
- Open the Security tab and select Edit.
- Now search for your name under the Groups or Usernames options.
- If you don’t see your username there, click Add.
- Now enter your username and click the Check Names button.
- Click Ok.
- Check the Full Control option under Permissions for the username.
- To save your changes, click Ok and Apply.
Restart the PC
It’s worth knowing that simply restarting your computer can solve many problems. So, the first thing you should do if you detect a flaw in Premiere software is to restart your PC. Before proceeding to more complicated procedures, try the simplest first and restart your computer.
Resolve any storage issues
There’s a chance your device’s storage is full, which means you won’t be able to export from Adobe Premiere Pro. Make some more space, and then try again. This problem can also arise if you use an external hard drive, particularly if you get errors such as Disk Full, Invalid Output Drive Error, and I/O Error. Experiment with exporting without and with the external hard disk to determine if you can now export from Premiere Pro.
Close all the other open programs
You should see the pop-up displaying the problem to resolve it. If it indicates you can’t save the file, it could be because another application is using that location. To overcome this problem, close the currently open application. This will immediately resolve the clash problem. Then, simply restart Adobe Premiere and check.
Change the optimization preferences
The problem with virtual memory is one of the reasons Adobe Premiere Pro may fail to export your video. To fix this, you need to change the optimization settings from performance to memory.
To do this,
- Open Adobe Premiere Pro, then choose Edit > Preferences.
- Click Optimize Rendering For > Memory now.
- After that, click Ok to save your changes and exit Premiere Pro.
- Finally, restart the program to see if it works.
Change the video codec format
Changing the video codec format is one possible solution for fixing the Adobe Premiere video format problem. You may simply accomplish this by modifying a few settings. To begin, open the export options and then choose quick time from the format. For the video codec, select Photo and JPEG. After that, try exporting the video again.
Why does Adobe Premiere Pro keep crashing?
Your Premiere Pro will not export videos if it crashes.
All of your projects will be halted if your Adobe Premiere Pro continues crashing.
It’s important to identify the issue and address it as soon as possible.
Below are some of the reasons your Premiere Pro keeps crashing.
- Outdated Windows
- Outdated Graphics driver
- Running resource-hungry applications
- Your PC or computer does not fulfill the minimum requirements
- Using unsupported file fonts and formats
- Corrupted installation of Premiere Pro
- Editing big-size projects
- Use of GPU acceleration
- Malware
Solutions to resolve the problem of Premiere Pro crashing
Check your plugins
Plugins occasionally cause Premiere Pro to crash, although not often while exporting. It’s worth checking because there might be an issue with the plugin preventing your software from running. Disable all plugins, choose your movie, choose “Remove Attributes,” and export.
After the export is finished, you can always add them again, or if there are other plugins available, try one of those instead.
Use supported fonts
Know that not all fonts are compatible with Adobe Premiere Pro. A crash could occur if you utilize fonts that aren’t common. The ideal fonts to use in Premiere Pro for captions are Arial and Lucida Grande.
Clear media cache
Accelerator, preview renderings, peak, and conformed audio files are all stored in the cache in Premiere Pro. The application may crash due to unused or outdated cache files. To achieve maximum performance, it is, therefore, best to remove the cache files.
Update Adobe Premiere Pro
Any program updates should ideally be made before beginning a project because doing so in the middle of one could make everything you’ve done obsolete. This is particularly true for bigger updates. Be sure to update your Creative Cloud and Premiere Pro regularly. And incorporate any changes offered by Adobe into the most recent versions of Premiere Pro.
Close CPU and memory-intensive applications
Large games or programs shouldn’t be used in conjunction with Adobe Premiere Pro. If used, Premiere Pro might not have enough processing power and crash. Before starting Adobe Premiere Pro, you should close any other graphically intensive programs.
Check disk space
Insufficient disk space can also be the reason behind the crashing issue. If you are exporting from and to different drives, be sure you have sufficient disk space on each device. Ensure you have sufficient disk space before exporting because Adobe Premiere Pro uses files and videos that might take up a lot of space.
Update your Graphics Driver
Premiere Pro may crash if your graphics driver has problems because it interacts directly with graphics. Consider upgrading the graphics driver because it can be damaged or corrupted. The manufacturer of your graphics card may determine how to update the graphics driver. Intel, AMD, and NVIDIA are only a few of them. The latest graphics drivers are available for download and installation on their official website.
You can also manually upgrade the graphics driver using the Device Manager program included with Windows.
Run a malware scan
Malware is a harmful application that can do enormous harm to your system. It can be found on the Internet and any external storage system. They seize control of your PC and interfere with its regular activities. So malware may also be a factor in Premiere Pro’s frequent crashes.
Therefore, if you don’t want Adobe Premiere Pro to crash, getting rid of spyware is crucial.
By using a malware scanner or an antivirus program, you may eliminate it quickly.
Reset your preferences
Adobe Premiere Pro could have crashed because of some conflicting modifications you made to the software’s settings.
Here’s how you can reset the preferences
- Activate Adobe Premiere Pro.
- If you are using Windows, hold down the Alt key, and if you are using a Mac, press the Option key.
- You will get a popup asking if you wish to reset the preferences.
- Once you click OK, you’re done.
Ensure your pictures are in the correct format
Does your project contain any pictures? Even though they are not on the timeline, if they are in the incorrect format, Adobe Premiere Pro may crash.
The screen’s pixel density is 72 dpi. Premiere Pro will have trouble processing an image higher than 150 dpi and eventually crash. Ensure that every image you import is 72 dpi.
Your photos’ basic dimensions are crucial. Premiere Pro will give up if the file is too large and you do not have sufficient processing power to handle it. The ideal size is determined by your computer’s specifications. Adhere to the final video’s dimensions, thus if it’s an HD video, ensure the picture is at most 1920 x 1080 pixels.
Variable frame rate
Frame rate is the speed at which successive images are displayed. Variable Frame Rates (VFR) are one of the primary causes of crashes in Premiere. They continuously change during playback. However, the common frame rate for videos is 24 frames per second. Smartphones, TV broadcasts, and motion pictures use this frame rate. The video editing software Adobe Premiere Pro does not support a VFR video.
You can check whether your video is a variable frame rate or not by right-clicking it in the timeline and choosing Properties. You can also choose the video and select File > Get Properties for > Selection. After that, a window will appear indicating whether it is VFR or not. To resolve this problem, you need to use high-end devices to capture the video. Videos taken from low-end devices have trouble maintaining a steady frame rate.
Use After Effects
Applying your effects to a video while using Premiere Pro can cause your computer to run slowly or even crash your Premier Pro. Hence, consider using After Effects in projects requiring intricate text animations, visual effects, and transitions.
Import fewer clips at a time
Importing media itself can sometimes result in crashes. If you experience this, consider importing fewer clips at once. You can also manually drag and drop media into Adobe Premiere Pro if you’re still experiencing issues.
Conclusion
I hope that the above-mentioned tips will help you resolve the problem of your Adobe Premiere Pro not exporting video or crashing. Click the following link to learn what to do if Maya crashes all the time.
If you want to learn more about Adobe Premiere Pro or to purchase the software, click here.
Are 3D Printers Hard To Use?
The 3d printer industry is expanding at a meteoric rate, leading to increased manufacturing of new and advanced technologies in the sector. Due to the advanced technology and mass production, the cost of 3d printers has decreased substantially and their sizes have also shrunk over the years so that they have become easily portable and small enough to be fitted on a desk.
In contrast to traditional printers used in offices, which only paste ink onto paper or other objects, 3D printers transform virtual models into physical models using a variety of materials such as plastic, metal, and wood. However, a common complaint concerning 3D printers is that they are difficult to use. Still, there are individuals who have a different perspective on this subject. Let’s find out if 3d printers are hard to use or if it is an overstatement.
3D printer use is quite hard for complete beginners, but advanced users get around it with extensive practice and education on using the technology. Use of a 3D printer involves as a prerequisite understanding of 3d modeling, printing materials, 3d printing technologies and associated advantages and drawbacks.
Is The 3d Printing Technology User-Friendly?
The creation and construction of a physical object are combined into a single process in 3D printing, which adds the element of complexity to the entire procedure. In order to produce anything using a 3D printer thats not already designed, you first need to have CAD or 3D modeling software. Moreover, a creative mind, a technical background, and a good sense of design all come in handy here.
Even for relatively simple items, the time required to design them might be a bit too long since there are no conventions and standards for CAD software that are widely approved. There are a variety of approaches that various businesses use when using these technologies, depending on the needs.
When it comes to 3D printing, hitting “Print” on a computer is only the last step in the process. When developing a product, it is essential to take into account the qualities of each component or substance.
All in all, the process of actual 3d printing is relatively simple if you have a good understanding of 3D and if you are good at putting things together. It might be a bit more complicated for those who have never dealt with 3D printers or those who have no 3D experience.
Challenges Associated With Using 3d Printers
3D printing is a big technical achievement in the industry, but the variety of accessible materials is still small and some are still under development. 3D printing usually utilizes plastic. Plastic is placed in thin, molten layers. However, plastic’s strength fluctuates, so it’s not always the best option. Several producers use metal, however, the products created with such material are usually not that dense. Glass and gold are other unusual materials that have uses in 3d printing but aren’t well-known.
Due to the buzz around 3D printing, customers may mistakenly believe that the technology is simpler than it really is and does not require prior knowledge. 3D printers are difficult to run and maintain since they often need a high-voltage power source, specialized equipment, and parts, especially for the professional 3D printers which often produce the best results. However, as a result of developments, 3D printing is becoming more user-friendly.
While 3D printers provide almost unlimited potential for mass customization, they are inefficient when it comes to producing large quantities of the same thing. The time required to print anything might range from hours to days. The more time and effort that goes into developing a product, the slower the printers will run. It may take several weeks for 3D printing businesses to complete requests for customized prints depending on the type of materials being used. Also, any error in a 3D print such as a damaged layer results in hours or days lost- you have to start the print from scratch.
-
High Initial Investment Costs
A 3D printer is expensive to buy and can cost thousands of dollars to tens of thousands. You will also need to spend additional money on equipment like scanners and design software if you plan to have a whole design pipeline. You’ll need to purchase maintenance products and replacement parts as well. If you’re still in the testing phase, you may need to spend even more on supplies or prototypes thus, making the process of using 3D printer much costlier in comparison to conventional manufacturing techniques.
-
Limited Customization Options
3D printers can come with multiple printing heads or a heated plate but the number of options is limited, unlike a car where you can choose dozens of options. In addition, prints themselves are often limited by material, number of colors, etc. The colors cannot usually be mixed and blended freely as they are limited by the material and switching filament and heads.
Are some 3D Printers easier to use?
If you are considering getting a 3D printer, ease of use is important to you. The right printer can make 3D printing affordable and easy to do. There are a few 3D printers that have been specifically designed with beginners in mind. But which printer is best for you?
1. Prusa i3
The Prusa i3 is a high-end 3D printer designed for serious hobbyists. It is also one of the most user-friendly 3D printers on the market. The 3D pen comes pre-assembled, making it easy to use. While they ditched the glass print bed of the earlier model, the improved design resulted in better print quality. The printer comes pre-calibrated, so you’ll only need to change the printing speed if you want to tweak the settings a bit.
2. Dremel 3D40
The Dremel DigiLab 3D40 Flex 3D Printer is a good choice for students (and teachers) because of its ease of use. It’s easy to use and easy to set up, making it a great choice for beginners: Students won’t need to deal with complicated software they just choose the design and print it. The Dremel 3D40 Flex 3D Printer is also not very expensive.
3. Flashforge Dreamer
Well, the Flashforge Dreamer is a choice of many due to its automatic temperature regulation abilities. It is also a user-friendly printer, which makes it a good choice for beginners and professionals. Due to its ability to take PLA, ABS, and PVA, it can be used for a wide range of projects. It is very reasonably priced.
4. TronXY X5S 3D Printer
The TronXY X5S is one of the easiest 3D printers to use and a top seller in stores like Gearbest and Aliexpress. It is the bigger brother of the TronXY X3S and offers a build volume of 330 x 330 x 400 mm. One of the best things about the X5S is its print speed of up to 120 mm/s. This makes it one of the fastest desktop 3D printers on the market.
How Long Does It Take To Learn To Use A 3d Printer?
Learning to use a 3d printer usually takes between one and two days. Current generation 3D printers (except the kit printers you have to put together yourself) usually come ready to print. Some may require calibration, but many modern printers are capable of self calibrating.
It is not difficult to get a 3D printer to operate, but getting it to print in a consistent manner is a more difficult task. You will need to learn everything as you go along, including how to level the bed, how to alter the settings on your slicing application, and how to remove particles from the tip of the printer.
Getting your 3D printer up and running and ready to print is rather simple, but creating your own prints and making customized tweaks may be challenging. To get precise prints, one must have an in-depth knowledge of the specifics involved in the design process.
Designing a print that will stand up with overhangs requires careful consideration of how the print will be supported at every stage of the process. Once you have that information, getting started with design should be easier, and many applications have built-in validation tools to ensure your work will run smoothly. An adequate infill level will prevent your print from failing in the midst of the print, so keeping that in mind is necessary.
Conclusion
The use of 3D printing has several advantages in several different business sectors. On the other hand, it is not going to completely replace conventional production. It is a relatively new technology that does have a few drawbacks, all of which should be taken into consideration before deciding on a strategy for product development.
Oftentimes, errors will be made, but it’s best to consider them as learning opportunities. The majority of the time, a few tweaks to the settings are required for the prints to come out quite smoothly.
There is a lot of information required to be proficient in 3D printing, but the majority of this comes from real-world experience and broad area knowledge. The first few times may be challenging, but it should get simpler with practice. Practice makes perfect.
Click on the following link to learn how long a 3D printer lasts.
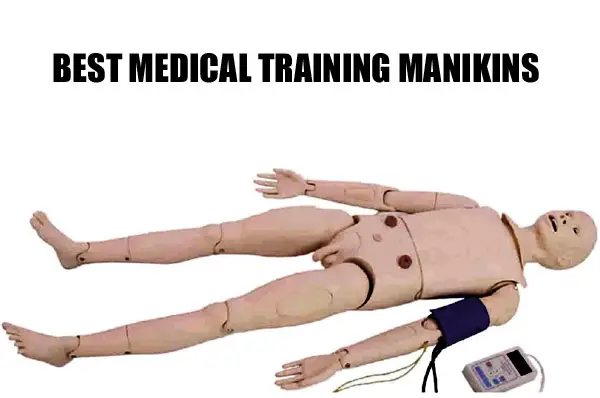
Best Medical Training Manikins and How to Choose One
A medical training manikin is an important part of medical training for medical, nursing, and EMT students and professionals. It helps them practice various procedures safely and get confident about the procedure before performing the procedure on an actual patient.
So how do you choose a medical training manikin?
Generally, the best medical training manikin for anyone would depend on its purpose. For most emergency procedures like CPR training and IV cannula insertion, a part-task manikin would be enough. For procedures that need monitoring of certain physiological responses, like intubation, a mid-fidelity manikin would be best. For surgical procedures and advanced anesthesiological procedures, a high-fidelity manikin would be the best choice.
There are a lot of brands in the market that produce a variety of medical manikins that serve different purposes and they may or may not give a response physiologically. A manikin can have high fidelity or it can be a simple model.
We’ll explore more about the types of medical manikins in this article. But first, let’s see what a medical training manikin is.
What Is A Medical Training Manikin?
A medical training manikin is a model patient simulator that helps medical, nursing, and EMT students and staff learn and practice various medical procedures before they can perform the procedure on a real patient. It helps the learner practice simulated scenarios in a controlled environment.
Various procedures, especially the procedures that are performed in emergencies and the invasive procedures should ideally be practiced on a simulator or a manikin before done on an actual patient. This helps them be more confident in an emergency and be able to perform the procedure precisely even under high-pressure situations. Performing any such medical procedures on a real patient can be intimidating, especially during emergencies when time is of importance. This is where medical training manikins come in handy. Learners can learn and practice various medical procedures and protocols, and get confident in performing the procedure accurately.
Medical training manikins can be made of rubber/polymerized rubber, PVC, plastic, silicone, foam, and fiber. Usually, they are made up of a mix of these materials, with stronger materials like rubber and plastic used to make firmer parts, and skin and face being made of polymerized rubber and silicone to make it soft and real-like. The material used to make the manikin may vary from company to company.
Some of the common procedures for which medical training manikin may be used are:
-
CPR training
-
Tracheostomy
-
IV cannula insertion
-
Intubation
-
Ear exam
-
Suture practice
-
CVP insertion
-
Amputation stump bandaging as well as regular bandaging.
-
Local and regional anesthesia
-
Surgical procedures
-
Labor simulation
Types Of Medical Training Manikins
A medical training manikin can be categorized into various types:
A medical training manikin can be a high, mid, or low infidelity manikin. Fidelity is the degree to which a manikin can mimic human physiology.
High Fidelity Manikin:
These are the most advanced variety of medical training manikins. They are wireless, computerized and react physiologically on their own to make the experience much more life-like. They may even have the ability to talk and mimic a patient’s symptoms. These are mostly used to learn advanced medical procedures like anesthesiological and surgical procedures, which cannot be replicated in lower-fidelity manikins.
Mid-Fidelity Manikin:
There is medium-level realism in mid-fidelity simulation. It doesn’t replicate all physiological responses but replicates some basic physiological phenomena like breathing sounds, bowel sounds, and heart sounds. Procedures like NG tube insertion and tracheostomy suctioning come under this category of simulation, as monitoring of breathing is important in these procedures.
Low-Fidelity Manikin:
This is the least realistic form of simulation where static manikins are used. Role-playing and written cases are used to learn and practice the protocols. Low-fidelity simulation is used to build knowledge. Procedures like CPR training on a CPR manikin comes under this category.
The majority of the medical training for both doctors and nurses is done using low to mid-fidelity manikins. High-fidelity manikins are required only for certain branches of medicine and are not needed for most emergency procedures like CPR training, intubation, and tracheostomy.
For obvious reasons, high-fidelity simulators are the costliest of all. Additionally, high-fidelity manikins don’t necessarily give a better learning experience in all situations, as proven by many studies. But, each of these different fidelity manikins or simulations has its respective important role at various levels. Therefore, which manikin to choose should depend on the purpose it will be serving.
Task trainers are manikins that allow learners to learn a specific task and practice psychomotor skills individually. There are no physiological responses from the manikin at all.
-
Full Body Task Trainer: This is a full body manikin. Usually, they are used in scenarios to simulate ECG monitoring, code blue drills, and other such situations where it’s better to have a full-body model.
-
Part-Task Trainer: The manikin consists of only the part involved in the procedure. They help one learn only one specific task, like airway intubation, central venous access, various anesthesia procedures, intraosseous injections, etc.
These can be found separately or with integration with the high or mid-fidelity manikins.
What To Look For In A Medical Training Manikin?
There are a variety of manikins for medical training available in the market to choose from. Before purchasing a manikin, the budget and the purpose of training should be kept in mind. For example, a low to mid-fidelity manikin would be enough to learn most emergency procedures like a CPR training class, and a high-fidelity manikin in this scenario may not be the best choice.
In addition to the purpose, certain other things that should be kept in mind are:
-
It should be easy to use, affordable, smooth in finish, and easy to clean
-
It should be sturdy enough to ensure reusability and ensure it doesn’t get disassembled (if with detachable parts) while performing the procedure.
-
It should be lightweight and portable if you are planning to carry the manikin to various classes.
-
Anatomical accuracy is important as anatomical/bony landmarks should be seen/palpable to locate the correct reference point wherever applicable.
-
The manikin should be flexible, i.e. joint movements should be smooth and accurate, as certain procedures mandate good joint movements, like head tilt, chin lift, and jaw thrust while performing intubation.
-
In the case of a fidelity manikin, the simulated physiological response should be accurate (as per the condition and the symptoms of the patient), and also, it should respond accurately to the treatment/procedure that is being performed in response.
-
Additional features that might indicate the correctness of the procedure are a plus. For example, an audible clicker on performing CPR to indicate correct depth of compression (in a part-task manikin).
-
Realistic resistance and recoil of the chest on a CPR manikin is important so that the learner can get accustomed to the actual chest recoil on a patient and understand how much pressure to apply on a real patient.
-
Simulated fluid flow on a successful lumbar puncture and IV cannula insertion.
-
The artificial skin should have the same elasticity and strength as real skin, such that it can endure the cuts and sutures well.
Best Medical Training Manikins
Portable CPR training manikin by MCR Medical
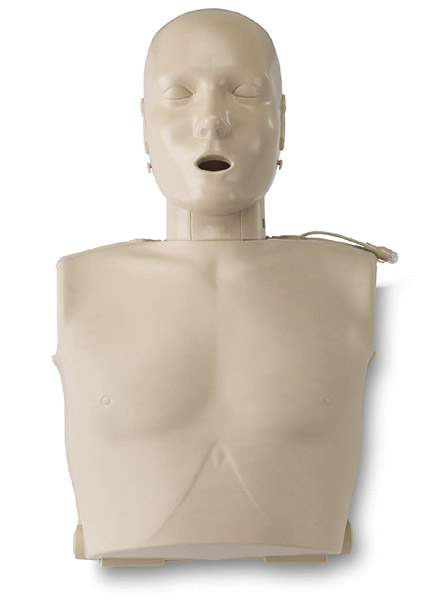
This particular CPR manikin is made for portability. It is lightweight and easy to carry around when compared to traditional CPR manikins. They are easy to assemble and disassemble. This set is great for people who are required to visit different classes to teach CPR.
This portable CPR training manikin contains 4 adult manikin torsos, 4 adult manikin heads, lung bags, 4 AED units, 4 feedback compression pistons, 4 packs of MCR kneeling pads, a carrying case, and an instruction sheet. You can teach a child CPR on an adult manikin as well. However, if you also need to teach infant CPR then you will need another set of infant CPR manikins.
Rating: 4.6/5
Prestan Infant CPR training kit
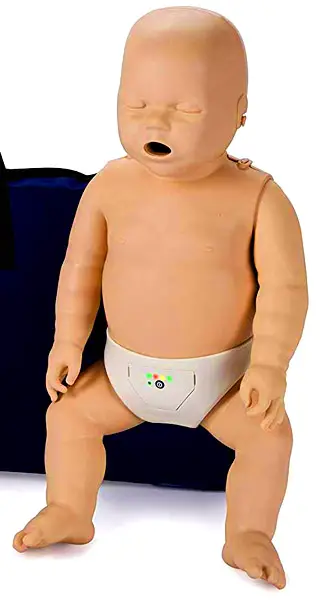
Infant CPR cannot be taught on an adult manikin as the way CPR is performed on an infant is different from on adults. Therefore, for infant CPR a separate infant CPR manikin is mandatory.
This infant CPR manikin set is a good option for this purpose. It comes with an infant manikin, a lung bag, and a carrying case. It also comes with a CPR rate monitor– which is a great addition, especially for a beginner, as CPR is all about the right amount of quality compression.
The manikin is very real-like and has all the necessary anatomical landmarks that make it easier to locate the carotid artery and the correct spot for compression.
This set is affordable and a good addition to your CPR training set.
Rating: 4.8/5
CPR trainers– Adult, Child, Infant
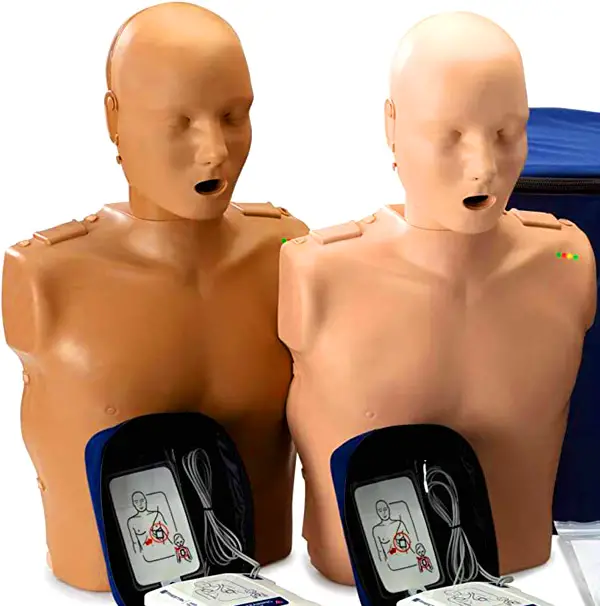
This set comes with 2 adult manikins and 2 infant manikins that are very realistic in looks and feel. It also includes 2 AED trainers that have 5 pre-recorded scenarios in each of the AED trainers in both English and Spanish.
It’s easy to set up and disassemble. It also has an in-build feedback mechanism that will help the learners be more confident in their technique.
20 Lung bags and 2 kneeling pads are included in the set too.
Rating: 4.6/5
Aliwovo Venipuncture practice kit
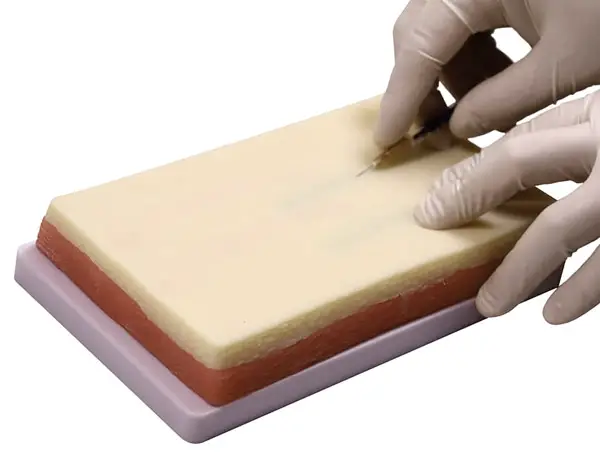
This set is great for medical and nursing students to practice procedures like venipuncture, IV/IM/subcutaneous injections, IV infusion practice, etc. These are great to practice the angle at which the needle should be inserted in these various procedures.
This model is made up of silicone and is very realistic. It has 3 layers representing skin, fat, and muscle layer– making it a good model to practice various procedures. It has 4 vessels- 2 red and 2 green. This model can also be used to practice the different types of sutures.
These are very realistic and affordable for the students. This set does not come with red ink or IV needles, however. So you will have to buy them separately.
Rating: 4/5
Advanced Trauma Management Manikin
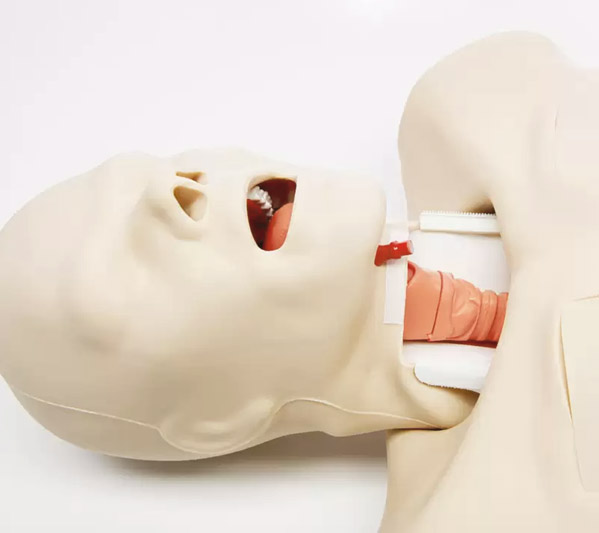
Traditional CPR manikins may not be equipped enough for more advanced procedures performed in traumatic cases. Although expensive, this trauma manikin covers the advanced features that will help the learner be confident in the various invasive and non-invasive procedures performed during such events.
This manikin helps learn advanced airway management and some emergency surgical procedures. A few procedures that can be performed on this manikin are tracheostomy, needle and surgical cricothyroidotomy, NG tube insertion, chest tube insertion, endotracheal intubation, needle decompression of tension pneumothorax, and CPR.
Audible hiss can be heard on successful insertion of the needle correctly at the 2nd and 5th intercostal space- which makes it great for beginners to know they’ve put the needle in the right place. The joint movement of the neck and jaw is smooth for various throat and neck-based procedures. Another unique feature of this manikin is that the tongue is inflatable to simulate tongue edema. Most emergency neck and chest-based procedures can be practiced on it.
It’s very realistic and durable. It has all the correct anatomical landmarks and comes with a 5-year warranty. This manikin is appropriate for a larger institution and trainers who teach the above-mentioned emergency procedures as well, apart from CPR.
Rating: 4.8/5
Difficult Airway Task Trainer
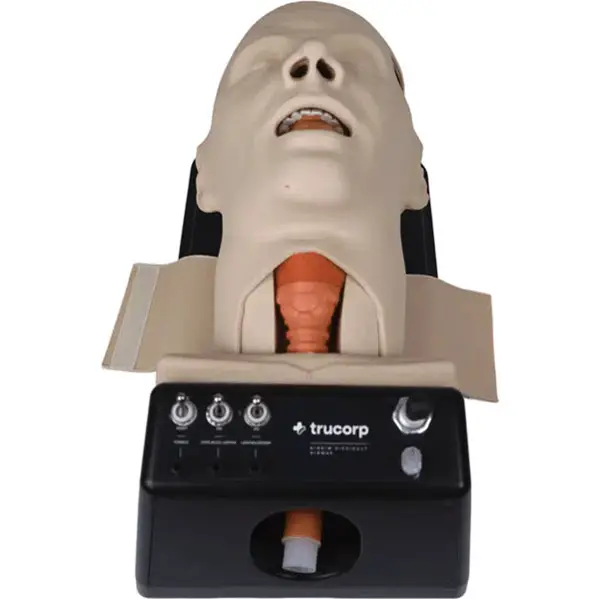
If you only wish to buy a difficult airway task trainer, this trainer comes with a wide range of simulated difficult airway scenarios.
This task trainer has an enlarged tongue, swollen posterior cartilages, and an elongated epiglottis that help create difficult airway scenarios.
Additionally, it also has advanced features like simulated laryngospasm, displaced larynx, cervical arthropathy, malocclusion, joint restriction, and trismus. Also, tracheostomy and cricothyrotomy can also be practiced on it.
Rating: 4.8/5
What To Remember When Buying A Medical Training Manikin
Which medical manikin to buy would depend on the purpose it is intended for. The most important factors are:
-
Ensure it serves the purpose that you are seeking to teach/learn
-
Ensure that it is anatomically accurate.
Additionally, affordability and durability are other important factors to consider.
I hope this article was helpful to you.
Click here to read about the best 3d anatomy apps (free and paid).
Is 3D Animation Easier Than 2D: The Surprising Facts
Animation has been around for several decades and has been the art behind the visual content we consume daily. The practice continues improving with technology. Individuals now even use Artificial Intelligence to animate virtual objects. Before that, artists had to animate by hand drawing frames, all in 2D. There seems to be a never-ending debate about which of the two is easier- 2D or 3D animation.
Let’s get to the bottom of which type of animation is easier, which is harder, and exactly for what reasons.
Generally speaking, animation that involves computer software, whether it is 2D or 3D, is easier in the sense that the software allows for reusable elements, fills in the inbetweens, is non-linear and allows for individual animation aspects to be modified, and may utilize computer assisted motion paths, physics, and import from motion capture devices. When you take into account the software learning curve and all the technical aspects of 3D animation, it is not easy and takes time to master. Both 2D and 3D animation have their challenges.
Differences Between 3D and 2D Animation
The table below illustrates the differences between 3D and 2D animation:
|
2D Animation |
3D Animation |
|
The characters are less lifelike because they are portrayed only in height and width. |
It produces more lifelike characters because it includes their width, height, and depth. |
|
2D animation focuses more on motion of still frames and lines to create character movements. |
3D animation focuses on character movements in XYZ space and real world physics such as collisions. |
|
2D figures are created using traditional hand-drawing methods. Every aspect of the object is hand-drawn frame-to-frame, but there have been improvements to incorporate software in action sequences for 2D characters, where 2D elements are animated. |
3D animation is done using computer software because of required intensive calculations after user input.
|
|
2D animation gives more room for creators to explore their traditional skills. |
3D animation somewhat limits artistic creativity because everything is done using computer software. |
|
In two dimensions any real world effects like shadows are drawn |
Three dimensions allow for real word effects |
|
It is mainly used in cartoon shows, advertisements, films, e-learning courses, and websites. |
It is mainly used in gaming, movies, medical, legal. |
|
2D animation software is usually Photoshop, After Effects, and Adobe Animate. |
The software used for 3D is usually Houdini, Maya, Cinema 4D, or Autodesk 3Ds Max. |
Which Is More Time-Consuming?
Traditional 2D animation in itself is more time consuming than 3D Animation. It is because artists need to do about 24 drawings per second, referred to as frame-by-frame. Then, the artist has to animate the drawings (also frame-by-frame). In traditional animation you cannot change one aspect of the animation such as height of a jump without redrawing it all, which takes time.
Unlike in 3D animation, where animators use computer software to program animations, in traditional 2D animation, animators use a light source to backlight a physical animation disc and a peg bar to hold the paper for drawing. Also, 2D artists manually flick through the drawings to stimulate a sense of timing and movement in the characters.
In software assisted 2D animation, the animator may utilize reusable elements of a character such as arms and legs or props to speed up workflow. He can also utilize the software to draw in between hand drawn frames to speed things up.
In 3D animation, while the software takes care of inbetweens and you can use a physics engine or motion paths to help speed up animation of objects, the real time consuming part is setting up characters and worlds to simulate a 3D world, especially if you are going for realism. You need to set up joints, kinematics, physics settings, lighting, texturing, not to mention model your 3D character which in itself is a profession.
Frame by Frame Animation
Frame-by-frame animation is a technique artists use when developing animated characters. The technique involves making slight modifications to every still illustration in a row. The illustrations that undergo this technique are usually hand drawings, and the animator modifies them one frame at a time. After modifying, the illustrations are presented sequentially at a rapid speed to give the illusion of motion, and this is what you see in cartoons, websites, and films.
This type of animation is one of the pioneer animation techniques. Artists used it to manipulate collective 2D illustrations and play them sequentially to animate them. Frame-by-frame is still relevant because it has a good aesthetic appeal in specific niches, hence its demand.
It is also simple and cheap, especially because artists can use computer software to assist in making and layering illustrations. However, frame-by-frame animation is becoming outdated in favor of CGI (Computer Generated Imagery) for commercial animations. It is because CGI is more visually appealing and effective than the former.
Technical Aspects of 3D
The following are the technical aspects involved in 3D:
-
Scripting and storyboarding
-
3D modeling
-
Texturing
-
Rigging and skinning
-
Animation
-
Lighting for realistic visuals
-
Compositing and Special FX
-
Rendering
These are explained below:
1. Scripting and Storyboarding
This process is done during the first phase of 3D modeling, the pre production period. Scripting and storyboarding help create a visual flow of the video animated in 3D. It is done using 3D software like cinema4D and Max.
2. 3D Modeling
This phase involves the designing of movie or game characters, including props and other objects that are part of them. Animators use simple props to develop and expand characters into 3D form.
3. Texturing
3D animators then add textures to the modeled characters. They do so by layering 2D images on the models. Artists use textures, colors, and designs to make the models appear lifelike in a process called mapping.
4. Rigging and Skinning
It is the creation of skeletons for characters and other visual aspects of the 3D animation. Modelers use skinning and rigging to create a system that controls the movement of characters in the animation process. The skeleton allows animators to dictate the characters’ mobility based on the script they follow, for instance, in movies. Then, the characters are ready for the production phase.
5. Animation
It marks the beginning of the production phase in 3D animation. The process involves programming the animated characters and elements to move. Artists use the keyframe method to create the animate the objects frame-by-frame. They can also use imported movement and animation data from external sources to animate the characters such as motion capture.
6. Lighting for Realistic Visuals
Lighting is another technical aspect of the 3D animation process. It is important to manipulate light for images to appear as real as possible. Therefore, designers and animators carefully consider the ideal lighting for each frame so that the outcome is visually appealing to viewers.
7. Compositing and Special FX
It combines various visual aspects from different sources into one place to create a layered image. Compositing and Special FX are technical aspects of 3D animation production that bring to life the project’s vision. Animators use special effects to merge live-action scenes with digital re-enactments in the production process.
8. Rendering
It is the final phase before completing the animation process. The final render of the animated character is tweaked with all sorts of image passes for the best visual appearance, in addition to motion blur, field of view, and depth of focus. Then, the editing team reviews the final product and makes the necessary edits before conducting image synthesis. Rendering helps animators create photorealistic images from the 3D model and export the final product into a video format ready for consumption.
What is Easier- 3D or 2D Animation?
Some people will argue that 3D animation is easier than 2D animation and others will take the opposite side. It really depends on what aspects you focus on. Sure, the learning curve for 3D animation software may be high. On the other hand, to become a skilled traditional 2D animator you will need to be a good artist and spend a long time perfecting your skills. Software makes some things easier while making others more complex.
To be a good 3D animator, you will not only need to master traditional animation techniques such as squash and stretch, unless you animate purely using a physics engine (unlikely as even those frames are usually baked and edited later), but you will need to learn computer hardware, software, output methods, compositing, and all the technical aspects of 3D animation mentioned above. That is a lifetime of learning and improving.
It all depends on how much of the animation process you will be involved in. A 3D or 2D animator working for himself such as many medical animators, will need to do all the creative and technical aspects himself. An animator in a large company may just be in charge of character animation for 3d characters, not the modeling, lighting, or even joint and kinematics setup.
You also have to decide what you find easy personally. Some people could draw in their sleep as it comes naturally or visualize everything in their head while being really bad with computers or scripting. Others do not have an artistic bone in their body but can still animate with the best of them in a 3D software package using existing assets and models.
This question likely will be a source of diverging views for a long time to come.
Here is an interesting video on CGI vs hand drawn work:
Thanks for reading.
Click the following link to learn if 3D modeling is harder than drawing.