
Ever experience having or being sent an STL file and needing to convert to the OBJ format but not knowing what to do?

In this guide, you’ll find everything you need to transform your STL files into OBJ models without losing quality. We’ll cover online tools for speedy conversions and explore specialist software options too! Not only will this save time but also maintain the integrity of your artistry during conversion.
Understanding STL and OBJ Files
When it comes to 3D modeling, two file formats often steal the show – STL and OBJ. Each has its own characteristics that make them suitable for different scenarios.
The STL file format is a staple in the world of 3D printing. Stereolithography, a term first used by 3D Systems, is the basis of the STL file format commonly employed in 3D printing. The beauty of an STL file lies in its simplicity; it describes only surface geometry without any representation of color or texture.
I consider this feature as both advantage and limitation because while it simplifies data handling processes during 3D print preparation but also limits capabilities when there’s need to create models with detailed textures or complex color patterns.
Diving Deeper into OBJ File Format
In contrast, we have another powerhouse: OBJ files. Developed by Wavefront Technologies (now part of Autodesk), these are not limited just like their counterparts – they offer more versatility.
An OBJ file goes beyond simple geometric information – it can contain details such as texture coordinates and other advanced graphical data. That’s why you’ll find them used frequently in industries where high-detail models are required such as video game development or cinematic special effects creation.
A Peek Inside These Formats
To better understand how these formats function on a deeper level let’s take look inside:
An STL file represents object surfaces using triangles which form ‘meshes’. This simplistic approach makes STL highly compatible across numerous software platforms involved in CAD designing & 3D printing. It’s no surprise STL files are often the go-to choice when it comes to rapid prototyping.
On the other hand, an OBJ file can use both polygons and freeform geometries (curves, surfaces) for modeling complex shapes with intricate detailing. And yes. They do store color information along with texture data too.
A Tale of Two Formats
Both formats certainly have their unique strengths. Deciding which is the most suitable for your necessities is key.
The Importance of STL to OBJ Conversion
3D printing has transformed the way we create and design. It’s a process that relies heavily on file formats, specifically STL and OBJ files. Converting between these two types can be vital for 3D modeling applications.
Why Convert STL Files?
An STL file is like a one-size-fits-all dress; it fits everyone but may not fit anyone perfectly. This file format is extensively employed in 3D printing due to its straightforwardness. However, it lacks flexibility when you want more detail or need to edit your model after saving it.
That’s where an OBJ conversion comes into play. Imagine now you have a tailor-made suit instead of that one-size-fits-all dress – this is what converting from STL to OBJ does for your 3D models.
Digging Deeper:
-
Versatility: An OBJ file allows for editing even after the initial save. Need to tweak some features? No problem with an OBJ file.
-
Fine Details: If you’re working on intricate designs or complex geometries, the additional details supported by the OBJ format are invaluable.
-
Ease-of-use: Even better news? The average time taken for converting an STL file into an OBJ takes seconds only – faster than making instant coffee.
It’s Time To Switch
Its believed that OBJ files will become the standard for 3D printing, leaving STL files in the dust. Switching to OBJ presents a prospect for you to better your 3D printing practice and fine-tune the particulars of your projects. Switching to OBJ is an opportunity for enhanced creativity and precision in your work. So why wait? Embrace the change now.
Methods for Converting STL to OBJ
At times, you may need to convert an STL file into the more flexible OBJ format due to compatibility issues or for additional features like color and texture data. This could be because of software compatibility issues or simply because OBJ files offer additional features such as color and texture data.
Using Online Tools for Conversion
The first method we’re going to discuss is using online tools like ImageToStl.com. These platforms provide a straightforward way to convert your files from one format to another. To use ImageToStl.com, simply click the “choose file” button, select your STL file and press the “convert” button to initiate the conversion process.
In just about five seconds on average (give or take depending on your internet speed), your conversion will be complete. The resulting download link pops up right away so you can grab your new OBJ file and continue with whatever project has brought you here today.
Utilizing Specialized Software
If online converters don’t cut it for you – maybe due their conversion limits or perhaps they aren’t handling UV data quite how’d like – specialist software might just be what you need. There are several professional CAD converter applications available that offer greater control over mesh conversions.
This kind of specialized tool typically offers batch conversions too which can save tons of time if dealing with multiple files at once.
Note: If you are considering this route but are put off by potentially complicated interfaces in these pro-level apps, don’t fret. Most are surprisingly easy even for beginners to use.
Some of these tools include Autodesk Meshmixer.
You can also use 3D modeling software such as Blender which is free to make this conversion.
So there you have it, two practical methods for converting STL files into OBJ format. Whether you choose an online tool or specialist software really depends on your specific needs and preferences. Either way, both options will get the job done effectively.
With determination and dedication, you can become a master of 3D modeling. Even when file conversion becomes tricky, don’t let it discourage you. Stick with it because mastering 3D modeling is truly worth the effort.
Step-by-Step Guide on Converting STL to OBJ
Converting an STL file into the more flexible OBJ format doesn’t have to be a daunting task. This tutorial will guide you through the steps to successfully convert an STL file into the more versatile OBJ format.
Preparing the STL File for Conversion
The first step is ensuring your STL files are in good shape before initiating the conversion process. An error-free, clean file not only makes it easier but also ensures accuracy and integrity in your target format.
You might want to consider using mesh repair tools available online if you find any errors or inconsistencies in your 3D model. After fixing these issues, we can move onto our next phase: actual conversion.
Converting the File and Downloading the Result
To start converting, navigate over to ImageToStl.com – a simple yet effective STL-to-OBJ converter. Once there, click on the “Choose File” button and select your prepped STL file from its location on your computer.
This cloud-based platform performs conversions swiftly; usually within five seconds. It’s ideal when dealing with large batches of files due to its high-speed processing capability.
-
Select ‘OBJ’ as the output format under ‘Target Format’. The site allows multiple selections at once for batch conversions too.
-
Hitting that ‘Convert’ button starts off our conversion action. You’ll see a progress bar which fills up pretty quickly thanks again to their efficient algorithms behind the scenes.
-
A download link pops up as soon as they’re done converting – click it without hesitation because who knows how long such things last online? Your converted OBJ should now reside comfortably somewhere safe within reach (probably the Downloads folder).
Remember to check your file’s integrity post-conversion. This can be done by opening it in a 3D viewer or software like Blender, Sketchup, or Fusion360.
Pros and Cons of Online STL to OBJ Converters
If you’re dealing with 3D modeling, chances are high that you’ve faced the need to convert files between different formats. Specifically, conversion from STL to OBJ can be a common task due to various reasons such as improved texture handling in OBJ format. An online converter’s convenience makes it a popular choice for this task.
The main advantage of using an online converter is its accessibility. As long as you have a web browser and internet connection, these tools are just one click away. No need for complex software installation or hardware requirements – simply upload your file(s), hit the “convert” button and download the resulting OBJ file once it’s ready.
This simplicity doesn’t mean they lack functionality though. Many online converters offer advanced features like batch conversions which let you transform multiple STL files at once saving precious time when working on large projects.
The Flip Side: Limitations & Challenges
However easy they may seem though, these platforms do come with some downsides too. One major limitation could be conversion limits – most free services impose restrictions on number or size of files converted per day unless upgraded to premium plans.
Apart from this constraint factor lies another hiccup related specifically with ImageToStl.com users having ad blockers installed in their browsers; research indicates that it tends up slowing down processing times significantly causing delays during conversions.
Navigating Conversion Quality Concerns
Moving past functional aspects comes yet another critical aspect worth pondering upon- quality concerns regarding mesh conversion results obtained via online services versus professional-grade CAD converter software solutions known for their precision and accuracy.
While online converters do a decent job at handling simple STL to OBJ conversions, they may not be the best fit when dealing with intricate 3D models as they could lead to loss of this information during conversion.
FAQs
How to convert a STL to OBJ?
To switch from STL to OBJ, you need an online converter or CAD software. Upload your file, pick the output format as OBJ, and then download.
Can you turn OBJ to STL?
Absolutely. Similar tools used for converting STL to OBJ can be employed in reverse order too. Choose your tool, upload the file and select ‘STL’ as output.
Is OBJ good for 3D printing?
In fact it is. An advantage of using an OBJ file over other formats is its ability to include color information which helps with detailed 3D prints.
Conclusion
Converting STL to OBJ can seem daunting, but not anymore. You’ve got the knowledge and tools at your fingertips now.
The key is knowing your file formats – STL and OBJ each have their unique strengths for 3D modeling.
Understand that converting these files isn’t just about changing extensions; it’s a necessary step in ensuring compatibility across different platforms and applications. Online converters like ImageToStl.com make this process a breeze. Click the following link to learn if 3d printers are hard to use.
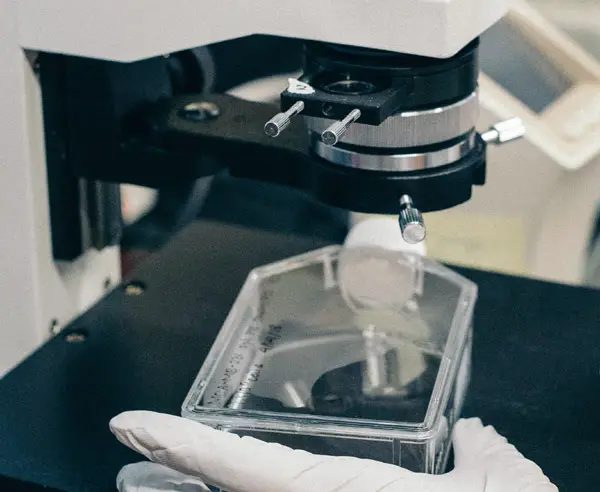
Decoding CLARITY Tissue Clearing
Ever attempted to peer thru a hazy window, straining your vision to make out what’s hidden behind the opaque glass? That’s often how researchers feel when they’re trying to understand the complex structures of biological tissues. But thanks to clarity tissue clearing, that foggy window can become as clear as crystal.

This scientific technique is revolutionizing our understanding of intricate biological systems like the human brain. We’re set to explore its techniques, comparisons with other methods, and even how it’s revolutionizing brain research.
Understanding Clarity Tissue Clearing
Attempting to gaze through a dense bit of tissue is comparable to attempting to observe through mist. But what if we could make that fog disappear? Enter clarity tissue clearing. This scientific method transforms biological tissues into transparent specimens, making them easier for researchers to study.
The term CLARITY stands for Clear Lipid-exchanged Acrylamide-hybridized Rigid Imaging-compatible Tissue hYdrogel. Quite the mouthful, isn’t it? To simplify things, let’s think about how this process works as an artist preparing a canvas. The biological tissue is our canvas here and needs some preparation before we can start painting – or in this case, studying.
This fascinating technique involves swapping out specific components of the tissue with exogenous elements while maintaining its structural integrity. You’re essentially giving your sample a ‘makeover’ which allows us more accessibility and functionality in research.
A Peek Into The Process
In clarity tissue clearing protocol (source), samples are embedded within hydrogels followed by lipid removal processes rendering them optically clear but still preserving their structure and molecules such as proteins and nucleic acids intact. So yes. It is possible to get rid of all those pesky lipids clouding up your view without losing any valuable information.
The result? A fully hydrated specimen that won’t dry out or shrink over time offering stable imaging conditions – much like having unobstructed binoculars while bird-watching. What’s better than gaining new insights into biology without disturbing cellular architecture?
Making Every Cell Count: Why Transparency Matters
Tissues are composed of different types of cells that interact in complex ways. Traditional methods like slicing tissues into thin sections or dissolving them away can disturb these interactions, making it harder to see the bigger picture. Clarity tissue clearing is like getting a VIP backstage pass – you get an all-access view of cellular concerts happening inside your sample.
Imagine the possibilities. With this ability to visualize each cell in a 3D context, we’re smashing through previous limitations. Depth is no longer a barrier to our progress.
The Clarity Tissue Clearing Protocol
Getting a clear view of biological tissues can be quite the challenge. That’s where CLARITY comes into play. The CLARITY Resource Center offers a wealth of information on this process.
Clearing Process and Equipment
The heart of the clarity protocol is preparing the hydrogel monomer solution. The main components of the clarity protocol’s hydrogel monomer solution are acrylamide, bisacrylamide, formaldehyde (PFA), and boric acid mixed in distilled water. PFA-fixed tissue samples are incubated in this solution at 4°C indefinitely to start the hydrogel formation.

In addition to your regular lab equipment like pipettes and microcentrifuge tubes, you’ll need some special items: A vacuum pump to remove bubbles from your sample chamber after it’s filled with clearing solution; And a power supply capable of delivering steady current throughout electrophoretic tissue clearing (ETC).
Incubation Time and Conditions
A key factor affecting success with CLARITY is incubation time – not just any old tick-tock will do. Your brain or spinal cord tissue needs ample time bathing in that delightful cocktail we call our ‘clearing solution’. Typically, adult mouse brains require about one week while post-mortem human brain slices may need up to two weeks.
If you’re thinking “Well… I’ve got plenty of time”, slow down. Over-incubating can cause increased background fluorescence making images difficult to interpret – definitely something we want to avoid.
Did you know? The basic CLARITY protocol involves the preparation of hydrogel solution, transcardial perfusion with the hydrogel solution, and finally tissue embedding in a hydrogel monomer.
Advantages and Limitations of Clarity Tissue Clearing
Tissue clearing is a groundbreaking approach that lets scientists explore biological tissues like the brain in three dimensions. One popular method, clarity tissue clearing, has brought forth a wave of advancements while also facing some challenges.
Analyzing Cleared Tissues
Cleared tissues give us an inside look into intact biological systems. They maintain their structural integrity during the process which allows for high-resolution imaging to be carried out later on. Traditional methods of tissue analysis involve staining thin slices of tissue on glass slides limiting spatial and morphological analysis. But with cleared tissues’ endogenous fluorescent properties and refractive indices, we can observe them without disturbing their natural state.
The technique’s real power comes from its ability to make soft body parts transparent – literally clear as crystal. By replacing lipids (fats) in cells with hydrogel polymerization – it’s like turning your biology textbook into 3D glasses.
This unique characteristic enhances our understanding by allowing for more comprehensive visualization compared to traditional two-dimensional approaches. However, this technique is not without its drawbacks.
The clarity protocol involves multiple steps including hydrogel formation followed by lipid removal which may lead to variability between samples due to differences in treatment conditions or individual sample characteristics such as size or age. The devil really is in the details here.
Balancing Transparency and Preservation
In all fairness though, achieving perfect optical transparency isn’t always possible because every specimen behaves differently based on factors like age, type etc., so sometimes you might need several rounds before hitting gold. Plus remember how we mentioned about replacing fats? Well those pesky things are pretty essential for cell function, so the trick is to get rid of enough lipids to make the tissue clear without damaging cellular structures.
Another challenge comes with imaging deeper into cleared tissues. The more you go in depth, it’s like walking further into a foggy forest; everything starts getting blurry due to light scattering issues. You’ll need a high numerical aperture and short working distance – sort of like having the right kind of flashlight when you’re trying to navigate through that dense fog.
Clarity Tissue Clearing vs Other Methods
When it comes to tissue clearing methods, the gold standard has traditionally been 2D thin section formalin fixed paraffin embedded samples. Yet, the scientific landscape is shifting. Enter CLARITY – a technique that’s making waves in the field of biological imaging.
The brilliance of CLARITY lies in its unique approach to tissue clearing. It utilizes hydrogel-based chemistry along with electrophoretic tissue clearing (ETC) to render tissues optically transparent while preserving their structural integrity.
SDS Micelles in Tissue Clearing
Sodium dodecyl sulfate (SDS), a common detergent used for cell lysis, plays an integral role in many clarity protocols including passive clarity techniques. In these methods, SDS micelles serve as nano-sized vehicles that carry away lipids from the tissues.
In comparison to other traditional methods like BABB (Benzyl Alcohol Benzyl Benzoate) or ScaleA2 which only make tissues transparent but do not necessarily remove lipids completely nor maintain native fluorescence efficiently; CLARITY goes beyond just optical transparency and provides an avenue for deep-tissue molecular phenotyping at cellular resolution without losing contextuality of structures.
This doesn’t mean though that all other approaches have fallen by the wayside – they still hold value depending on your specific needs and constraints.
CUBIC vs Clarity
CUBIC protocol also known as clear unobstructed brain/body imaging cocktails and computational analysis is another method which uses high-temperature and strong detergents for tissue clearing. While it’s true that CUBIC can process larger samples more quickly, the intense treatment often results in tissue distortion.
On the other hand, Clarity retains the structural integrity of tissues and enables researchers to visualize neural networks in their entirety – something which is a big deal when studying complex structures like an adult mouse brain or post-mortem human brain.
Clarity Tissue Clearing in Brain Research
The exploration of the human brain, as well as that of a mouse brain, is crucial for advancing our understanding of neurological diseases. Clarity tissue clearing has revolutionized this field by making it possible to study these intricate organs more closely.
Before we can delve into how clarity tissue clearing impacts brain research, let’s get acquainted with what exactly this technique involves. In essence, clarity tissue clearing, also known as CLARITY transforms biological tissues into transparent specimens without disrupting their structural integrity or molecular composition.
Transcardial Perfusion Process
The process begins with transcardial perfusion – an essential step when preparing tissues for clarity. This method helps maintain the structure and morphology of delicate post-mortem human and animal brains during subsequent processing steps.
In short, using PFA-fixed (paraformaldehyde) solutions ensures that proteins within the cells are cross-linked securely before moving on to further stages in the protocol.
This initial preparation paves way for immunostaining techniques which allow researchers to identify specific structures within processed mouse and post-mortem human brain tissues. Thanks to clarity technology; detailed imaging at cellular level becomes possible.
A Deeper Dive Into Clarity Technology
To appreciate its impact on neuroscience research fully, let’s take a deeper dive into some specifics about this technology. At its core lies hydrogel formation: A mixture containing acrylamide monomers is infused through vascular channels into organ systems like the spinal cord or whole brain.
After polymerization, this hydrogel network stabilizes biomolecules in their native state within the tissue. Then comes lipid removal using SDS micelles, rendering tissues optically transparent while retaining fluorescent protein signals and nucleic acids intact.
With the power of clarity tissue clearing technology, we can now get detailed data about neuronal networks in mouse or human brains. This tech even lets us uncover details that were once hidden from view.
Best Practices for Successful Clarity Tissue Clearing
Perfecting clarity tissue clearing techniques can be quite a challenge, but with the right practices in place, you can achieve remarkable results. It’s all about careful handling and storage of your samples.
Use of Sodium Dodecyl and Nitrogen Gas
Sodium dodecyl sulfate (SDS) plays an essential role in achieving optimal transparency during clarity tissue clearing. Its detergent-like properties help dissolve lipids to clear tissues effectively. But remember, SDS is hazardous – so handle it carefully.
Nitrogen gas comes into play when you’re preparing your hydrogel monomer solution – this is where minimizing exposure to oxygen becomes critical. Oxygen impedes hydrogel formation by reacting with radicals that initiate polymerization.
To combat this issue, use nitrogen gas while making up the solution to displace any ambient oxygen. Store the mixture at room temperature under gentle shaking conditions for 24 hours before adding your sample – this helps get rid of residual dissolved oxygen which could hinder polymerization.
In addition to these methods, CLARITY Resource Center suggests storing cleared tissues at 4°C indefinitely or preserving them as whole-mount slides for long-term storage.
| Tips & Techniques: |
|---|
| 1. Gentle Handling: Avoid damaging delicate structures within your sample by using fine-tipped forceps whenever possible. |
| 2. Precise Timing: The time taken during each step has a significant impact on final outcomes – following suggested timelines will lead towards success. |
| 3. Safety First: The CLARITY protocol requires caution and adherence to safety precautions due to the potential hazards of chemicals involved. |
All these measures might seem overwhelming, but remember – patience is key. It’s a meticulous process, requiring care at every step. But trust me when I say this: The results are well worth it.
Visualization Techniques for Cleared Tissues
To fully leverage the potential of clarity tissue clearing, we need to master some specific visualization techniques. This is where software tools like Imaris come into play.
The Importance of Numerical Aperture and Working Distance
Numerical aperture (NA) plays a vital role in determining the resolving power of an objective lens. The higher the NA, the better your system’s ability to gather light and resolve fine specimen detail at a fixed object distance or working distance.
In addition to this, understanding working distance—the space between your sample and the front lens—can help you avoid damaging delicate samples while ensuring optimal imaging conditions.
Cellular Membranes Visualization with Imaris Software
Imaris Software, specifically designed for visualizing 3D data sets, has proven incredibly useful when dealing with cleared tissues. It lets us see cellular membranes as never before—rendering them in three dimensions with remarkable precision.
This tool provides an effective way to visualize complex biological structures within our cleared tissue samples.
Key Stat: Neurite tracing can be performed using Imaris software, allowing for manual tracing of individual neurons and analysis of interconnections.
Detecting Nucleic Acids: An Important Aspect Of Cellular Analysis
Nucleic acids are crucial elements in cells that carry genetic information. Their detection is fundamental when studying cell functions on both molecular and organismal levels.
- An innovative technique is using fluorescent stains that bind specifically to these nucleic acids, allowing us to see them under a microscope.
- By leveraging the optical transparency achieved through clarity tissue clearing, we can use these techniques even more effectively.
Moving Forward: The Future of Visualization Techniques
Thanks to advances in both software and hardware technologies, our ability to visualize cleared tissues continues to improve. This means researchers will be able to gather increasingly detailed data about biological structures at cellular levels.
FAQs
What is CLARITY tissue clearing?
CLARITY tissue clearing swaps out opaque biological elements with transparent ones. This lets researchers view tissues in 3D, revolutionizing biology and brain research.
What is the process of tissue clearing?
The procedure involves preparing a hydrogel solution, perfusing it through the specimen, and embedding the tissue in hydrogel. The sample then undergoes incubation to reach transparency.
What is the CLARITY method?
The CLARITY method uses chemicals to make tissues see-through while preserving their structure for detailed imaging. It’s crucial for studying complex systems like brains at a cellular level.
What are the disadvantages of tissue clearing?
Tissue clearing can be time-consuming and require careful handling due to potential chemical hazards. Also, some techniques may alter endogenous fluorescent properties or refractive indices of samples.
Conclusion
So, we’ve uncovered the incredible world of clarity tissue clearing. It’s a game-changer in biological research and particularly instrumental for brain studies.
We’ve seen how it replaces traditional 2D methods with a transformative approach. From hydrogel formation to incubation time, every step is crucial.
The process may be intricate, but the benefits are vast – high-definition imaging capabilities that can unveil hidden details within tissues. But remember: as powerful as this method is, limitations still exist. Yet those challenges don’t overshadow its potential.
In essence, clarity tissue clearing allows us to look deeper into life’s fundamental building blocks. The result? A better understanding of complex systems like our own brains. Click the following link to learn more about tissue clearing methods.
How to 3D Model for VR today?
Ever stand at the edge of a virtual precipice, feeling your stomach drop as you take in the vast expanse of an immersive digital world? If so, then you know just how transformative modeling for VR can be. Imagine if I said you could make these incredible experiences yourself? You see, crafting lifelike virtual environments isn’t some arcane secret held by a select few. It’s an art and science combo open to anyone willing to dive into this fascinating world.
This guide offers more than just theoretical knowledge; it promises practical steps on using software. You’ll learn about constructing intricate character designs and even get tips on choosing suitable file types for smooth integration into game engines.
Understanding Virtual Reality Modeling
VR tech is transforming multiple sectors, from video games to construction, with its immersive capabilities. But its impact doesn’t stop there; it has also revolutionized 3D design and modeling.
The world of VR modeling differs significantly from traditional methods. Instead of viewing your creations on a computer screen, you’re placed directly inside them. You can walk around, examine every angle, even reach out and interact with virtual objects in real-time using specialized VR equipment like Meta Quest or HTC Vive.
Studies show that VR prototyping improves the efficiency and accuracy of product design by a whopping 50%. However, it’s essential to understand that VR prototyping and VR modeling are related but distinct concepts.
A Dive into The Realms of Virtual Reality
In simple terms, VR modeling involves creating 3D models within a fully immersive virtual environment, while VR prototyping refers to testing these designs in said environment.
This shift from flat screens to full immersion opens up new possibilities for character designs or architecture layouts – whatever needs conceptualizing. Designers can now use software like Gravity Sketch for intuitive creation right within their headsets.
The Advantages That Come Along With It
The benefits compared with standard procedures are significant. For one thing: feedback loops become faster because designers instantly see how their work affects the entire model rather than having only a part visible at any given time on their monitors.
Motion Tracking Takes Center Stage
Additionally, motion tracking in VR modeling lets designers use their physical movements to shape and manipulate 3D models. This intuitive interaction can speed up the design process and make it more engaging.
Teamwork Makes The Dream Work
Collaborative work truly shines in this setup. It allows teams to converge within the same virtual space, working together but on different parts all at once.
Choosing the Right Modeling Software for VR
When diving into the world of 3D modeling, picking out suitable software can feel like navigating a labyrinth. But fear not. The key is to choose one that aligns with your specific needs and project requirements.
Exploring Popular CAD Applications
CAD (Computer-Aided Design) applications are often used to create intricate 3D models designed for virtual reality environments. Among them, some names stand tall due to their robust features and widespread use.
Navisworks, Creo Parametrics, Revit, 3D EXPERIENCE, CATIA V5, Maya and Solidworks have been celebrated as the best VR 3D modeling software of this year.
The traditional CAD approach has its merits; however, it’s crucial to explore other options that might be better suited for creating immersive VR experiences. Remember this golden rule: Your choice should empower you rather than restrict you.
Diving Deeper Into Virtual Reality Specific Tools
Beyond conventional CAD apps lies a treasure trove of tools specifically tailored towards creating captivating VR models. For instance, Gravity Sketch.
This tool takes advantage of spatial awareness inherent in Virtual Reality Technology allowing users to craft designs from within an immersive environment—a game-changer when working on complex character designs or architectural layouts intended for viewing through VR headsets.
Finding What Works Best For You
If all these choices make your head spin – relax. Every designer’s journey is unique because every project carries its own set of challenges & demands. Take your time, test out diverse software and find what works for you. Remember – the aim is not just creating models; it’s about telling stories that resonate.
Whether you’re building VR applications for the construction industry or crafting immersive training experiences in healthcare, there’s a perfect tool out there waiting for you. So start exploring.
Workflow for Creating Models in Virtual Reality
The process of constructing three-dimensional models for virtual reality entails a few essential stages. Let’s dive into this fascinating journey from design to VR implementation.
Conceptualization and Designing Base Models
In the first step, you need to conceptualize your design. Sketch out a rough idea or use a tool like Gravity Sketch on your computer screen to create base models. It’s an essential part of how we create VR designs because it sets the groundwork for what will eventually be translated into the virtual environment.
Refining Your Model with Software Tools
Once you have your basic model, refine it using specialized modelling software tools such as Daz Studio or CAD applications. These tools let us add more details and textures, enhancing realism within our models.
Data Collection and Optimization
The next step is optimization – which can be seen as a form of data collection concerning the properties of each element within your model. Here we work on reducing polygon count without losing visual fidelity; this ensures smooth performance when rendered in VR environments even if they are fully immersive ones like Meta Quest offers.
Motion Tracking Integration & Video Editing
If necessary, motion tracking information may also be incorporated at this stage before moving onto video editing processes that finalize aesthetics while maintaining web accessibility across various platforms. UT Libraries offers excellent resource lists about these aspects.
Testing In A Virtual Environment And Exportation
This last phase includes testing how well your model interacts with its intended virtual environment- taking note any potential issues such as lighting glitches or unexpected collisions. Once you’re satisfied, the 3D model is then exported as a file type suitable for integration into your chosen VR application.
The field of VR modeling is continually evolving, with new virtual reality resources and research guides emerging regularly. Therefore, always stay updated on industry trends to ensure that your models meet current standards.
Optimizing Your Models for Virtual Reality
Visualizing highly complex 3D models in a virtual environment like VR is no small feat. It’s like packing for a thrilling camping journey – you must have the fundamentals, but there’s only so much space in your rucksack.
To make sure everything fits smoothly into the realm of virtual reality, it helps to optimize your designs by reducing face count and simplifying details without losing their essence. This strategy makes sense when you realize that unlike on a computer screen where high-resolution models can be displayed with relative ease, VR requires streamlined versions due to its immersive nature.
Simplifying Your Designs
The first step towards optimizing your 3D model involves trimming down unnecessary details. Think about removing any components unseen by the user or those too minute to impact overall perception.
This process doesn’t mean compromising quality; rather, it allows users’ devices not just to survive but thrive within these virtual environments while delivering engaging experiences seamlessly.
Reducing Face Count: Less Is More
In terms of technical specifics, focus on minimizing face counts as much as possible because every extra polygon demands more computational power from VR equipment. In this context, remember our camping analogy? The polygons are equivalent to heavy items bogging down your backpack (VR device), making navigation tougher than necessary.
Leveraging Level-of-Detail Techniques
A useful technique here is implementing levels of detail (LODs). LODs allow us to present detailed models when viewed up close and simpler versions from a distance. Think of it as adjusting your eyesight: you don’t need glasses to admire the Grand Canyon’s vastness, but they become essential when reading a map.
By using LODs, we make sure the performance is smooth and still keeps top-notch visual quality.
Exporting and Importing 3D Models for Virtual Reality
Moving your meticulously crafted 3D models into the immersive realm of virtual reality (VR) is a two-step dance: exporting from your modeling software, then importing into VR.
Step One: Export Your Model
From the CAD software or modelling tool, export your model in an optimized format for VR with limited polygons. Make sure it’s optimized for VR; keep those polygons in check.
Different applications have their own processes, but generally speaking, you’d select ‘File’ > ‘Export’, choosing a common file type like .FBX or .OBJ. These are widely supported across game engines and VR platforms.
Step Two: Import Into Virtual Reality
You’ve got your exported 3D model—great. But now comes the fun part – diving into virtual reality. Whether using a Meta Quest or another device entirely depends on personal preference.
To import your model to these devices typically involves opening up a resource list within a game engine like Unity or Unreal Engine. You’d find the ‘Import’ option under ‘File’, locate your saved file on the computer screen, and voila – it’s integrated with all its glory onto the platform ready for use in construction industry projects.
A Word On File Types
Autodesk FBX, Wavefront OBJ, COLLADA – they might sound like sci-fi characters but they’re actually some of the most popularly used formats when working with digital content creation tools such as Daz Studio. It’s important to note that not all file types are created equal. Some formats support animation, others focus on static 3D objects. For instance, .FBX is a great VR model format as it supports complex character designs and motion tracking.
Don’t worry if you have the wrong type. A handy 3D model converter can easily change your .STL to an .OBJ or vice versa.
Reality Check
Navigating between two realms can be a complex endeavor, necessitating patience and comprehension. It’s an intricate dance, requiring patience and understanding.
Integrating Your Models into Virtual Reality Environments
Moving your 3D models from a computer screen to an immersive virtual environment can be thrilling. But, this process presents its own difficulties.
Finding the Right VR Application
Different VR applications offer varied features for model integration. For instance, Navisworks, used extensively in the construction industry, provides robust tools for integrating complex 3D models into VR environments. It’s great for design engineering tasks and enables engineers to visualize their designs in fully immersive reality technology like HTC Vive.
If you’re more focused on character designs or animated scenes though, consider using Daz Studio which supports various file types such as OBJs and FBX files that are common in game engines.
Exporting Your Model Correctly
To ensure seamless integration of your 3D model into a virtual environment, you need to export it correctly from your modeling software. Remember: not all programs use the same format.
For example, CAD software often exports models as STEP files while other popular modeling software may prefer STL or OBJ formats. Check what file type is compatible with your chosen VR application before exporting.
The Role of Converters
In some cases where direct compatibility isn’t available between your modeling software and virtual reality resources at hand, using a model converter tool might help bridge this gap by changing one 3D model file type to another supported one.
Beware Of Performance Issues
Don’t forget – performance matters. Large complex structures could slow down frame rates leading to choppy VR experiences. Optimizing your model to reduce polygon count without sacrificing visual fidelity is key.
Testing Your Models in the Virtual Environment
Lastly, always remember to run tests. A 3D model may appear flawless on your computer screen, but that doesn’t guarantee it’ll perform equally well in virtual reality. Pay special attention to potential problems such as scaling and spatial awareness. These factors can significantly influence the overall immersive experience.
Collaborative Virtual Reality Modeling
Dive into the fascinating world of collaborative virtual reality (VR) modeling, where imagination takes physical form in a shared virtual space. With collaborative virtual reality (VR) modeling, multiple users can join forces to craft 3D models and share their ideas in an immersive space.
Creating character designs or even constructing complex structures becomes an engaging group activity with VR modeling. Imagine this: you’re not only able to see your creations come alive but also tweak them in real-time while collaborating with others. It feels like playing god in a virtual environment.
The Mechanics of Collaboration
In this setting, each participant wears VR headsets such as a Meta Quest. They can then interact with their surroundings using handheld controllers for tactile input. But wait till we get to the really cool part – participants can view and manipulate the same 3D models simultaneously. Think about how much faster design engineering could be when everyone involved sees changes made by others instantly.
Powerful Applications Across Industries
This method has shown huge benefits compared to traditional methods across several industries including game development and construction industry among others. For instance, Gravity Sketch is one application developed specifically for designing within VR which offers some fantastic features enabling engineers to create intricate details seamlessly.
Beyond these practical applications though, there are training experiences too. For example, medical students could study detailed anatomical models collaboratively making learning more interactive and fun.
FAQs
Can you do 3D modeling in VR?
Absolutely. Software like Google’s Tilt Brush and Gravity Sketch let you create intricate 3D models directly within a VR environment.
How to convert 3D model to VR?
To make your 3D model ready for VR, export it from your CAD software as a .FBX or .OBJ file then import into the chosen virtual reality platform.
How do you create a virtual reality model?
Create VR models using specific software. The process involves building the base model, optimizing for performance, and integrating it into the desired virtual environment.
Can I use blender in VR?
You can indeed use Blender with its built-in support for headsets to design detailed models right inside of Virtual Reality.
Conclusion
Venturing into the realm of virtual reality is an exhilarating exploration, not just a mere step. An exciting journey that begins with understanding how to 3D model for VR. You’ve discovered software like Gravity Sketch and Daz Studio. You’re no longer strangers to intricate character designs or choosing appropriate file types for seamless game engine integration.
But there’s more in your arsenal now: optimizing models, ensuring they’re VR-ready, handling complex 3D visualizations. Your toolkit is brimming with newfound skills. All these pieces form the grand puzzle of creating immersive virtual environments from scratch. Click the following link to learn what the best program for 3d modeling is.
How to 3D Print from CT or MRI Scans
Ever wondered how a medical scan could be transformed into something tangible? Well, you’re not alone. Many are captivated by this marriage of technology and medicine, bringing the once flat images to life in your hands. Picture holding a detailed model of your own heart, feeling its intricate structures under your fingertips. This is what awaits us at the crossroads of radiology and 3D printing.
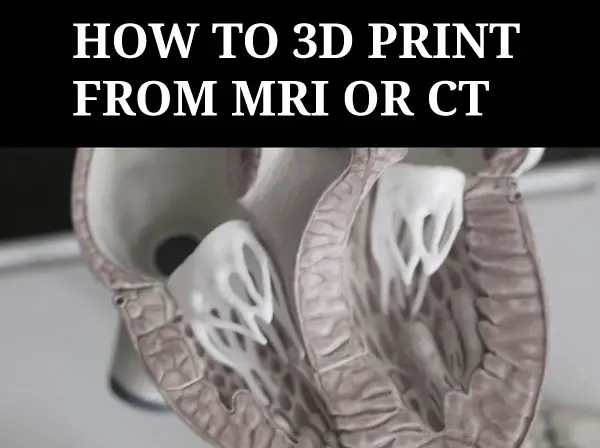
In this journey through computed tomography (CT) scans and magnetic resonance imaging (MRI), we’ll learn how to create accurate 3D models using innovative software packages like OsiriX, Meshlab, Meshmixer…and more!
Understanding CT and MRI Scans for 3D Printing
If you’ve ever marveled at the precision of 3D printed anatomical models, it is likely that unlike models created from scratch in a design program, they began with scan data from medical imaging techniques like computed tomography (CT) or magnetic resonance imaging (MRI). These scans provide detailed views of body features, which can be transformed into a printable model. Whether it’s creating an accurate brain model based on an MRI image or crafting bone structures from a CT scan, these technologies are invaluable. But how do we get from these intricate scans to tangible 3D models? The key lies in DICOM files.
The Role of Medical Imaging in 3D Printing
DICOM stands for Digital Imaging and Communications in Medicine. It is a standard format used by radiology departments around the world to store complex medical images such as those obtained through CT and MRI procedures.
In simple terms, each DICOM file represents a high-resolution ‘slice’ of the human anatomy captured during scanning. A series of slices put together forms what we call volumetric data – essentially a three-dimensional view inside our bodies.
This volumetric information is vital when trying to create accurate representations using 3D printing technology. After all, every detail counts when your goal is replicating parts as delicate as brain tissue or intricate bone structures.
To turn this wealth of digital data into something tangible – say an exact replica model bones– specialized software packages are required; free versions often exist but might lack some functionalities found in their premium counterparts.
Doctors already use 3D printed models to better prepare for surgeries. This technology is not just for enthusiasts; it’s saving lives and improving medical outcomes every day.
Converting Scan Data into Usable Formats
To transform your CT or MRI scan data into a format ready for 3D printing, you need to convert it from DICOM files to STL files. The key player in this process is the OsiriX imaging software. It’s capable of turning medical images (DICOM file) into an STL file, which can then be manipulated and printed. The sectional data must be selected based on density or other feature or manually outlined to become a 3d model.
The OsiriX imaging software does more than just create accurate anatomical models; it serves as a bridge between precision imaging technology like computed tomography (CT scans), magnetic resonance imaging (MRI scans), and 3D modeling techniques used in print-ready designs.
Software Selection: Beyond Just Conversions
Apart from OsiriX, there are several other free software options that offer similar functionalities. Software package such as Horos Project (download here) allows you to import DICOM data directly from your MRI brain scan stored on a jump drive or email account.
You also have paid alternatives offering advanced features for professional use but remember – whatever tool you choose needs not only perform conversions but also help model bones and body features with high fidelity.
Making Use of 3d Model Files
The beauty lies in what happens after conversion. Your newly minted STL files let us play around with bone structures, creating intricate details right down to the tiniest ridge. This model can even be imported into a full 3D design program like Maya where any feature of the model can be modified. You could make scale models of complex parts like the human brain using real patient-specific data.
Tips To Remember:
- DICOM vs STL: Remember, DICOM files contain raw scan data while STL is a universally accepted format in 3D printing.
- Software Choice: Choose software based on your needs. Free versions like OsiriX or Horos are great for beginners and non-commercial use.
- Data Accuracy: Always give the output file a second look. Make sure it’s correctly translating medical images into printable models.
Selecting and Preparing Specific Parts for Printing
Getting the right details from your scan data is crucial to create accurate 3D models. This part of the process can feel a bit like looking for specific anatomical models in a jigsaw puzzle.
Trimming Down Heavy Geometry
The first step in selecting and preparing parts involves dealing with heavy geometry after creating a 3d model from a medical modality, which means you’re handling dense or complex structures within your CT scans or MRI data. But don’t worry; this doesn’t mean you need to be an expert in modeling techniques or precision imaging.
Meshlab, a free software package, comes to our rescue here by helping us clean up and rebuild these complicated geometries into something more manageable – much like tidying up after building that intricate Lego model. There are other similar programs, some of which come with 3d printers. You can also clean up meshes in 3d design programs like Maya or 3D Studio.
Repairing and Finishing Models with Meshmixer
Once you’ve selected the specific parts from your scan data and created a 3d mesh, it’s time to refine your 3D model. Enter Meshmixer, a free software tool that’s a godsend for this part of the process.
This is where we fix any issues in our models like gaps or misaligned sections. It also helps smooth out rough edges, making them ready for printing.
Mending Your Model
The first step involves ‘healing’ any holes present in your model using Meshmixer’s “Inspector” tool. Think of it as patching up a punctured tire; it won’t run smoothly until fixed.
A few clicks here and there will seal these breaches ensuring no unwanted empty spaces are left behind.
Refining Surfaces
Beyond just repairing flaws, Meshmixer lets us perfect our model by refining its surfaces too. Using tools such as “Sculpt” and “Smooth”, you can easily fine-tune even intricate details on anatomical models like bone structures or body features derived from CT scans or MRI data.
Gearing Up For Printing
The last lap before hitting print involves generating support structures – kind of like scaffolding around a building under construction. This gives extra stability during the actual printing process especially when dealing with complex shapes derived from medical imaging data.
Simplifying the Process with democratiz3D Service
The process of converting CT scans to 3D printable bone STL models can seem complex. But, there’s a service that simplifies it all – democratiz3D.
This free software transforms your scan data into anatomical models ready for printing. It handles everything from DICOM files to MRI brain images and even entire body features.
The magic happens now. After uploading and providing necessary details about your model (like description), hit submit. Believe it or not, in as little as ten minutes later; voila –your detailed STL model will be ready for download.
A few tips:
- Please make sure that during upload stage you choose “Yes” when asked if you want democratiz3D to process your file.
- Once processing is done, you can download the resulting STL file and send it straight to your 3D printer.
This software is a boon for professionals who want accurate models but lack time or extensive technical knowledge.
Best Practices for Exporting Scan Data for Printing
When you’re working with CT or MRI scan data, it’s crucial to understand the best practices of exporting this information for 3D printing. The journey from DICOM file to a printed model can be complex, but we’ve got some helpful tips to make sure everything runs smoothly.
The Role of STL Files in 3D Printing
To start off, let’s discuss how vital STL files are in this process. Once you have extracted data from the DICOM files into an STL format, you’re one step closer towards bringing your anatomical models to life. But remember: always double-check your exported STL file before moving on.
Meticulous Preparations and Quality Control Checks
The next part involves quality control checks using applications such as Meshlab and Meshmixer. They help repair any inconsistencies in our geometry that might affect the final printout.
Using these tools allows us not only correct mistakes but also refine our models down even further by removing unwanted elements – resulting in clean and precise 3D prints every time.
Picking Your Printer Wisely
You should take note while choosing a printer too. Not all printers handle intricate details equally well; so it’s important picking one suitable specifically for medical scans outputting accurate printable models. The last thing you want with medical or scientific 3d models is stair stepping or a collapsed model.
Choosing the Right Printer for Scan Data
The journey from scan data to a tangible 3D model requires one crucial piece of equipment: the right 3D printer. But with countless models on the market, how do you decide?
Analyzing Your Needs
To start off, consider your specific needs. Are you printing anatomical models or bone structures? This will dictate what features are important in a printer.
If precision imaging is paramount (as it often is when dealing with MRI and CT scans), look for printers known for their high resolution.
Type of Material Used
Next up, think about materials. Some printers only work with certain types – plastic filament might be fine if you’re creating simple representations like brain tissue models; however, if detailed bone replicas are needed then resin-based printers could offer more detail. Biodegradable materials like PLA may be good for the environment but dont always last as long as things like ABS.
Consideration For Support Structures
When dealing with complex geometries that organic medical models usually have, support material becomes key as well. Certain printers allow easy removal of these supports which can save time post-printing.
A Note On Software Compatibility
Last but not least – ensure that your chosen printer’s software package syncs seamlessly with other tools used during this process such as MeshMixer, ensuring smooth transitions between steps without lost business due to technical issues.
Understanding Legal Considerations and Copyright Laws
The world of 3D printing, particularly from medical scan data like CT or MRI scans, isn’t just about technology. It also navigates a complex landscape of legal considerations and copyright laws.
When dealing with patient data such as CT scans, privacy is paramount. In the US, HIPAA regulations guarantee patients’ rights to keep their health information private. Hence it’s crucial to ensure that any data used for creating 3D printed models has been anonymized or properly consented for use.
In terms of intellectual property concerns when transforming these images into printable models, things can get tricky too. Medical imaging could potentially be considered original works protected under copyright law but this remains an area of ongoing debate among legal scholars.
Copyright Laws on Anatomical Models
Beyond patient privacy issues lies another grey area – who owns the rights to anatomical structures? Is a kidney scanned by an MRI machine considered “created” by that device’s manufacturer?
A rule-of-thumb often applied here is if you’re using someone else’s scan without permission – even if you’re making modifications before printing – there may well be a case for infringement unless your usage falls within ‘fair use’. But remember fair use is subjective so always consult with knowledgeable counsel when in doubt.
Navigating Through The Grey Areas
This lack of clear regulation means creators must tread carefully not only respecting patient confidentiality but ensuring they are not infringing upon potential intellectual property rights associated with the creation process itself.
All these highlight the need for clearer legal frameworks surrounding 3D printing from medical imaging.
Case Studies Demonstrating Success in Medical Imaging and Printing
The power of 3D printing from CT or MRI scans isn’t just theoretical. There are real-world cases where this technology has revolutionized medical practice.
Hospitals around the globe have embraced 3D printed models derived from medical scan data, creating tangible, patient-specific anatomical replicas for improved surgical planning and education.
Cranial Surgery Using Patient-Specific Models
A particularly compelling example is the use of a 3D model for cranial surgery preparation. By converting MRI brain scan data into a printable model, surgeons were able to simulate complex procedures beforehand, reducing operating time by up to 25% according to one study.
Bone Structure Visualization with Precision Imaging
In another instance, radiologists utilized CT scans to create accurate representations of bone structures. The printed models allowed doctors not only to see but also to touch the affected areas – something impossible with traditional imaging techniques alone.
Patient Education Through Printed Anatomical Models
The potential extends beyond treatment as well. For patients struggling to understand their conditions based on flat images alone, having access to detailed physical models can be transformative for comprehension and engagement in their own care process.
“It’s like holding your heart in your hands,” one patient said upon seeing her own cardiac structure recreated via precision imaging and advanced printing technology.
Conclusion
3D printing from medical scan data takes several steps and quite a bit of work, but new software and services allow this process to be simplified. We delved deep into tissue-specific modalities in medical imaging and learned how software packages like OsiriX, Meshlab, Meshmixer help transform DICOM files into tangible models. The right tools let us clean up heavy geometry for precise modeling before printing. Be on the lookout for even more improvements in this process in the future. Click the following link to learn about 3d modeling for 3d printing.
CT vs MRI: A Deep Dive into Medical Imaging Technology
CT and MRI are two critical technologies in the realm of medical imaging, each with its unique strengths and applications. Understanding these powerful tools can seem daunting at first glance. Despite their complexity, CT and MRI are essential for diagnosing a variety of health issues.
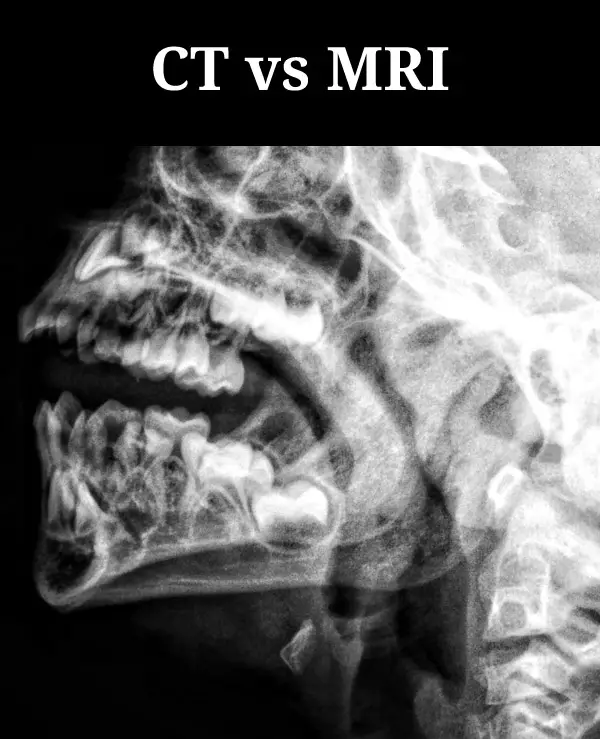
The choice between CT and MRI often depends on the specific needs of the patient and what doctors aim to uncover. In this deep dive into CT vs MRI, we’ll explore their underlying technology, uses in medical diagnosis, speed & efficiency comparisons, safety concerns associated with both scan types among other factors that make them distinct yet complementary diagnostic tools.
Unraveling the Science of CT and MRI Scans
The advent of medical imaging has marked a significant breakthrough in healthcare, offering clinicians an unprecedented internal view into patients’ bodies without resorting to invasive procedures. Two key medical imaging techniques used to gain an internal view of patients’ bodies without resorting to invasive procedures are Computed Tomography (CT) scans and Magnetic Resonance Imaging (MRI).
Computed Tomography: The Power of X-rays
A computed tomography scan, often referred to as a CT or CAT scan, leverages X-ray technology. It works by rotating a large X-ray machine around the patient during what is known as a typical CT procedure.
This process generates cross-sectional images that can be amalgamated using computer processing algorithms to create three-dimensional visuals. These comprehensive views offer invaluable insights into bones, blood vessels, and soft tissues – all crucial for good clinical decision-making.
Magnetic Resonance Imaging: Harnessing Radio Waves
In contrast with computed tomography’s reliance on X-rays, magnetic resonance imaging makes use of radio waves coupled with powerful magnets for its operation. An MRI machine creates strong magnetic fields that interact with hydrogen atoms within our body structure.
This interaction gives rise to signals that are picked up by antennas situated in close proximity to the area under examination. Sophisticated software processes these signals, converting them into high-resolution images representing both anatomical structures and physiological activities within our bodies – proving particularly beneficial when examining soft tissues like muscles or brain matter.
Applications of CT and MRI Scans in Medical Diagnosis
The versatility of computed tomography (CT) scans is evident in their wide range of applications. Notably, these powerful imaging tools are often employed for abdominal imaging tests to identify potential issues with organs such as the liver, pancreas, or kidneys.
The Role of Contrast Dye in Enhancing Images
In certain instances during a typical CT procedure, doctors decide to utilize contrast dye, which serves an essential role. Injected into the body before scanning commences, this substance illuminates specific areas within our anatomy on CT images produced by large x-ray machines partaking in the scan process.
This technique greatly enhances visibility and allows medical professionals to detect any abnormalities that might otherwise be missed due to its ability to highlight structures not easily discernible without it.
Beyond abdominal investigations, though, lies another crucial application: diagnosing bone fractures. By providing cross-sectional views from various angles using X-rays emitted by CT machines, they offer invaluable insights into skeletal integrity, aiding good clinical decision-making regarding appropriate treatments.
MRI’s Unmatched Soft Tissue Imaging Capabilities
Contrarily, Magnetic Resonance Imaging (MRI) has its unique strengths too – particularly when dealing with soft tissues like brain tumors or spinal canal anomalies detection where other techniques fall short.
An MRI, unlike most diagnostic modalities, uses radio waves alongside a powerful magnet interaction with hydrogen atoms present within us all, creating detailed imagery unparalleled elsewhere, especially when cancerous tissue presence suspected necessitating high-resolution pictures. This information helps clinicians determine the best course of action for each patient case basis while ensuring maximum safety.
Speed and Efficiency: A Comparative Look at CT and MRI Scans
In the realm of medical imaging, speed is a crucial factor. Not only does it impact patient comfort, but it also determines how swiftly healthcare providers can diagnose conditions or initiate treatments. When comparing computed tomography (CT) scans with magnetic resonance imaging (MRI), there’s a clear disparity in their respective durations.
The Speed Factor in Computed Tomography Scan Procedures
A typical CT procedure involves using a large X-ray machine that rotates around the body, capturing images from various angles. These multiple snapshots are then combined by sophisticated software algorithms to create CT images within minutes. This fast-paced operation makes them especially valuable during emergencies when every second counts – for instance, while diagnosing traumatic injuries or acute abdominal pain.
MRI Scans: Quality Over Time?
Magnetic Resonance Imaging works differently; MRI machines generate strong magnetic fields interacting with hydrogen atoms inside our bodies, producing signals that get converted into detailed pictures revealing soft tissue abnormalities like brain tumors or spinal issues. MRI exams may take anywhere from 15 minutes to an hour, depending on the body part being scanned. Patients with phobias or anxiety issues may find the MRI experience uncomfortable.
Evaluating Overall Efficiency Beyond Just Timing
When comparing the efficiency of CT and MRI scans, it’s important to consider factors beyond just timing. While CT scans are faster, they expose patients to ionizing radiation, which can be a concern for repeated or prolonged exposure. On the other hand, MRI scans do not use radiation, making them a safer option for certain individuals, such as pregnant women or children.
Additionally, the type of information provided by each imaging modality differs. CT scans are excellent for visualizing bone structures and detecting conditions like fractures or tumors. They are also commonly used for evaluating the chest, abdomen, and pelvis. MRI scans, on the other hand, excel at capturing detailed images of soft tissues, such as the brain, spinal cord, or joints. They are particularly useful for diagnosing conditions like multiple sclerosis, stroke, or ligament damage.
Safety Concerns Associated with CT and MRI Scans
When looking into medical imaging techniques such as CT or MRI, it is critical to think about the safety elements involved. Each type of scan carries unique potential risks that need careful consideration.
Risks Involved in Computed Tomography Scan Procedures
The primary issue associated with a normal CT process is the introduction to ionizing radiation, which can harm cells in our body and thus raise the possibility of malignancy after some time. This becomes particularly concerning for patients who require multiple CT scans throughout their life due to chronic conditions.
The U.S Food and Drug Administration estimates suggest that even a single CT can expose an individual to more radiation than they would naturally encounter over several years. Hence, doctors decide to prescribe this large X-ray machine only after carefully weighing its benefits against these inherent risks.
Potential Dangers Posed by Magnetic Resonance Imaging Procedure
MRI machines operate differently from traditional CT machines as they utilize radio waves along with powerful magnets instead of x-rays; however, this comes with its own set of challenges. The intense magnet used in MRIs could potentially attract metal objects, causing them to move violently or heat up during the scanning process if not properly screened prior to any MRI procedures taking place.
This poses a significant danger, especially for those with certain medical implants such as pacemakers or cochlear devices, as these might malfunction under strong magnetic fields, leading to serious injuries at times. Hence, comprehensive screening measures are always taken before performing an MRI, commonly requiring extra cautionary steps compared to other abdominal imaging tests conducted using different modalities.
Costs Involved in Getting a Scan
The costs associated with obtaining CT and MRI scans are multifaceted, encompassing everything from the initial investment for equipment to ongoing maintenance fees. These expenses can significantly influence healthcare providers’ decisions about which imaging modality they offer.
Purchasing Imaging Equipment: A Major Investment
MRI machines tend to be more expensive than their CT counterparts due to the complex technology involved, including powerful magnets and radio waves. This cost difference often influences whether a facility opts for an MRI or computed tomography scan machine when setting up its services.
Ongoing Costs: Maintenance Fees & Staff Training Expenses
Beyond purchasing the scanning devices themselves, facilities must also budget for routine maintenance of these high-tech machines as well as staff training expenses. Operating both types of scanners requires specialized knowledge and skills that come at an additional cost.
Economic Considerations Impacting Healthcare Providers’ Decisions
In addition to direct costs such as those mentioned above, indirect economic considerations may also sway decision-making processes regarding medical imaging options. For instance, because CT procedures typically take less time than MRIs, thanks largely to faster processing speeds, this could lead clinics offering computed tomography over magnetic resonance imaging towards higher patient throughput and potentially greater revenue generation in certain situations.
Note: While it’s crucial from a clinical perspective that doctors decide based on what would provide good clinical decision making when deciding between abdominal imaging tests like CT vs MRI scans, considering economical aspects like equipment cost and maintenance fees sometimes might influence this choice too, especially among smaller healthcare providers who need careful budget management.
Image Quality & File Size: A Comparative Analysis
In the realm of medical and scientific imaging, CT and MRI scans play a pivotal role. Both CT and MRI scans generate images of a high quality for diagnostic purposes, yet the size of their files differ considerably.
The Image Clarity and Data Volume from CT Scans
A typical CT procedure yields incredibly detailed imagery, especially when examining hard tissues like bones. The resolution can reach up to 0.5 mm, which makes it possible to spot minute fractures or detect cancerous tissue with relative ease.
However, this level of detail comes at a cost: data volume. Each slice captured by a large x-ray machine during the scan creates an individual digital image that needs storage space. Consequently, as more slices are taken during one session – creating comprehensive cross-sectional views – their combined file sizes add up quickly, demanding significant storage capacity.
MRI Scan’s Superior Soft Tissue Visualization And Larger Files
Magnetic resonance imaging stands out when visualizing soft tissues such as brain matter or muscles due to its unique use of radio waves interacting with hydrogen atoms within body fluids, thereby producing superior contrast between different types of tissue, making them ideal for diagnosing conditions affecting internal organs.
Unlike CT scans where each slice is stored separately, MRI procedures produce multiple sequences compiled into one larger file, resulting in overall bigger files per patient study compared to those generated by CT machines. This aspect should be considered while planning resources for facilities conducting these abdominal imaging tests on a daily basis.
Finding Balance Between Diagnostic Needs And Practical Constraints
Determining whether to opt for a CT scan we’re unsure about or go ahead with an MRI commonly requires balancing medical necessity against practical considerations, including economic factors such as costs related to equipment maintenance, staff training expenses, among others, also taking into account potential implications concerning data management practices. In essence, doctors decide the best course of action based on a good clinical decision-making process, ensuring optimal outcomes for patients while maintaining operational efficiency in the healthcare facility simultaneously.
Potential for Live Use & Postmortem Subjects
CT and MRI scans have revolutionized the medical field, offering detailed internal images without invasive procedures. These imaging techniques are not only useful in diagnosing conditions but also provide invaluable guidance during live surgeries.
In particular, CT scans are favored due to their speed and efficiency. Their ability to create real-time images provides essential guidance in fields like neurosurgery and orthopedics, where precise navigation within a patient’s body is necessary for successful outcomes.
MRI Scans: Superior Soft Tissue Contrast
Despite taking longer than CT scans, MRIs offer superior soft tissue contrast, making them indispensable when monitoring the progress of treatments on cancerous tissues or conducting brain surgeries. Furthermore, researchers explore the potential use of MRI machines beyond identifying abnormalities – they could potentially enable non-invasive biopsies by differentiating abnormal cells based on their magnetic resonance signatures.
The Future of Digital Autopsy
Beyond live applications, both CT and MRI technologies show promise for postmortem examinations as well. The possibility lies with these non-destructive imaging methods that can be used alongside traditional autopsy techniques or even replace them under certain circumstances.
A recent study found that combining post-mortem computed tomography scan and magnetic resonance imaging was able to detect most causes of death accurately, suggesting a future where digital autopsies become commonplace; thus pushing us closer towards the development of newer medical devices using 3D reconstructions from such data sets. This highlights how technological advancements continue reshaping our understanding of human anatomy while contributing significantly to good clinical decision-making processes.
Exploring Possibilities for 3D Reconstructions
The innovation of CT and MRI scans has led to significant advancements in medical imaging, with one area standing out – the creation of three-dimensional reconstructions from scan data.
Applications in Surgical Planning
Surgical planning is a key area where these technologies shine. Surgeons can utilize three-dimensional models generated from computed tomography or magnetic resonance imaging scans to visualize complex anatomical structures before surgery. This not only allows them to plan their approach meticulously but also enhances patient outcomes by reducing operative time.
Hospitals are already harnessing this technology for surgeries involving intricate structures like the heart or brain, marking a shift towards personalized medicine based on individual anatomy rather than generalized protocols.
Newer Medical Devices Development & Customization
Beyond surgical planning, 3D reconstructions have implications in developing newer medical devices as well. Engineers can leverage these images created using large X-ray machines (CT) or powerful magnets (MRI) to design custom prosthetics that perfectly fit each patient’s unique body structure, improving device performance and post-implantation comfort levels.
This application extends beyond human patients; even veterinarians might find similar techniques beneficial when treating animal patients.
Educational Tools: Enhancing Patient Understanding & Teaching Aids
Apart from clinical applications, there’s an educational aspect too. Three-dimensional visual aids derived from abdominal imaging tests via CT scans or soft tissue studies through MRIs help individuals better understand their health conditions. Studies suggest that such detailed depictions improve comprehension during doctor-patient consultations while serving as effective teaching tools within academic settings, enabling students studying biology to gain a tangible grasp over complex anatomical concepts.
Conclusion
Delving into the technology behind CT and MRI scans reveals a fascinating world of medical imaging. From harnessing X-rays in computed tomography to utilizing radio waves in magnetic resonance imaging, these techniques have revolutionized healthcare. Their applications are vast – detecting bone fractures, diagnosing cancer metastases with CT scans, or spotting soft tissue abnormalities using MRIs.
Speed and efficiency vary between the two, with CT often being faster but MRI providing superior detail for certain conditions. Safety concerns do exist; ionizing radiation from CTs needs careful management while powerful magnets used in MRIs can pose risks for patients with certain implants. Economic considerations also play a role as costs associated with each scan type can be significant factors influencing their usage by healthcare providers.
Finally, we’ve seen how image quality and file sizes differ between these modalities impacting storage requirements, especially when conducting high volumes of scans daily. Potential uses extend beyond human medicine into veterinary science and research purposes. The possibilities for 3D reconstructions from scan data could transform surgical planning or even spur the development of newer medical devices. Click the following link to learn if an MRI can show detail.
Why is 3D Reconstruction Not Done for Every CT Scan or MRI?
Why is 3D reconstruction not done for every CT scan or MRI? This is a question that often arises in the domain of medical imaging technology.
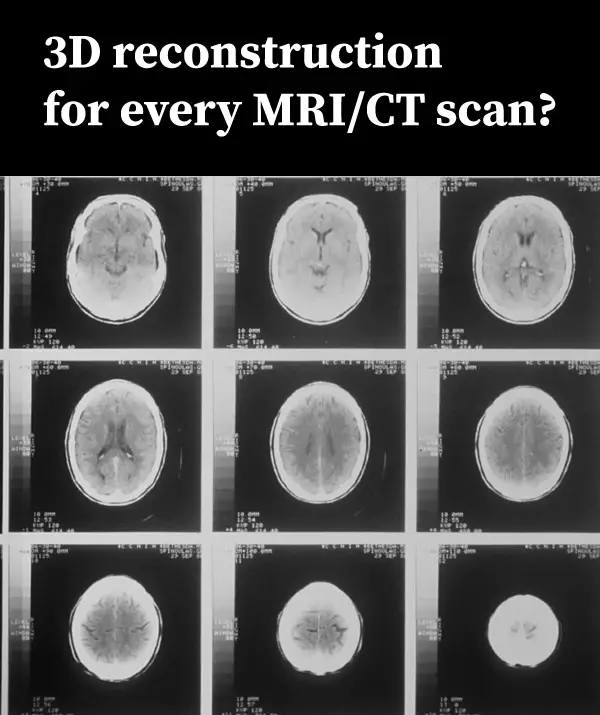
After all, 3D reconstructions provide the most life like depiction of anatomy and pathology available, while other modalities only show sectional 2D views
The answer, like most things in medicine and tech, isn’t as straightforward as one might hope.
In fact, the use of 3D reconstructions from CT scans or MRIs can be quite complex. The process involves intricate software tools and requires significant time investment.
This complexity may deter some from utilizing it consistently. Yet understanding why 3D reconstruction is not always used could offer valuable insights into its potential benefits and limitations.
The Evolution of 3D Reconstruction in Medical Imaging
Over the past decades, medical imaging has seen remarkable advances with 3D reconstruction from CT scans and MRIs leading to improved operative planning and patient outcomes. The advent and refinement of 3D reconstruction from CT scans and MRIs have brought about revolutionary changes to how clinicians approach operative planning and enhance patient outcomes. However, these techniques are not employed universally for every scan due to several constraints.
One primary hurdle is cost-related. Advanced software tools required for generating high-quality three-dimensional image simulations, especially realtime ones, can be expensive, thus deterring smaller healthcare facilities or those with limited budgets from investing heavily in them. Elarref MA et al. suggests that another challenge lies within the complexity associated with certain reconstructions, such as lung reconstruction or advanced mediastinal mass reconstruction, which require specific expertise often only found among specialized professionals.
Volumetric Data Acquisition: A Paradigm Shift?
In recent years, advancements aimed at making volumetric data acquisition more accessible and efficient have emerged on the horizon. Note: These include open-source medical image viewers like Horos, enabling professionals across different surgical specialties, including general thoracic surgery cases or cardiothoracic surgery specifically, to utilize free 3D modeling software without hefty investments.
This democratization of technology has also resulted in real-time interactive 3D imaging becoming increasingly prevalent within clinical practice around the globe.
Decoding the Process of 3D Reconstruction
The realm of medical imaging has seen significant advancements with the introduction and evolution of 3D reconstruction. But what exactly does this process entail? Let’s delve into how CT scans or MRIs are transformed from two-dimensional images to three-dimensional representations using advanced software tools.
These scanning techniques capture cross-sectional views, each representing a thin slice of internal body structures at various angles. When these slices come together, they form a volumetric dataset that serves as raw material for creating our desired output – interactive 3D reconstructions.
Leveraging Free Tools for Basic Reconstructions
In an era where resources can be limited, free alternatives have emerged offering valuable assistance to professionals looking to utilize basic reconstruction methods effectively without breaking their budget. Horos, an open-source medical image viewer, offers capabilities such as volume rendering and multiplanar reformation, making it an ideal tool when considering a patient’s CT scan and how to perform tasks like lung reconstructions.
This platform allows users to import DICOM files – a standard format for storing medical imaging data – directly from devices or PACS servers. However, while Horos provides control over visualization tasks, it may lack some features found in commercial counterparts, like sophisticated segmentation capabilities or post-processing filters.
To navigate through these limitations successfully, one must carefully consider specific needs before opting for any particular tool, whether a paid version or a free alternative.
Applications of Advanced Visualization in General Thoracic Surgery
The transformative power of advanced visualization tools has revolutionized general thoracic surgery. By enabling a comprehensive understanding of complex anatomical structures, these technologies have significantly improved surgical planning and patient outcomes.
In the educational context, interactive platforms provided by these visualizations allow for demonstration and exploration of intricate procedures or conditions. Trainees can manipulate 3D models to view different angles and layers that traditional 2D images cannot provide, gaining an all-encompassing perspective on the subject matter at hand.
A Case Study on Operative Planning
One area where advanced visualization truly shines is operative planning. A study comparing imaging techniques, for instance, showcased how CT scans could be utilized in operative planning specifically within cardiothoracic surgery.
This study demonstrated that high-quality three-dimensional image simulation resulted in superior preoperative assessment compared to conventional methods alone, which often lack sufficient detail or spatial context required for complex surgeries such as lung reconstruction or re-do surgery operations.
Surgeons were able to visualize tumors relative to surrounding tissues with this technology before stepping into the operating room, allowing them meticulous preparation leading to potentially better short-term surgical outcomes by reducing complications associated with unexpected intraoperative findings.
Patient Education Benefits from Advanced Visualization
An equally important application lies within patient education – a critical aspect of the healthcare delivery system. With sophisticated modeling software, physicians are now equipped to create personalized simulations based on an individual’s own medical imagery. By leveraging personalized simulations based on an individual’s medical imagery, physicians can enable patients to gain a better comprehension of their condition and the treatment options available, leading to increased satisfaction post-surgery.
The Role of Interactive 3D Reconstruction in Video-Assisted Thoracoscopic Lung Surgery
Video-assisted thoracoscopic surgery (VATS) is a game-changer for lung surgery, offering less invasive procedures that lead to reduced postoperative discomfort and faster recovery. However, VATS demands an intricate understanding of complex pulmonary anatomy, which can be difficult to visualize using traditional two-dimensional imaging techniques.
This is where interactive 3D reconstruction steps in. By converting CT scans into three-dimensional models, surgeons gain deeper insights into the patient’s unique anatomy and plan their surgical approach accordingly.
Paving Way for Preoperative Planning with Interactive 3D Reconstructions
In terms of preoperative planning, these reconstructions allow surgeons to virtually navigate through the operative site before making an incision. They can identify potential obstacles such as tumors or anatomical variations that may complicate the procedure ahead of time.
The ability to rotate and manipulate these models also gives them a comprehensive view from multiple angles – something not possible with conventional imaging methods. This greatly enhances their spatial awareness, leading to more accurate operative plans, specifically enhancing cardiothoracic surgery.
Virtually Simulating Surgical Procedures: A Leap Forward
Beyond just planning purposes, interactive 3D reconstructions offer opportunities for virtual simulation too. Surgeons are now able to rehearse complicated surgeries beforehand on a computer screen, simulating real-life conditions closely.
This practice leads to improved performance during actual surgeries due to its high fidelity nature, accurately mirroring real-world scenarios. This increases surgeon confidence while significantly reducing error rates, according to recent studies, including one conducted by Dr. Nia’s team mentioned earlier in this article.
Unraveling the Challenges and Limitations of Current 3D Reconstruction Techniques
In our journey to understand advanced imaging techniques, it is essential to address not just their advantages but also their limitations. These technologies are intended as adjunct tools rather than replacements for traditional axial imaging.
Precision Matters: The Accuracy Dilemma
The precision of basic mediastinal mass reconstruction heavily depends on the clarity and resolution of initial images from CT scans or MRIs. Any artifacts present could affect subsequent visualizations, potentially leading to misinterpretation.
Software algorithms have improved over time, yet they still struggle with complex anatomical structures where different tissues intersect closely together, such as lung parenchyma or vascular trees.
Lack Of Standardization And Training
Different platforms used for generating interactive 3D reconstructions can produce varying results due to differences in underlying algorithms. This lack of standardization can lead to inconsistencies when comparing studies conducted using various systems.
Apart from this technical aspect, there is an absence of standardized training for medical professionals on how best to utilize free modeling software – an issue that needs addressing if we want wider adoption within healthcare institutions worldwide.
Exploring Open Source Medical Image Viewers
The realm of open source medical image viewers is expansive and diverse, offering a myriad of tools for professionals in the scientific 3D field. These platforms present an economical alternative to expensive proprietary software, making advanced reconstruction more attainable.
RadiAnt DICOM Viewer, with its user-friendly interface and comprehensive functionality, has become quite popular. It supports various modalities such as CT scans, MRIs, PETs, and ultrasounds, among others. The unique feature it provides – a 3D cursor that synchronizes points picked across different series – enables easier comparison between images.
Moving beyond basic viewing functionalities offered by RadiAnt lies 3D Slicer, an interactive platform designed specifically for medical image processing, particularly useful for research purposes. From simple measurements or visualizations to complex surgical simulations or radiotherapy planning procedures, they can be performed using this powerful tool.
This robust tool facilitates extensive options for segmentation, where regions within the anatomy can be separately highlighted, allowing detailed study of structures inside a patient’s body based on their CT scan. How-to instructions provided by radiology experts further enhance the utilization of this tool.
Looking Towards the Future – Augmented Reality Visualization
The future of 3D imaging, particularly in thoracic surgery and other surgical specialties, holds immense promise with augmented reality (AR) visualization. This cutting-edge technology is set to redefine patient outcomes by enhancing surgical precision.
Augmented reality overlays digital data onto real-world environments, providing surgeons with a comprehensive view of complex anatomical structures without making invasive incisions. It is poised to reduce operative times while simultaneously improving accuracy.
Potential Advantages of AR
AR offers an enhanced understanding and interactive 3D reconstruction for intricate anatomy like lung tissues. These visual aids are instrumental for effective preoperative planning and intraoperative guidance during procedures such as lung resections or advanced reconstructions.
A study led by Elarref MA et al. underscores how AR visualization can lead to more precise tumor resection margins along with improved lymph node dissection techniques – potentially optimizing short-term surgical outcomes for patients undergoing these types of surgeries.
Leveraging Open Source Platforms For Implementing AR
To realize widespread adoption of this innovative technique, it will be crucial to utilize open-source software platforms, allowing professionals easy access to high-quality simulations without hefty investments.
Developers have already started creating open-source projects aimed at implementing augmented reality into healthcare settings – indicating promising signs towards a future where every surgeon has ready access to interactive 3D reconstruction tools coupled with augmented reality capabilities.
As we forge ahead into this exciting new era in medicine, technologies like AR undoubtedly play pivotal roles in shaping our approach towards achieving optimal results across various surgical specialties.
FAQs
Can CT scans produce 3D images?
Yes, with the help of advanced software tools, data from CT scans can be converted into detailed 3D reconstructions for better visualization and analysis.
What is 3D reconstruction in CT scan?
It’s a process where two-dimensional X-ray images captured during a CT scan are processed using specialized software to create a three-dimensional model of the scanned area.
Why do MRIs have better tissue differentiation compared with CT scanners?
MRI uses magnetic fields and radio waves instead of radiation. This allows it to differentiate between tissues more effectively than a standard CT scanner, providing clearer imaging results.
What are the advantages of using 3D reconstructions?
The use of 3D reconstructions provides enhanced spatial understanding, aids in surgical planning, improves patient education, and has potential applications in teaching medical students or trainees.
Conclusion
Progress in 3D reconstruction for medical imaging has been significant, from being a costly and time-consuming procedure to becoming more attainable with the introduction of sophisticated software solutions. While it’s proving invaluable in areas like thoracic surgery for teaching, patient education, and operative planning, it’s not without its challenges. It serves as an adjunct tool rather than replacing axial imaging entirely.
The potential pitfalls and limitations of current techniques underscore the need for further advancements in this field. This brings us to open source medical image viewers that allow professionals to create high-quality simulations sans hefty investments.
As we look towards the future, augmented reality visualization stands out as a promising trend that could revolutionize surgical specialties beyond just thoracic surgery. Click the following link to learn about the best free DICOM viewers.