
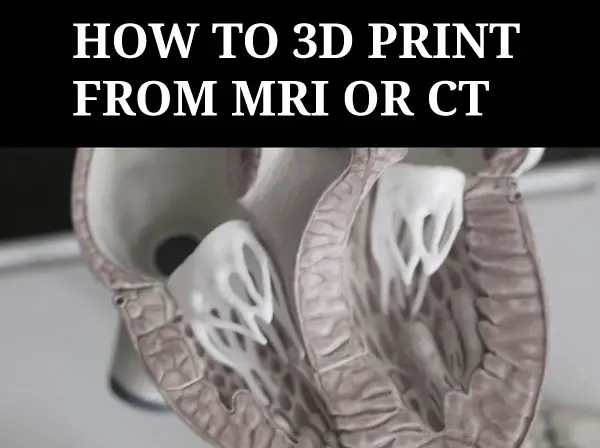
Ever wondered how a medical scan could be transformed into something tangible? Well, you’re not alone. Many are captivated by this marriage of technology and medicine, bringing the once flat images to life in your hands. Picture holding a detailed model of your own heart, feeling its intricate structures under your fingertips. This is what awaits us at the crossroads of radiology and 3D printing.
In this journey through computed tomography (CT) scans and magnetic resonance imaging (MRI), we’ll learn how to create accurate 3D models using innovative software packages like OsiriX, Meshlab, Meshmixer…and more!
Understanding CT and MRI Scans for 3D Printing
If you’ve ever marveled at the precision of 3D printed anatomical models, it is likely that unlike models created from scratch in a design program, they began with scan data from medical imaging techniques like computed tomography (CT) or magnetic resonance imaging (MRI). These scans provide detailed views of body features, which can be transformed into a printable model. Whether it’s creating an accurate brain model based on an MRI image or crafting bone structures from a CT scan, these technologies are invaluable. But how do we get from these intricate scans to tangible 3D models? The key lies in DICOM files.
The Role of Medical Imaging in 3D Printing
DICOM stands for Digital Imaging and Communications in Medicine. It is a standard format used by radiology departments around the world to store complex medical images such as those obtained through CT and MRI procedures.
In simple terms, each DICOM file represents a high-resolution ‘slice’ of the human anatomy captured during scanning. A series of slices put together forms what we call volumetric data – essentially a three-dimensional view inside our bodies.
This volumetric information is vital when trying to create accurate representations using 3D printing technology. After all, every detail counts when your goal is replicating parts as delicate as brain tissue or intricate bone structures.
To turn this wealth of digital data into something tangible – say an exact replica model bones– specialized software packages are required; free versions often exist but might lack some functionalities found in their premium counterparts.
Doctors already use 3D printed models to better prepare for surgeries. This technology is not just for enthusiasts; it’s saving lives and improving medical outcomes every day.
Converting Scan Data into Usable Formats
To transform your CT or MRI scan data into a format ready for 3D printing, you need to convert it from DICOM files to STL files. The key player in this process is the OsiriX imaging software. It’s capable of turning medical images (DICOM file) into an STL file, which can then be manipulated and printed. The sectional data must be selected based on density or other feature or manually outlined to become a 3d model.
The OsiriX imaging software does more than just create accurate anatomical models; it serves as a bridge between precision imaging technology like computed tomography (CT scans), magnetic resonance imaging (MRI scans), and 3D modeling techniques used in print-ready designs.
Software Selection: Beyond Just Conversions
Apart from OsiriX, there are several other free software options that offer similar functionalities. Software package such as Horos Project (download here) allows you to import DICOM data directly from your MRI brain scan stored on a jump drive or email account.
You also have paid alternatives offering advanced features for professional use but remember – whatever tool you choose needs not only perform conversions but also help model bones and body features with high fidelity.
Making Use of 3d Model Files
The beauty lies in what happens after conversion. Your newly minted STL files let us play around with bone structures, creating intricate details right down to the tiniest ridge. This model can even be imported into a full 3D design program like Maya where any feature of the model can be modified. You could make scale models of complex parts like the human brain using real patient-specific data.
Tips To Remember:
- DICOM vs STL: Remember, DICOM files contain raw scan data while STL is a universally accepted format in 3D printing.
- Software Choice: Choose software based on your needs. Free versions like OsiriX or Horos are great for beginners and non-commercial use.
- Data Accuracy: Always give the output file a second look. Make sure it’s correctly translating medical images into printable models.
Selecting and Preparing Specific Parts for Printing
Getting the right details from your scan data is crucial to create accurate 3D models. This part of the process can feel a bit like looking for specific anatomical models in a jigsaw puzzle.
Trimming Down Heavy Geometry
The first step in selecting and preparing parts involves dealing with heavy geometry after creating a 3d model from a medical modality, which means you’re handling dense or complex structures within your CT scans or MRI data. But don’t worry; this doesn’t mean you need to be an expert in modeling techniques or precision imaging.
Meshlab, a free software package, comes to our rescue here by helping us clean up and rebuild these complicated geometries into something more manageable – much like tidying up after building that intricate Lego model. There are other similar programs, some of which come with 3d printers. You can also clean up meshes in 3d design programs like Maya or 3D Studio.
Repairing and Finishing Models with Meshmixer
Once you’ve selected the specific parts from your scan data and created a 3d mesh, it’s time to refine your 3D model. Enter Meshmixer, a free software tool that’s a godsend for this part of the process.
This is where we fix any issues in our models like gaps or misaligned sections. It also helps smooth out rough edges, making them ready for printing.
Mending Your Model
The first step involves ‘healing’ any holes present in your model using Meshmixer’s “Inspector” tool. Think of it as patching up a punctured tire; it won’t run smoothly until fixed.
A few clicks here and there will seal these breaches ensuring no unwanted empty spaces are left behind.
Refining Surfaces
Beyond just repairing flaws, Meshmixer lets us perfect our model by refining its surfaces too. Using tools such as “Sculpt” and “Smooth”, you can easily fine-tune even intricate details on anatomical models like bone structures or body features derived from CT scans or MRI data.
Gearing Up For Printing
The last lap before hitting print involves generating support structures – kind of like scaffolding around a building under construction. This gives extra stability during the actual printing process especially when dealing with complex shapes derived from medical imaging data.
Simplifying the Process with democratiz3D Service
The process of converting CT scans to 3D printable bone STL models can seem complex. But, there’s a service that simplifies it all – democratiz3D.
This free software transforms your scan data into anatomical models ready for printing. It handles everything from DICOM files to MRI brain images and even entire body features.
The magic happens now. After uploading and providing necessary details about your model (like description), hit submit. Believe it or not, in as little as ten minutes later; voila –your detailed STL model will be ready for download.
A few tips:
- Please make sure that during upload stage you choose “Yes” when asked if you want democratiz3D to process your file.
- Once processing is done, you can download the resulting STL file and send it straight to your 3D printer.
This software is a boon for professionals who want accurate models but lack time or extensive technical knowledge.
Best Practices for Exporting Scan Data for Printing
When you’re working with CT or MRI scan data, it’s crucial to understand the best practices of exporting this information for 3D printing. The journey from DICOM file to a printed model can be complex, but we’ve got some helpful tips to make sure everything runs smoothly.
The Role of STL Files in 3D Printing
To start off, let’s discuss how vital STL files are in this process. Once you have extracted data from the DICOM files into an STL format, you’re one step closer towards bringing your anatomical models to life. But remember: always double-check your exported STL file before moving on.
Meticulous Preparations and Quality Control Checks
The next part involves quality control checks using applications such as Meshlab and Meshmixer. They help repair any inconsistencies in our geometry that might affect the final printout.
Using these tools allows us not only correct mistakes but also refine our models down even further by removing unwanted elements – resulting in clean and precise 3D prints every time.
Picking Your Printer Wisely
You should take note while choosing a printer too. Not all printers handle intricate details equally well; so it’s important picking one suitable specifically for medical scans outputting accurate printable models. The last thing you want with medical or scientific 3d models is stair stepping or a collapsed model.
Choosing the Right Printer for Scan Data
The journey from scan data to a tangible 3D model requires one crucial piece of equipment: the right 3D printer. But with countless models on the market, how do you decide?
Analyzing Your Needs
To start off, consider your specific needs. Are you printing anatomical models or bone structures? This will dictate what features are important in a printer.
If precision imaging is paramount (as it often is when dealing with MRI and CT scans), look for printers known for their high resolution.
Type of Material Used
Next up, think about materials. Some printers only work with certain types – plastic filament might be fine if you’re creating simple representations like brain tissue models; however, if detailed bone replicas are needed then resin-based printers could offer more detail. Biodegradable materials like PLA may be good for the environment but dont always last as long as things like ABS.
Consideration For Support Structures
When dealing with complex geometries that organic medical models usually have, support material becomes key as well. Certain printers allow easy removal of these supports which can save time post-printing.
A Note On Software Compatibility
Last but not least – ensure that your chosen printer’s software package syncs seamlessly with other tools used during this process such as MeshMixer, ensuring smooth transitions between steps without lost business due to technical issues.
Understanding Legal Considerations and Copyright Laws
The world of 3D printing, particularly from medical scan data like CT or MRI scans, isn’t just about technology. It also navigates a complex landscape of legal considerations and copyright laws.
When dealing with patient data such as CT scans, privacy is paramount. In the US, HIPAA regulations guarantee patients’ rights to keep their health information private. Hence it’s crucial to ensure that any data used for creating 3D printed models has been anonymized or properly consented for use.
In terms of intellectual property concerns when transforming these images into printable models, things can get tricky too. Medical imaging could potentially be considered original works protected under copyright law but this remains an area of ongoing debate among legal scholars.
Copyright Laws on Anatomical Models
Beyond patient privacy issues lies another grey area – who owns the rights to anatomical structures? Is a kidney scanned by an MRI machine considered “created” by that device’s manufacturer?
A rule-of-thumb often applied here is if you’re using someone else’s scan without permission – even if you’re making modifications before printing – there may well be a case for infringement unless your usage falls within ‘fair use’. But remember fair use is subjective so always consult with knowledgeable counsel when in doubt.
Navigating Through The Grey Areas
This lack of clear regulation means creators must tread carefully not only respecting patient confidentiality but ensuring they are not infringing upon potential intellectual property rights associated with the creation process itself.
All these highlight the need for clearer legal frameworks surrounding 3D printing from medical imaging.
Case Studies Demonstrating Success in Medical Imaging and Printing
The power of 3D printing from CT or MRI scans isn’t just theoretical. There are real-world cases where this technology has revolutionized medical practice.
Hospitals around the globe have embraced 3D printed models derived from medical scan data, creating tangible, patient-specific anatomical replicas for improved surgical planning and education.
Cranial Surgery Using Patient-Specific Models
A particularly compelling example is the use of a 3D model for cranial surgery preparation. By converting MRI brain scan data into a printable model, surgeons were able to simulate complex procedures beforehand, reducing operating time by up to 25% according to one study.
Bone Structure Visualization with Precision Imaging
In another instance, radiologists utilized CT scans to create accurate representations of bone structures. The printed models allowed doctors not only to see but also to touch the affected areas – something impossible with traditional imaging techniques alone.
Patient Education Through Printed Anatomical Models
The potential extends beyond treatment as well. For patients struggling to understand their conditions based on flat images alone, having access to detailed physical models can be transformative for comprehension and engagement in their own care process.
“It’s like holding your heart in your hands,” one patient said upon seeing her own cardiac structure recreated via precision imaging and advanced printing technology.
Conclusion
3D printing from medical scan data takes several steps and quite a bit of work, but new software and services allow this process to be simplified. We delved deep into tissue-specific modalities in medical imaging and learned how software packages like OsiriX, Meshlab, Meshmixer help transform DICOM files into tangible models. The right tools let us clean up heavy geometry for precise modeling before printing. Be on the lookout for even more improvements in this process in the future. Click the following link to learn about 3d modeling for 3d printing.
Recent Posts
Mastering point cloud to 3d model conversion can feel like translating whispers from another dimension into vivid sculptures. You've got this cloud of data points, a chaotic concert of coordinates...
Let's say you've got a drawing, something you sketched out during a burst of inspiration, and now you're itching to see it leap off the page into three dimensions. Well, that’s exactly what I did...