
Tissue clearing which started as an isolated, complicated process taking a long time has over the years evolved and been improved by several groups. It is now possible to purchase ready made reagents for tissue clearing and even skip the process of 3D printing chambers and constructing DYI setups.
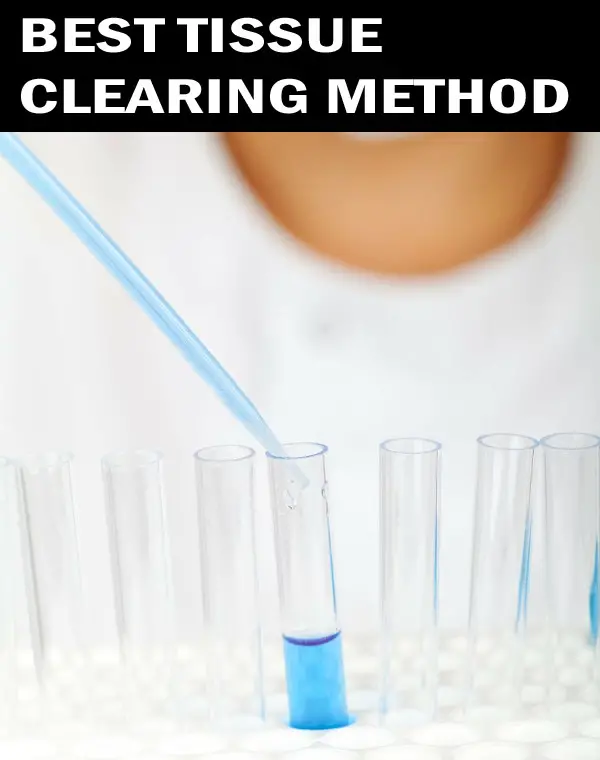
Which then is the best tissue clearing method for your research?
There are many tissue clearing methods, such as hydrogel embedding tissue clearing, hyperhydrating solutions, aqueous-based tissue clearing, organic solvent-based tissue clearing methods, and high refractive index (RI) aqueous solutions. However, every method has its own advantages and disadvantages. There is no one best method for all situations. Let me explain.
But first, a few clearing basics so that you can understand the differences between methods.
What Is Tissue Clearing?
Tissue clearing involves a series of chemical steps that render cell cultures or tissues transparent. Biological tissues are made up of heterogeneous materials that have different refractive indices (optical properties).
Examples of biological tissues are epithelial tissues, connective tissues, nervous tissues, and muscular tissues in animals.
Light absorption and light scattering inside tissues are the primary reasons for tissue opacity. And it is a major obstacle for the imaging of a complete organ or body.
Mismatches of refractive indices inside tissues are the primary reason for light scattering and tissue opacity.
Refractive index matching can make tissue transparent and decrease tissue scattering.
Controlling the tissue’s optical properties may result in tissue transparency by chemical or physical changes. Therefore, the purpose of tissue clearing is to clarify tissue by decreasing the absorption and scattering of light inside biological tissues.
The best tissue clearing method should preserve fluorescent proteins and should have a great clearing capacity.
Importance of Tissue Clearing
Imaging 3D cell cultures, spheroids, organoids, and microtissues can be challenging due to the opacity of these models. The outer layers of the sample may differ significantly in function and morphology from the inner layers. Hence, obtaining clear pictures of all the cell layers is essential to completely understand the tissue sample being analyzed on all levels.
Using tissue clearing methods lets you image 3D cell cultures, spheroids, and organoids.
What Are the Procedures of Tissue Clearing?
There are a number of tissue clearing methods, and each method comes with its own drawbacks and benefits. Many tissue clearing techniques are carried out by the following steps:
1. Tissue Fixation
Tissue fixation is done to preserve tissue and cell components during the tissue clearing process. Chemicals used to fix tissues during clearing include acrylamide hydrogel embedding, glutaraldehyde, and paraformaldehyde.
Chemically known as polyoxymethylene, paraformaldehyde is a cross-linking reagent that is better at preserving the structure of cells. Organic solvents, on the other hand, dehydrate the cells and extract lipids. They also cause complete precipitation of proteins to preserve cells.
2. Permeabilization
Permeabilization, or the puncturing of the cell membrane, is needed when big molecules like antibodies need to get inside the cells to detect intracellular antigens.
Delipidation reagents, hyperhydration reagents, and solvents (acetone and methanol) are some of the reagents used in permeabilization.
3. Decolorization
Endogenous pigments absorb light, significantly reduce imaging quality, and interfere with the penetration of the light. Decolorizing these pigments would lead to 3D imaging and transmission of the light.
4. Refractive Index Matching
Mismatches of refractive indices inside tissues is the primary reason for light scattering and tissue opacity. Equilibrating the refractive index of the whole tissue can decrease the scattering of light. Contrast reagents, hydrophilic reagents, and aromatic solvents are used for refractive index matching.
What Are the Best Tissue Clearing Methods?
Now let’s look at some of the best tissue clearing methods.
1. Hydrogel Embedding Tissue Clearing
Hydrogel embedding tissue clearing methods stabilize proteins in the sample by cross-linking them to a hydrogel, extracting lipids with detergents, and then immersing the samples in a solution with refractive indices between 1.38 and 1.45. The primary benefits of these methods are their good clearing performance. And what’s so good about these methods is that they are compatible with protein-based fluorophores. However, the disadvantage of these methods is that the tissue clearing is not fast.
Benefits
-
- Expansion or swelling
-
- Preservation of fluorescent proteins
-
- Excellent clearing capacity
Drawbacks
-
- Costly equipment needed
-
- Technical complexity
-
- Slow clearing times
Application
-
- Mouse brain slices
-
- Complete mouse organs
-
- Complete mouse bones
2. Hyperhydration-Based Tissue Clearing
These methods use urea, detergents, and a final solution with a refractive index in the range of 1.38 to 1.48 to extract lipids. Examples of hyperhydration-based tissue clearing methods include the Scale family and CUBIC family.
The primary benefits of CUBIC are its preservation of fluorescent proteins and excellent clearing performance. However, big samples can take weeks to clear.
Benefits
-
- Preservation of fluorescent proteins
-
- Preservation of lipids
-
- Compatible with immunostaining
-
- High clearing capacity
-
- Short clearing times (small samples)
Drawbacks
-
- Expansion or swelling
-
- Long clearing times are impractical for immunostaining
-
- Long clearing times (large samples)
Application
-
- Mouse embryo
-
- Mouse brain slices
-
- Mouse skin layers
-
- Complete fish organs
-
- Mouse body and organs
3. Aqueous-Based Tissue Clearing
These methods can be classified into two groups: simple immersion and hydration or delipidation. In simple immersion, samples are submerged in high RI aqueous solutions (1.44-1.52) and become transparent slowly and steadily. This process was chosen for its lipid preservation and technical simplicity. It’s also worth knowing that bigger samples take a longer time to clear. Hence, simple immersion is usually used to clear tiny insects, organoids, and other smaller samples. Aqueous solutions used for refractive index matching are extremely costly.
It’s important to note that simple immersion methods do not remove lipids; hence, they cannot offer extremely transparent samples. Lipids are the primary source of light scattering. Tissue delipidation could improve quality and clearing efficiency. This can be accomplished with detergents or amino alcohols, such as Triton X-100, saponin, and sodium dodecyl sulfate.
Benefits of simple immersion tissue clearing
-
- Preservation of fluorescent proteins
-
- Preservation of lipids
-
- Technical simplicity
-
- Good for clearing small samples
Drawbacks of simple immersion tissue clearing
-
- Costly clearing solutions
-
- Transparency of sample limited by lipid preservation
-
- Low clearing capacity for large samples
-
- Long clearing times
Application
-
- Sectioned chicken embryos
-
- Neurospheres
-
- Mammal organoids
-
- Whole insects
4. Organic Solvent-Based Tissue Clearing
There are many kinds of organic solvent methods to clear tissues. Organic solvent-based tissue clearing methods dehydrate samples, remove lipids, and homogenize the refractive index to high value. Fast speed and high quality are the main benefits of this kind of tissue clearing. The main drawback of this method is the use of dangerous or corrosive chemicals that need sealing the sample to prevent damage to the microscope. Also, no lipid staining is possible because lipids are removed. Additionally, shrinkage of the sample can happen due to the dehydration steps.
Benefits
-
- Compatible with immunostaining
-
- Permanent preservation of samples
-
- High clearing capacity
-
- Short clearing times
Drawbacks
-
- Toxic and corrosive chemicals require special care to prevent damage to the microscope
-
- No direct lipid staining
Application
-
- Whole human embryos
-
- Tumor tissues
-
- Stem cells
-
- Mouse organs and body
The table below summarizes the characteristics of each tissue clearing method.
|
Family/Method |
Time to clear |
Main Components |
Lipid Preservation |
Changes in Tissue Morphology |
|
Hydrogel Embedding |
||||
|
PARS |
Days to Weeks |
Histodenz |
No |
No |
|
PACT |
Days to Weeks |
Histodenz |
No |
a little expansion |
|
CLARITY |
Days |
FocusClear
80% Glycerol |
No |
a little expansion |
|
Hyperhydration |
||||
|
Whole Body CUBIC |
Days |
4M Urea |
Yes |
expansion |
|
CUBIC |
Days |
4M Urea
50% Sucrose |
Yes |
expansion |
|
Simple Immersion |
||||
|
TDE |
Days to Weeks |
2,2′-thiodiethanol |
Yes |
No |
|
SeeDB |
Days |
Fructose Thioglycerol |
Yes |
No |
|
ClearT2* |
Hours to Days |
Formamide PEG |
Yes |
No |
|
ClearT |
Hours to Days |
Formamide |
Yes |
No |
|
FocusClear |
Hours to Days |
Diatrizoic acid |
Yes |
No |
|
Organic Solvents |
||||
|
iDISCO |
Hours – Days |
Dichloromethane Dibenzylether |
No |
Shrinkage |
|
BABB |
Days |
Benzyl alcohol Benzylbenzoate |
No |
Shrinkage |
|
Spatleholz |
Months |
Benzylbenzoate Methylsalicilate |
No |
Shrinkage |
|
Visikol HISTO |
Hours to days |
Visikol HISTO-1, Visikol HISTO-2 and Visikol HISTO-M |
Yes |
No |
Here is some more information about Visikol HISTO (organic solvent-based clearing technique.
Visikol HISTO is a tissue clearing method that renders biological tissues transparent through the refractive index matching method.
The Visikol HISTO protocol will differ significantly based upon the desired labels and the kind of tissue that is being used. The process is given below:
- Biological tissues are usually fixed before processing.
- The sample is pre-treated with the iDISCO to increase the penetration of the label into tissues.
- The sample can be labeled using endogenous fluorescence, immunolabels, and stains.
- Tissues are dehydrated to remove the water before tissue clearing.
- Sample is cleared with Visikol HISTO-1 or Visikol HISTO-M.
Advantages of Visikol HISTO
-
- No damage to morphology
-
- Affordable
-
- Fast tissue clearing
-
- Easy-to-use
-
- No special equipment needed
-
- Compatible with fluorescent labels
Application
-
- Whole mouse brain
Which Tissue Clearing Method Is Best for You?
Here are some of the factors you need to consider when choosing the best tissue clearing method.
1. Ease-of-Use
The use of solvent-based methods and protein expansion clearing methods are relatively simple where samples are placed in different solutions until they are rendered transparent. On the other hand, hydrogel-based techniques need embedding samples in acrylamide hydrogels which is a considerably challenging process.
2. Processing Time
The time needed to render a sample transparent will depend on factors, such as the method of tissue preparation, age of the animal, size of the tissue, temperature, and kind of tissue. Other than that, each clearing method will react differently to each one of these factors. While solvent-based methods can render fatty tissues transparent without any difficulty, lipid removal methods cannot.
3. Molecular Labeling Technique
Tissue clearing methods are compatible with either fluorescent protein or immunolabeling or both. Each tissue clearing method comes with its own benefits and drawbacks. And methods that are compatible with both fluorescent protein and immunolabeling have their own specific cons such as slow clearing, toxicity, tissue shrinkage, and cost.
Things to Keep in Mind
You will need to take all these factors into account when choosing your clearing method. You can experiment with several methods on tissue from the same source to compare them and narrow down your choices based on clearing quality, time taken, tissue shrinkage, or whichever factors are most important to you.
I personally have tested many methods, built my own clearing chambers from commonly available parts, and waited many weeks to see what the results would be. Still, there was not one method for all tissue types, all fixatives, and all circumstances. Just keep a good notebook of all the test you have done as there may be many, and within each method you might want to run several tests with different tissue thickness and different settings.
Keep in mind more and more methods will be available in the future. If you are short on time and dont want to go through the process of building a clearing device, buying a solution such as Visikol is a good option.
Check out this informative video on tissue clearing and tissue clearing methods:
Click the following link to learn about the best mounting medium for confocal microscopy.
Recent Posts
Mastering point cloud to 3d model conversion can feel like translating whispers from another dimension into vivid sculptures. You've got this cloud of data points, a chaotic concert of coordinates...
Let's say you've got a drawing, something you sketched out during a burst of inspiration, and now you're itching to see it leap off the page into three dimensions. Well, that’s exactly what I did...