
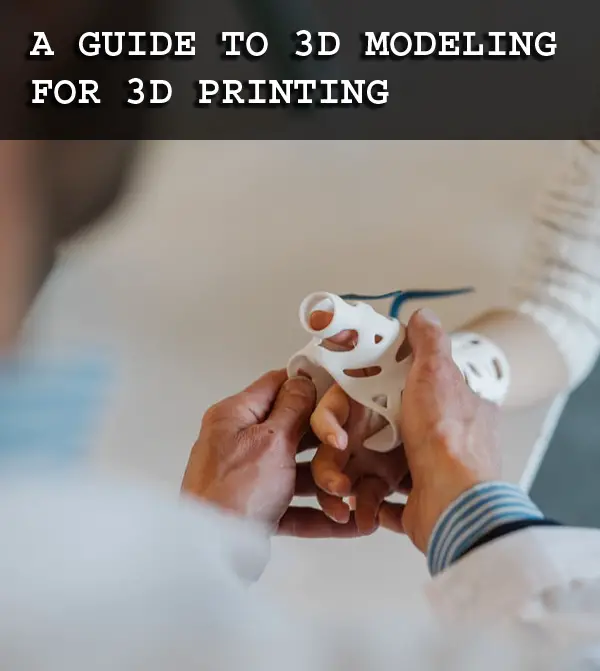
The advent of 3D printing has been a boon in the medical field, with individuals being able to quickly and affordably create customized objects that can help them fill specific needs. However, to make effective 3D prints, the healthcare professional must first have an appropriate model so that the printer has instructions on what to create.
The practices in modeling for 3D printing will change based on the printing process used. However, 3D modeling for medical purposes will initially require some sort of reference which unlike in 3d modeling for movies etc, is often not a sketch from imagination but rather accurate medical data. This can include medical imaging data such as CT or MRI, the measurements of body anatomy such as a hand, or a 3D scan of something like a mouth cavity.
Even if the reference is just a photograph, care must be taken to make sure all the dimensions are correctly recorded since the 3d print must be accurate before exporting the finalized image into 3D editing software.
There are rules involved in 3D modeling for any type of project where the final output will be 3D printed. Much like 3D modeling for animation, 3D modeling for 3D printing has its own constraints and requirements.
In addition, any data which is brought into the process from the real world such as 3D scan data or medical imaging data will likely be very heavy in geometry and requiring a lot of clean up and simplification for a printer to be able to print the model.
3D Modeling: The Basics
While the various printing processes will require different tips and best practices when manufacturing an object on its platform, there are some general steps that 3D printing requires to bring a prospective model to life.
Conceptualize the Object to be Created
Like any invention, 3D printers rose to prominence as a means of solving problems and satisfying needs. This is especially true in the medical field, as each patient will have specific needs that may not be able to be met by the existing market.
Sometimes, practitioners may want more of an object, such as a replica of a knee joint, or have an idea for an item that does not currently exist but would help them in a unique case, such as a specialized brace joint for an overweight patient.
Whatever the scenario, the user must have a clear idea of the object they want to create to continue with the modeling process.
Draw, Scan, Reconstruct or Photograph the Object to be Produced
In this step, the conceptualized object will be given a tangible form. Think of this step as the creation of the blueprint.
If you are trying to replicate an existing macro object, you will need to have some high-quality images of the piece to be printed. For example, if an additional ankle sheath were required for a patient, the practitioner would use pictures of the current sheath as the reference to create the 3D print.
Photographing Objects
If photographing objects to be replicated, it is vital to use a quality camera and capture the object from all angles. Also, make sure that you have a photo of the object against a consistent background (preferably grid paper) to be sure that you are correctly scaling the item when it is uploaded to the software. Multiple photographs from all angles can also be used in macro scale 3D reconstruction software, where the program will actually create a 3D model based just on 2D photographs of the object.
Using Medical Imaging
MRI, CT and microscopy data can be used to model and print structures as well as devices. These modalities will need an extra step in the process called 3D reconstruction, where the medical data, usually two dimensional, is selectively converted to a virtual polygonal 3d object. This object will need simplification and geometry cleanup.
There are many software packages which allow use of real data through reconstruction, such as 3D Doctor, Amira, Imaris, Osirix and others.
Drawing an Image of an Object
If you are trying to create an object that does not currently exist to fill a unique need, you will have to make the item’s image; this is common for 3D modeling in the medical field because there are times that patients will require a specialized piece, such as a plate for an irregular bone fracture, that cannot be effectively created by medical device manufacturers.
When this is the case, a detailed image of the desired piece must be sketched. Using a piece of graph paper or software, capture the item from all angles to form your design’s blueprint. If the object you have planned is intricate, you may need to solicit professional help from artists or graphic designers.
Import the Design into a Photo Editing Suite
If your reference is a drawing or photo, you will need to digitize your pictures to continue with the process. As such, you must upload them to a photo editing suite. Using the photo editor, you can extrude a 3D model from a 2D picture and further prepare your image for print using basic 3D modeling tools in software such as Photoshop. This works for very simple 3D objects only.
Depending on the quality of your images, the amount of time working in the photo editing software will vary. The important part is that you get all the minute details down to build the object in the modeling software effectively.
Export the Image to 3D Modeling Software
After you have the image the way you want it in the photo editing suite, it is time to export it to the actual modeling software, which will be used to build a virtual 3D version of your object and provide the printing instructions.
Keep in mind that you will most likely want to build your 3D model for 3D printing in polygons, and not another modeling method such as NURBS. Polygon models are made up of thousands of faces (polygons) and they are easier to edit, smooth, simplify and output to printing. When you import medical data such as 3D scans or 3D reconstructions, this is where the existing polygons will need to be simplified and cleaned up.
There are many modeling software options on the market, such as Maya, 3D Studio Max, Rhino, Morphi, BlocksCAD, Leopoly, and 3D Slash, some of which are favorites among 3D creators (Source: Sculpteo).
Another program is Within Medical, a modeling software from Autodesk. This is the same company that created the vanguard TinkerCAD software on which most 3D models are made. Within Medical is a specialized product that offers several optimized features that make it ideal for modeling bone fusions and implants.
Among the tasks you will complete in the modeling software you choose include:
- Object cleanup if imported from real scan/medical imaging data
- Rotating the object along the various 3D work planes
- Scaling and adjusting your image to ensure that it is printed in the correct size and dimensions
- Any 3D modeling that needs to be done to add to the object or create new objects
- Combining multiple shapes to create an articulated or interlocking design
- Object optimization/simplification
- Converting your finalized model to an STL file that is ready to be printed in 3D
If these steps seem daunting, it will be beneficial to go through some test runs, making simple objects so that you know how to use all the features of your modeling software. Most packages have shapes and primitives that users can use to block their model together. I cannot cover 3D modeling in detail here as this in itself is a course of study.
Considerations for Different 3D Printing Processes
While the steps mentioned above are a general process for creating 3D models for 3D printing and will serve you well across the various 3D modeling platforms, there are some special considerations based on whether you are using FDM, SLA, or SLS manufacturing processes to complete your print.
Modeling for FDM Printers
Fused deposition modeling (FDM) is the most common type of 3D printing thanks mostly to its affordability and relative simplicity of the process, making it a favorite in high school engineering classes and at home with everyday hobbyists. However, this printing method can definitely have its utility for medical purposes if used with the appropriate print compounds.
FDM printers use thermoplastic filaments as a building material. This filament is melted and extruded through a nozzle that runs along the three dimensions (X, Y, and Z axes), forming layers that will cool and harden into the completed 3D object.
With this in mind, this specific process works best when the following factors are taken into consideration when designing your model:
Build Plate Adhesion
Using this manufacturing method, the initial layer of filament must adhere to the base plate. For this reason, the model should have a base plate that is large and flat and oriented downward to increase the chances of adhesion.
If the model does not adhere, it could shift during production and require the creator to go back and redesign the model. If your model’s flat side does not cover enough surface area, it is a good idea to include a raft, brim, or support into your model, all of which can be detached from the final print but increase surface area during manufacture.
Supported Parts
FDM printers layer from the base plate up, so it is essential that all parts of the model are connected to the initial layer. 3D objects cannot be printed in air, so all aspects of your model must be connected to the base surface.
Overhangs
One of the most challenging aspects of printing with FDM is the problem created by overhangs, as unsupported overhangs can melt and become deformed before hardening into place.
Therefore, when building your model, it is best to support overhangs on both sides or, if you must include them, make them less than 45-degrees to the vertical. If your model requires an overhang sharper than this, try to keep it small, with a length of five millimeters or less protrusion into thin air.
Modeling for SLA Printers
Stereolithography (SLA) uses a bath of resin to create the object and solidifies the finished model with a laser. This manufacturing process is inverted from that used in FDM, with a build plate dipped down into the resin below, and the model printed upside down.
SLA printing produces a far better resolution than FDM, although the final object is not quite as strong or durable, making this an excellent process for highly intricate items. With this in mind, there are some critical points to remember when modeling for this process:
Drainage
This process selectively solidifies a photopolymer resin, allowing for the creation of hollow objects. However, if this is not done correctly, the final item will be sealed shut with an uncured resin trapped inside.
Therefore, when modeling an object using this process, it is a good idea to include small holes in the design that allow the resin to drain so that the final item does not have a liquid trapped inside.
Surface Area and Supports
While printing, SLA continuously pulls the cured layers off the film at the resin vat base. Due to the force incurred during this process, the print’s cured part can become detached from the build plate.
Therefore, when modeling your object, make sure that the base is wide so that there is more adhered surface area against the base plate, reducing the likelihood of the item detaching while the cured layers are being pulled from the resin.
Detail and Deformation
Because SLA can produce more intricate prints than FDM, you may model fine details into your design, such as small holes and threads. While the print process will take longer, you can capture the precision you are looking for, so make sure your model reflects as much. For example, the overhangs that are problematic in FDM printing can be more effectively rendered using SLA.
Modeling for SLS Printers
The last common type of object manufacturing in 3D printing is selective laser sintering (SLS). This process uses a print area full of material throughout the printing process, using a laser to solidify a selective layer model.
While this process is like SLA manufacturing, instead of using a laser to solidify the resin, the laser forms the object from a powdered plastic bed. While SLS avoids some of the issues that can undermine SLA prints, such as uncured resin deposits, there are still some considerations you must plan for when modeling for this print process:
Support Capabilities
Due to this process’s nature, the unsintered powder around the model automatically supports the printed object, meaning that any number of intricate designs can be attempted without the need for extra support. Therefore, if you have small hinges or steeply angled overhangs, be sure to include them when printing using this method.
Hollow Spaces
Like SLA, this process can also print hollow objects, which means that powdery residue can get trapped in the finalized item. Since powder is more difficult to drain than resin, it is best to model solid objects or objects with a built-in drainage aperture when using this printing process.
Interlocking Parts
There must always be a gap when constructing the two opposite mating ends of an interlocking part. However, when this gap is filled with powder, the female end can get dusted with granules, creating a rough joint that needs to be cleared out.
There is also concern that the sintering process may cause the grains separating the mating parts to be melted, resulting in a fused object with an unmoving joint. Therefore, when modeling objects for SLS printing, you must consider this and take measures to ensure that the tolerance is not too sensitive.
Important Considerations when Modeling for 3D Printing
Now that you know the necessary steps for creating a 3D model and the specific guidelines that each of the three main manufacturing processes requires, it is essential to look into the following factors that will determine your final 3D models’ quality.
Model Based on Your Printer
You can have the best design idea in the world and have every minute detail edited down to perfection, but if you are working with a printer that will not render the model effectively, then your efforts have been in vain.
For example, if your object will require many thin threads and sharp, intricate angles, but you only have access to an FDM printer, then there is very little chance that you will be able to print your model successfully.
Know What Materials You Will Use Before Modeling
While there are three primary methods used to manufacture 3D objects, the possibilities for manufacturing compounds are much more extensive. Filaments and resins can produce items that are brittle or strong, flexible or solid, heavy or light, etc.
Therefore, objects should be modeled with a particular material in mind. If you are trying to make a simple, low-impact piece with ABS plastic filament, then your model will work out to perfection; if you are trying to design a custom knee joint with the same material, you will likely be sorely disappointed.
Make Sure Your Model Has the Appropriate Wall Thickness
While you will probably consider wall thickness when choosing the material you want to print with, it is essential to verify that the thickness of the walls in your model will be sufficient to withstand the printing process.
Issues with wall thickness are a common reason some 3D models are not printable. Walls that are too thin make it impossible to print specific sections of the model, while extremely thick walls create significant internal stress that can cause the model to crack.
Be Aware of the Appropriate File Resolution for Your Model
When dealing with 3D modeling, the software you use will likely create an STL (standard triangle language) model. Even if it does not make this file type by default, there is likely to be an option to export the model to an STL file so that the printer can read it.
When examining the STL file resolution, be aware of a model whose resolution is too low. This will cause the print to come out “pixelated.” On the other hand, STL files with a very high resolution may require a specific level of detail that some printers, such as basic FDM versions, are simply not capable of printing.
Below is a useful video on 3D modeling specifically for 3D printing. Its in the software Blender but the rules apply to others:
In Conclusion
While the use of 3D printers has allowed an entire generation of people to become at-home engineers, the solutions it has provided in the medical field are inspiring and potentially revolutionary.
However, to ensure a successful print, a quality model must first be created. From the basic steps of planning, designing, and editing to using techniques that will increase the chances of success for a specific manufacturing process, there are many factors that creators must consider to make the perfect model for 3D printing.
Click the following link to learn about the best software for medical 3d animation.
Recent Posts
Mastering point cloud to 3d model conversion can feel like translating whispers from another dimension into vivid sculptures. You've got this cloud of data points, a chaotic concert of coordinates...
Let's say you've got a drawing, something you sketched out during a burst of inspiration, and now you're itching to see it leap off the page into three dimensions. Well, that’s exactly what I did...