
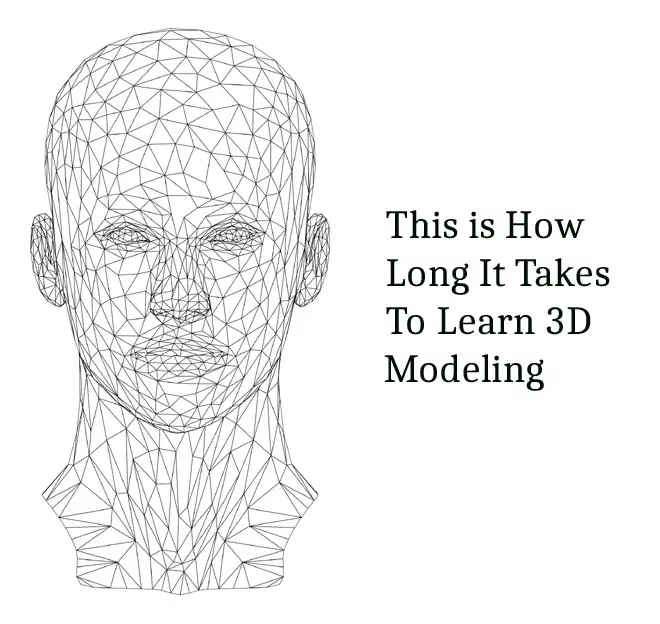
The proliferation of 3D printing has brought many benefits to the medical field, creating customized objects to solve many unique needs for healthcare professionals. If you are looking for ways in which 3D printing can add value to your profession, you have likely done some research on how long it takes to learn how to create 3D models.
Let’s get into this topic.
Continue reading “This is How Long It Takes To Learn 3D Modeling”
3D Animation of Muscle Contraction
This 3D animation shows the contraction of skeletal muscle fibers and the molecular events involved.
Review:
Striated muscle is made up of bundles of multinucleated muscle cells called myofibers. A myofiber is packed with myofibrils that extend the length of the cell.
A sarcomere, the functional and structural unit of muscle consists of thick myosin filaments and thin actin filaments.
Titin keeps thick filament centered during contraction. In muscle contraction actin filaments slide past myosin filaments. Neither filaments change in length yet the sarcomere becomes shorter.
The force required for this movement is generated by myosin heads which may cross bridge attachments to actin. Myosin heads walk along an actin filament using ATP for energy. Tropomyosin is part of the complex that prevents myosin from sliding along the thin filaments.
A myosin head binds ATP and as a result detaches from the actin filament. It rebinds in a new position.
Phosphate release triggers a power stroke that moves the actin filament. ADP disassociates and the process is repeated.
Click here for an article on the best interactive biology games.
Trax Editor Vs. Time Editor: Whats the Difference?
Maya, a 3D animation software by Autodesk, is no doubt a popular application amongst professional animators, artists, and even 3D medical animation professionals.
You may have noticed that Trax Editor and Time Editor are tools that can be used within the program for animation editing, but this leaves you wondering: What is the difference?
Continue reading “Trax Editor Vs. Time Editor: Whats the Difference?”
These Are The Top Medical Animation Firms In The US
Whether maintaining a top-notch medical practice, dominating pharmaceutical sales, or educating students and patients, having the most current medical animation is necessary to remain on top of the medical and scientific field.
With so many choices for medical animation firms, deciding which one to hire can be a daunting task. The following list highlights 13 of the top medical animation firms in the US, explains what they can do for you, and why you need them.
Lets get started:
Continue reading “These Are The Top Medical Animation Firms In The US”
Can You Animate with Zbrush?
ZBrush is the most advanced 3D sculpting software in the world of digital animation. Artists and game designers use this software to create characters that will eventually be part of an animated production.
Continue reading “Can You Animate with Zbrush?”
9 of the Best Medical Animation Videos Sources- Free Download for You
It is no secret that animations and other forms of visual art are some of the best educational tools you can use in the sciences, especially in the medical field. But not all medical professionals are graced with artistic talents, so you must often look elsewhere for this media.
More often than not, purchasing the rights to medical animation videos is an expensive endeavor. Fortunately, many sites provide such media either for free or royalty-free or give unlimited access to millions of digital assets for a low-cost subscription. This article discusses nine of the best places to find medical animation videos.
Videvo: Free Medical Stock Video Footage
Videvo is an official recommendation for sourcing medical animated media by the U.S. National Library of Medicine (NLM). You can choose from 1,500 clips of medical stock video footage, both live-action and animated. Remember that not all of it is free, so you must be mindful when attempting to download your selected clips. (Source: NLM)
When using Videvo stock footage and motion graphics, the following guidelines and protections apply:
- The Videvo Attribution License only applies to videos that are available for free download. The license allows users to download and use clips in as many projects as they wish, all free of charge. With this license, you are expected to credit the author, which, in many cases, is Videvo. (Source: Videvo)
- Note: If you don’t want to include attribution, you can upgrade to either Videvo Plus or Pro. A subscription to either of these plans will upgrade your Attribution license to a Royalty-Free one.
- Under the Videvo Attribution License, you will be allowed to edit your downloaded clips in any way you prefer.
- Although the Attribution License gives you the right to publish the clip on any platform of your choosing, you cannot circulate the downloaded clip in its original form. This is primarily to prevent illegal reselling of stock footage and motion graphics.
If you want a full video production available at low- or no-cost, Videvo also provides music and sound effects that you can add to your medical animation as needed.
Nucleus Medical Media: Free Medical Animations
Nucleus Medical Media is associated with one of the largest scientific content producers in the world, EBSCO (Elton B. Stephens Company, now EBSCO Industries, Inc.). Their media library is overflowing with more than 18,000 medical animations and other visual arts, all designed to assist in public education.
There are two main ways to get access to Nucleus’ free medical animations (Source: Nucleus Medical Media):
- SMART (Scientific & Medical ART) Imagebase: If you are associated with a university or another educational institution, your school library or media resources department should provide access to this database, free of charge.
- Free 30-day trial: You can sign up for a 30-day free trial.
All their content is kept current and up-to-date, so you can go back to the site as often as you like without worrying whether they’ll have what you need. Currently, they have just stocked the library with over seven hours of brand-new content in Biology, Anatomy, and Physiology. (Source: SMART Imagebase)
As an international leader in written and visual educational content, you can rely on Nucleus and EBSCO to continually supply you with top-notch freely downloadable medical animations.
DNAtube: Free Downloadable Medical Videos
DNAtube is stocked with over 20,000 medical videos, both live-action and animated. Implied by the name, this platform operates similarly to YouTube. By uploading their content, users automatically agree that other DNAtube users may download their videos, although the possible downloaded content applications are severely limited.
Restrictions to downloaded DNAtube content are as follows (Source: DNAtube)
- Downloaded DNAtube videos cannot be used for any commercial purposes.
- Any files you download from DNAtube must be deleted within 24 hours.
If you plan to use any content you source from DNAtube on your company’s website or any other online projects in the allotted 24-hour period, you are prohibited from linking to their website. You can only do so if they give explicit permission for linking. Further, this website does not guarantee that the uploaded videos are accurate or factual, so anything you use is at your own risk and discretion.
Those who decide to use media from this website should contact the video authors directly before downloading anything. Since there are so many restrictions and no guarantee of factually correct information, you’ll want to do everything you can to ensure you’re downloading high-quality, trustworthy content.
Pond5: Free Medical Animations for Members
Pond5 is one of the world’s leading visual media producers. They supply members with tens of millions of stock videos, photos, audio tracks, and so much more, with over 64,000 medical animation videos included in that total. All the available stock footage is royalty-free, so whether you’re a member or not, you don’t have to worry about paying a fee with each download or play of your published videos.
However, further benefits vary according to your membership (or lack thereof) with Pond5. On the one hand, non-members only reap the benefits of the royalty-free attributes, while on the other, members can download any of the 13 million Pond5 media files for free. Of course, you will need to pay either a monthly or annual membership fee to gain access to these advantages.
Once you are registered, you can enjoy the following benefits (Source: Pond5):
- 10 free monthly downloads
- Exclusive, low price points for HD, 4K stock video footage
- Rollover any unused downloads to your next subscription month
- Exclusive access to the “Membership Content” filter
Upon download, Pond5 extends you the “non-exclusive, perpetual right” to modify, copy, and publish your footage under the All Media License. However, you must only use the downloaded media in a single project and publish or stream it on permitted platforms to maintain these rights. (Source: Pond5)
Free Editing Tools from Pond5
Not only does Pond5 offer live-action and animated media, but they also provide free video editing software and AI visual search software. With this support, you can compose a beautifully edited promotional, educational, or any other type of video using the latest software.
Available tools include (Source: Pond5):
- Pond5 Visual Search: To help you track down licensable footage that complements your brand’s aesthetic, Visual Search AI will receive your mobile device’s captured images and match the color palette to Pond5’s available stock footage. This way, you can ensure your brand is visually consistent no matter what.
- Premiere Pro Add-On: Get free access to the renowned video editing software, Adobe Premiere Pro, with your Pond5 membership. You will also receive 50 free clips with your download.
- Final Cut Pro X App: To add another layer of video editing professionalism to your repertoire, Pond5 offers Final Cut Pro X to its members. Additionally, you get 50 free clips when downloading this complementary application.
iStock: Free Medical Animation Stock Videos
iStock is a property of Getty Images, so you can be confident that this well of animations and stock videos will never run dry. One of the tricky things about using iStock’s media is that their content is “royalty-free,” which does not equate to “free” pricing.
As iStock explains, royalty-free does not mean that users will not have to pay for the content they use. Instead, it means that they are expected to make a one-time license purchase, and after that, they can download and use the video whenever they need to, without paying royalty fees.
Apart from the royalty-free animations and footage, iStock offers three complimentary video clips when you join for free and one free monthly clip after that. There is no guarantee that you will receive free medical animations, but there are over 26,500 files of medical stock footage in their collection, so don’t write off the possibility.
All of iStock’s free media comes with the following benefits (Source: iStock):
- Free downloads have the same licensing protections as paid downloads and can be used in almost any project you need, within the confines of the iStock content license agreement
- Professional quality assessment
- Official legal releases for models and personal property
- $10,000 legal protection
Storyblocks: Membership-Based Free Medical Animations
Most of Storyblocks’ free downloadable stock video footage contains live-action acting. However, they do have plenty of animated media available as well. To access Storyblocks’ free downloadable medical animations (meaning you do not pay per download), you must sign up for one of the following subscription plans.
Note that these plans all include royalty-free licensing (Source: Storyblocks):
- For Individuals
- Basic Video: You can download five HD videos each month under the Standard License. Under this license, all content you download can be freely distributed and permanently belongs to you. This also comes with a $20,000 indemnity.
- Unlimited Video: You can download as many HD and 4K videos as you need, all of which are provided with a Standard License. You also receive Storyblocks’ After Effects Templates.
- Unlimited All Access: For full video production, this plan offers music, sound effects, illustrations, and more, all in addition to the HD and 4K video footage and After Effects Templates. The Standard License also protects content downloaded under this plan.
- For Businesses
- Enterprise Unlimited: This plan has all the same benefits as the individual’s Unlimited All Access plan but provides one million dollars for indemnification. Additionally, instead of only one person having permissions to download Storyblocks’ media, everyone in your company can. All licensing is permanent under this plan as well.
If you need help putting the video together, Storyblocks also provides Maker, an intuitive video editing program. By default, it includes access to their content and gives you an option to upload your content for use alongside the stock footage.
You can add your company’s logo and integrate subtitles and other text, as well as video transitions, for a more professional look. You can also secure a full Storyblocks media package that guarantees professional yet informative animated medical content for low monthly rates.
Videezy: Free Medical Stock Footage
Videezy is a platform that offers a vast array of medical stock footage and animated illustrations. While some of their videos are available for free download, the entire collection is made up of animated media under the following licenses:
- Standard: These videos are produced by the Videezy staff and are available free of charge. Those who use these media without payment must credit Videezy whenever and wherever they distribute the videos. If you wish to use the video without attributions, you will have to pay for it.
- Pro: This footage is only available with payment but does include a royalty-free license.
- Creative Commons: Another category for free footage and animations, these videos are available for free use according to the Creative Commons guidelines.
- Editorial Use Only: If you’re publishing a news article, documentary, or other educational work, Videezy offers free animations and stock footage for you to use. You cannot use this free media to earn revenue, though, so including your downloaded animations in any publications meant for commercial, promotional, or similar applications is prohibited.
Videezy is one of the world’s leading video production companies in the world. Their media is kept up-to-date with current events, so you never have to worry about your footage being stale or irrelevant. Plus, if you ever need to customize your videos after download, they provide post-production templates, in addition to Animation and After Effects.
Videezy is just one part of the Eezy media network, which also includes Brusheezy, Vecteezy, and Themeezy. So, if you feel that your video is lackluster on its own, they’ll provide you with even more tools to ensure that your animation is visually pleasing, informative, and engaging.
Videoplasty: Free Medical Stock Animation Clips
While Videoplasty does not have too many free videos to choose from at the moment, there is a chance they’ll grow their collection in the future, especially given that they have an entire category dedicated to free stock animations. In total, they have more than 240 medical stock animations, but only a handful of them are free.
Fortunately, much of their content is available at extremely low prices, offered with discounts as large as 69% off if you need more than those 240+ files. To narrow your search down to the free files, all you have to do is open the site filter and select “Free.” The content will be updated as they add more over time.
One of the best things about sourcing your animations from Videoplasty is that you can control an incredible amount of detail in your selected media. For example, the filter options allow you to choose the following:
- Number of people in the animation
- Age of the people in the clip (adult or senior)
- Characters’ genders (only male and female available)
- Character races (includes white, Asian, Black, Arab, and Indian)
All their clips are available in HD, 4K, or 1080p, so you can be sure that your viewers will be receiving the sharpest, highest-quality content possible. Once you download the file, the watermarks will be removed so you can use them in any project you have planned. Essentially, their main restriction, like most other platforms, is that you do not resell the animations without their explicit permission. (Source: Videoplasty)
Envato Elements: Subscription-Based Medical Videos
Envato allows users unlimited access to downloadable stock motion graphics when they make a free account or subscribe to a monthly plan. When you sign up for a free account, you will receive twelve free files every single month.
Although it’s not guaranteed that these will be medical motion graphics videos, there is a high chance that such media will be included since there are over 6,130 files in this category. All files are covered by the Envato Elements License, which still applies to your regular assets, even if you unsubscribe from one of their monthly plans.
The license allows you to use the registered file for a single commercial or non-commercial use in perpetuity and prohibits the following actions (Source: Envato):
- You cannot resell or redistribute any media you download from Envato.
- Envato content cannot be used in on-demand services.
- Illustrations you download from Envato can’t be included in any merchandise you sell.
Envato Subscription Options
For those who want (or need) access to more footage, Envato offers three different subscription plans that provide unlimited access to medical motion graphics. You can download all these files at no cost, apart from the monthly subscription fee (Source: Envato Elements):
- Individual Plan: Get access to over three million assets and tens of millions of stock photos. You can also enroll in Envato creative courses.
- Note: There is also a student plan available at 30% off.
- Team Plan: Up to five people can access all the Envato Individual Plan benefits with a maximum savings of 35%.
- Enterprise Plan: Groups of six or more can get all the Team plan advantages with greater indemnification, along with more customer support and personalization.
In Conclusion
It can be challenging to find high-quality animated medical videos free of charge. Fortunately, many platforms recognize the need for such media and do everything they can to supply you with such videos. Still, they cannot all offer free animated videos in the same capacity.
To make up for this, these sources provide freely accessible content at purely no cost, royalty-free (no pay per video), or as unlimited free downloads with an account or subscription. Be careful to read the licensing terms and conditions with all free downloads to prevent any negative legal repercussions for accidental improper media use.
Click the following link to learn how much medical animation costs.