
The microscope diaphragm is a crucial yet often overlooked component in microscopy. It is what stands between you and crystal clear images of your specimens.
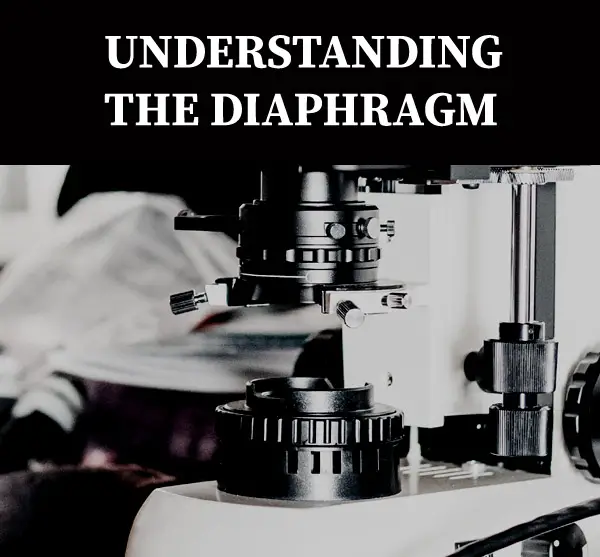
Whether you’re an experienced scientist or just starting out in the world of microscopic exploration, mastering this part of the microscope can make all the difference to your viewing experience.
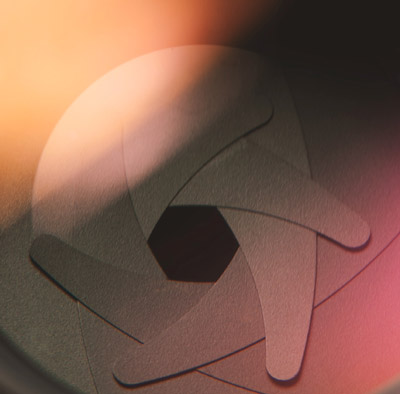
In a light microscope, the diaphragm found beneath the stage controls both the shape and amount of light that passes through the specimen toward the eyepiece, and comes in the form of an iris or disc. A simpler disc diaphragm is a rotating disc with different size circular holes in it. The more complex iris diaphragm made up of overlapping metal blades works like the eye or aperture of a camera lens.
The condenser aperture diaphragm is more than just an accessory in your microscope. It’s a pivotal tool that takes charge of contrast, depth-of-field, and resolution – three elements that can make or break your microscopic examination.
Path of Light in the Microscope
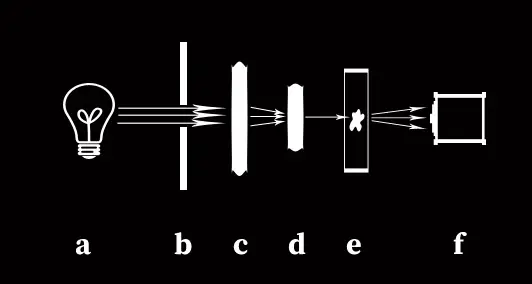
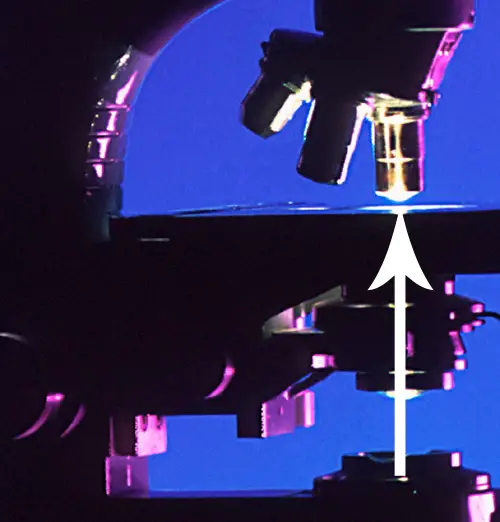
The diagram above illustrates what happens in a typical light microscope. The light from light source (a) travels through the opening in the diaphragm (b), then is converged by one lens (c) in the condenser and focused by a second lens (d) onto your sample. The light then travels through your sample (e) to your chosen microscope objective (f).
Contrast Control through Diaphragm
An open wide setting lets abundant light flow into the system while a narrow one restricts its entry, thereby increasing contrast between different structures within the viewfield. So next time when peering down the lens, remember – wider isn’t always better, especially if you’re aiming for high contrast.
Depth-of-Field Adjustment Using The Microscope Diaphragm
Apart from managing contrast, diaphragms also play a vital role in determining the depth of field (DOF), i.e., the range in which objects appear sharp and clear under magnification. This becomes particularly useful when focusing microscopes on specific layers or areas within specimens, depending on their nature and complexity.
You can increase the depth of field much like in a camera by reducing the numerical aperture (stopping down), which also increases contrast, but this reduces your resolution.
How To Optimize Resolution With Your Microscope’s Diaphragm
Last but certainly not least among the functions performed by the microscope’s primary aperture lies the influence over resolution- the detail level at which individual components are distinguished from each other during observation sessions using higher total magnification levels. Adjusting the size affects the amount of light entering the system, hence impacting the clarity of captured images.

To maximize without compromising brightness too much, the optimal position is usually found somewhere midway along the adjustment scale. However, the exact point varies depending on the type of specimen being examined and the conditions present inside the viewing chamber itself. Therefore, it requires practice and experience to determine the best settings for the unique situation encountered.
Closing the Diaphragm to Enhance Focus
To enhance focus when observing highly transparent specimens, you may need to close or partially close your condenser’s diaphragm. This action reduces angular aperture and increases contrast by limiting peripheral rays from reaching the objective lens.
This technique is particularly useful with disc diaphragms found on basic microscope models where it can significantly improve image clarity for detailed observations. However, remember not to completely shut off light as this would make viewing impossible.
Compensating for Light Loss by Increasing Intensity
In situations where closing down your field diaphragm results in too much loss of illumination – making observation difficult – there’s a solution: increase lamp intensity. The goal here isn’t necessarily brightness but rather ensuring optimal visibility without compromising resolution or causing glare.
A word of caution though – excessive lighting might cause damage both to observer’s eyes and delicate samples under study over time if not managed properly.
Balancing Image Brightness and Resolution
When observing highly transparent specimens under advanced microscopes, the balance between image brightness and resolution becomes critical. When you open up your diaphragm, both brightness and resolution increase due to a wider angle of light cone reaching the front glass slide of your current objective lens.
Increase in Light Intensity: A Double-Edged Sword?
An opened aperture diaphragm allows more light to enter. This results in increased illumination which is beneficial when focusing microscopes on darker images that require more visibility. This process involves adjusting various components such as condenser lens that converges the light towards specimen or disc diaphragms for controlling amount entering through it.
Risks Associated with Over-Illumination
You might think – “The brighter, the better”. However, overdoing it can actually be detrimental for obtaining clear visuals using a technical concept called numerical aperture.
A surplus amount of incoming rays may cause glare making final image less sharp despite seemingly clearer appearance initially. The field diaphragm controls how much area gets illuminated thereby influencing overall quality too.
Numerical Aperture & Lens Focuses Relationship Explained
The NA value indicated on your objective should match that set on your condenser for best results. It’s directly related with angular aperture i.e., maximum angle at which system can accept or emit light effectively impacting its resolving power greatly.
If not matched correctly according to their respective capacities like common 1.25x magnification having NA around 0.04 while high-end ones could go up to 1.0+. This mismatch could lead into decreased image quality despite seeming otherwise visually pleasing.
This complex interplay between different variables demonstrates why understanding each component’s function is crucial before starting any specimen viewing or measuring.

Matching Numerical Aperture for Optimal Resolution
Numerical aperture is essentially a measure of how much light an objective lens can gather from the specimen being observed. Numerical aperture, abbreviated as NA, is directly related to both the angular aperture and refractive index between your current objective lens and its medium (usually air or oil). The larger this value, the more detailed your final image will be.
The Role of Condenser in Matching Numerical Apertures
By adjusting the diaphragm appropriately based on your chosen objective’s numerical aperture value indicated usually right beside magnification power number, you ensure maximum possible detail capture without unnecessary loss due to misalignment.
This adjustment process might seem daunting at first but becomes intuitive with practice – just remember not to fully open up unless using advanced microscopes equipped with high-power objectives which require large amounts of light for effective functioning.
Finding Balance Between Light Intensity and Detail Capture
While having your diaphragms fully open increases brightness thus aiding visibility especially when observing highly transparent specimens; overdoing it may lead to reduced sharpness caused by excessive glare. Here lies another important role played by our trusty field diaphragm controls: they help us balance out intensity while maintaining desired level details captured within each frame viewed under the microscopes eye-piece.
Making Adjustments Based On Specimen Type And Objective Lens Used
- If working with low-magnification lenses such as 10x or less where depth-of-field isn’t a significant issue – keep the diaphragm slightly closed so only central portion gets illuminated leading to better contrast overall making features stand-out easily against background.
- For higher magnifications like 40x and above requiring thin section slides prepared avoiding overlapping layers – opening-up helps increase amount of light entering thereby improving clarity though one needs to compensate for potential losses via increasing lamp’s output accordingly if necessary.
Distinguishing Structures using Condenser Adjustment
One of the fundamental aspects of microscopy is discerning fine details in a specimen. This task becomes more manageable when you understand how to adjust your condenser effectively.
Fully Open vs Closed: A Balancing Act
A common misconception among beginners is that keeping their microscope’s diaphragm fully open will yield better images due to increased brightness. This assumption may not always be accurate.
An over-illuminated field may result in glare which reduces sharpness and detail especially if working with high numerical apertures where angular aperture plays a significant role. Conversely though too much closure (i.e., having your disc diaphgram nearly shut) might lead into diffraction patterns becoming visible thus affecting image clarity negatively despite potentially making certain elements stand out more clearly than before.
Finding balance between opening size for optimal illumination without causing unwanted effects such as glare or diffraction artifacts proves crucial here.
In our next section we’ll explore how different types specimens require varying settings for best viewing experience, a process often involving some trial-and-error until one finds most suitable setting per their needs without needing constant refocusing each time anew.
Finding Suitable Settings based On Specimen Type
Microscopy, especially when using advanced microscopes, requires precision and adaptability. The settings you choose can significantly affect the final image quality.
The Role of Diaphragms in Microscope Image Quality
A microscope’s diaphragm plays a critical role in focusing light on your specimen. Whether it is an iris diaphragm or disc diaphragm, its adjustment directly impacts how well you see your sample under the lens.
In particular, adjusting field diaphragms controls the amount of light entering through objective lenses. This feature becomes essential while observing highly transparent specimens where too much illumination could wash out important details.
Tailoring Your Approach to Different Specimens
Different types of samples may require different approaches for optimal viewing experience with a microscope. For instance,
- When dealing with bacterial cultures on glass slides, having disc or common diaphragms fully open might not yield best results as they are better viewed when these are closed due to their diffraction patterns becoming more visible.
- If you’re studying cells stained with dyes that fluoresce under certain wavelengths of light – condenser lens converges this focused beam onto them creating vibrant images even if iris diaphram opened only partially.
FAQs
What is a fact about the diaphragm of a microscope?
The diaphragm in a microscope regulates light intensity and contrast, directly influencing image quality.
What is the function of a diaphragm in a microscope?
A microscope’s diaphragm controls the amount of light reaching the specimen, impacting visibility, resolution, and depth perception.
What are the two types of diaphragms in a microscope?
The two main types are iris or disc diaphragms. Iris versions offer variable aperture sizes while disc ones have fixed openings.
What is diaphragm in simple microscope?
In simple microscopes, the diaphragm acts as an adjustable opening that controls illumination on your specimen for better viewing clarity.
Conclusion
Mastering the microscope diaphragm is importan in your microscopic exploration journey. It’s not just about turning knobs and adjusting light intensity, it’s about understanding its role in controlling contrast, depth of field, and resolution. The right balance between brightness and resolution is key to clear viewing. Too much or too little of either could hamper image quality. Different specimens require different settings – there isn’t one-size-fits-all here. Click the following link to learn if microscopes invert images.
Recent Posts
Mastering point cloud to 3d model conversion can feel like translating whispers from another dimension into vivid sculptures. You've got this cloud of data points, a chaotic concert of coordinates...
Let's say you've got a drawing, something you sketched out during a burst of inspiration, and now you're itching to see it leap off the page into three dimensions. Well, that’s exactly what I did...